How to Print Sewing Patterns
General ·If you have never printed a digital pattern, read these instructions to make sure your project comes out the correct size.
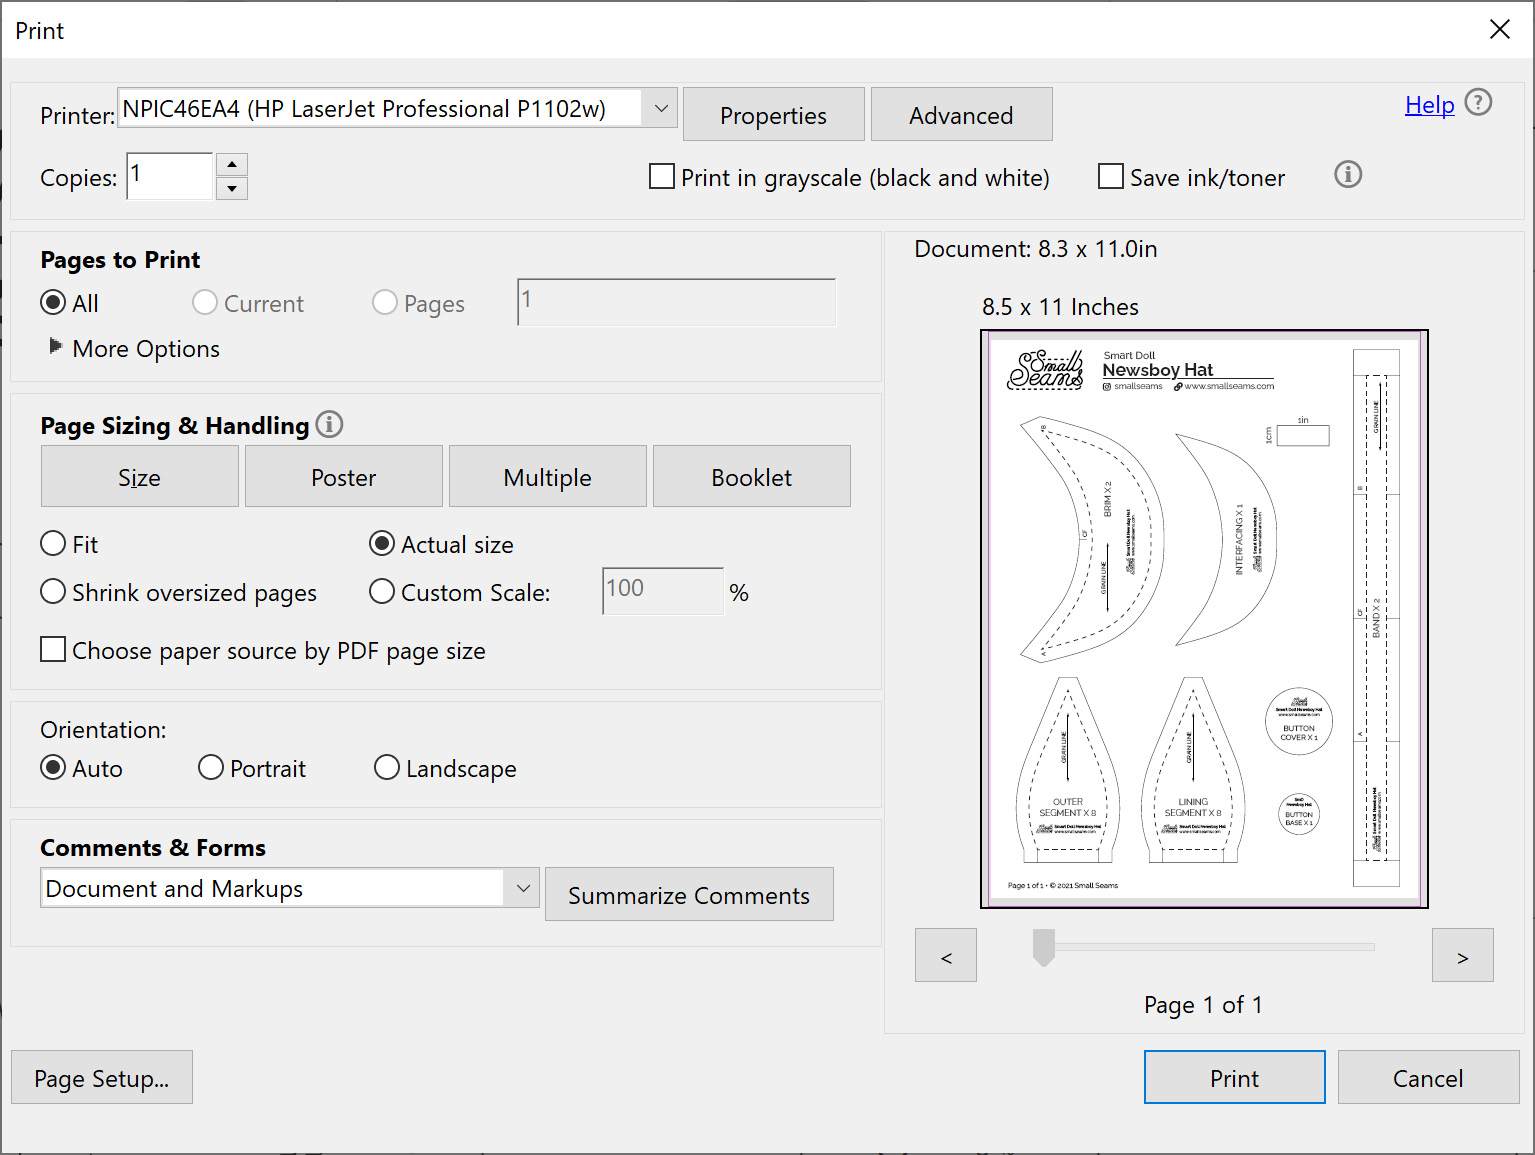
Print Dialogue
When printing patterns, make sure that the size is set to “Scale 100%” or “Actual Size”. Otherwise the pattern might not be printed at the right size. My patterns will print correctly on an A4 and a letter page. The margins are intentionally left blank to allow this.
To check that your pattern was printed correctly, measure the rectangle marked 1 cm/1 inch with a ruler. If the sides are not the correct length, check the settings in your print dialogue.
Laser Printer Warning
When printing patterns with a laser printer and then cutting along the lines, the toner may come off in small specks and attach to the soft parts of vinyl dolls. To prevent this I make the lines quite thin, so less tones is used, and is less likely to fall off. Printing with inkjet printers, or tracing the patterns onto another piece of paper will also prevent this.
If you do get specks of toner stuck to your dolls, gently rub a cottons swap with a little bit of rubbing alcohol on the spot to remove it.
About My Patterns
Unless otherwise indicated, all seam allowances are 1/4 inch. This lets me use a 1/4 inch quilting foot (or 1/4 inch needle position) without having to mark the seams.