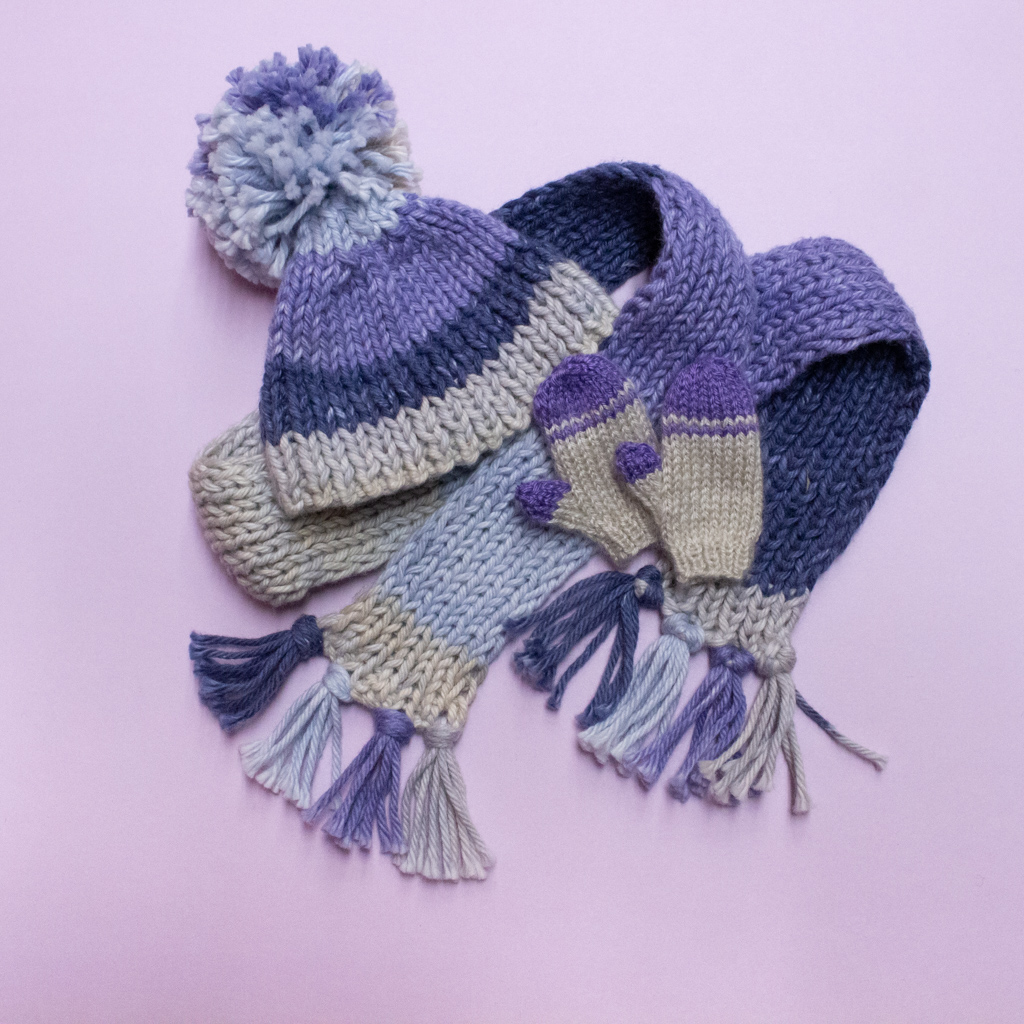
Smart Doll Girl's Knit Mittens
Smart Doll ·Perfect for the snowy season, these mittens fit the default Smart Doll hands. They are knit in the round, but could also be done flat. You could knit them solid, add a stripe or other designs. Keep reading to find out how I designed the pattern, or skip to the pattern and make your own!
How I Made This Pattern
To make this pattern, I first knit a swatch with my chosen yarn and needles. I like Woolike yarn from Michaels for my Smart Doll knitting. It’s inexpensive and available in my area. It’s categorized as a Super Fine (1) yarn with an expected gage of 32 stitches and 42 rows in a 10 x 10 cm square with 2.75mm needles. My swatch had about 36 stitches and 46 rows for a 10 x 10 cm square.
Next I looked up free patterns for mittens, to learn how human mittens are made. Human sized mittens can be knit flat or on the round. After knitting a cuff in ribbing, stitches are added until there are almost enough for the thumb. The thumb stitches are saved on some waste yarn. The rest of the mitten is a tube. At the end it is either decreased at each side, or decreased in regular intervals. The remaining stitches can be sewn up with a Kitchener stitch or the end can be threaded through and pulled tight.
I measured the wrist of my doll to figure out how many stitches I needed for the cuff. I also measured around the fingers, so make sure there would be enough room. I used the gage swatch to determine how many stitches I needed.
I also measured how many stitches I needed for the thumb, but in the end I changed the amount a couple times. At first I added stitches for the thumb in each row, but that made a thumb that stick out oddly. I spaced out the additions gradually, and that made a much nicer shape.
For this smaller Smart Doll girls mitten pattern, I chose to decrease the hand at regular intervals (instead of at the edges), then thread through and pull tight. I was worried it would make a pointy mitten, but it actually looks nice and round.
For the thumb I picked up 2 extra stitches to close the hole, then knit in the round and finished by decreasing and pulling through, just like the hand.
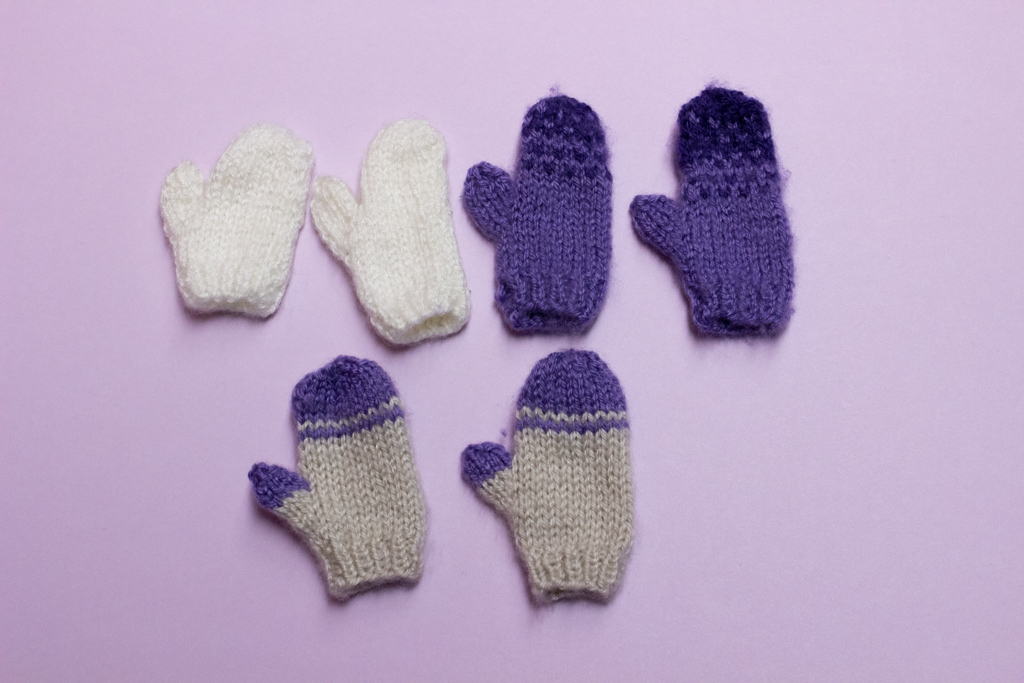
As you can see I made a bunch of these before I settled on a pattern I liked.
Knitting Pattern
Needles: 2mm stainless steel circular needles for the cuff, 2.75mm stainless steel circular needles for the rest.
Gage: 36 stitches, 46 rows -> 10 x 10 cm
Yarn: Super Fine (1) (Woolike)
Abbreviations:
- k1 - Knit one stitch or however many the number says.
- p1 - Purl one stitch or however many the number says
- RLI - Right leaning increase, that adds an extra stitch to the right of the next stitch. I use the “grandmother” method (or pickup a stitch from the previous row and knit that). You can also use make one right, or your own favorite increase. Just make sure that at the end you have the expected amount of stitches : )
- LLI - Left leaning increase, that adds a new stitch to the left of the stitch you just knit. Same as above, use what works for you.
- LLD - Left leaning decrease, knitting two stitches together with the first stitch ending up on top. For my way of knitting this is the easiest decrease of just knitting two stitches together.
Cuff
Cast on 20 stitches in the round on 2.5mm needles.
RND 1-5: k1 p1 ribbing.
Hand
Switch needles to 2.75mm
RND 6-8: k20.
RND 9: RLI, k18, LLI (22)
RND 10-11: k22
RND 12: k1, RLI, k18, LLI, k1 (24)
RND 13: k24
RND 14: k2, RLI, k18, LLI, k2 (26)
RND 15: k 23, hold 3 for thumb
RND 16: hold 3 more for thumb, k20
RND 17-26: k20
RND 27: LLD * 10 (10)
RND 28: LLD * 5 (5)
Cut yarn, thread the tail through the remaining stitches and pull to close. Weave in the ends.
Thumb
Pick up 2 stitches at gap.
RND 1-4: k8
RND 5: LLD * 4 (4)
Cut yarn, thread the tail through the remaining stitches and pull to close. Weave in the ends.

How to Knit Flat
If you don’t like knitting in the round, you could knit the mittens flat. Split each round in the middle, so the second half or a round, plus the first half of the next round become one row. The thumb will grow out of the middle of the row, instead of the start of the round. Add an extra stitch to each side to become the selvage edge. You will need this so you can sew the sides together at the end. For the thumb, make sure to pick up 2 stitches instead of one at each end to make selvage to sew up at the end.
Helpful Videos
Here are some videos from YouTube that have helped me learn the different knitting techniques.
Magic Loop
To knit small projects in the round on circular needles, you can use the “magic loop” technique. It lets you put half the stitches on one needle and the other half on the cord. You only have to adjust needles twice each round, instead of 4 times like you would with DPNs (double pointed needles).
Increasing Stitches
To increase the stitch count to make the thumb you could use the make one right (M1R) and make one left (M1L) technique demonstrated in the following video.
Picking up Stitches
When starting the thumb you need to pick up two stitches. I had trouble understanding what this means at first, so here is a video I found about it.
Weaving in Ends
At the end you will need to weave in the ends. Here is a video about the method I use.