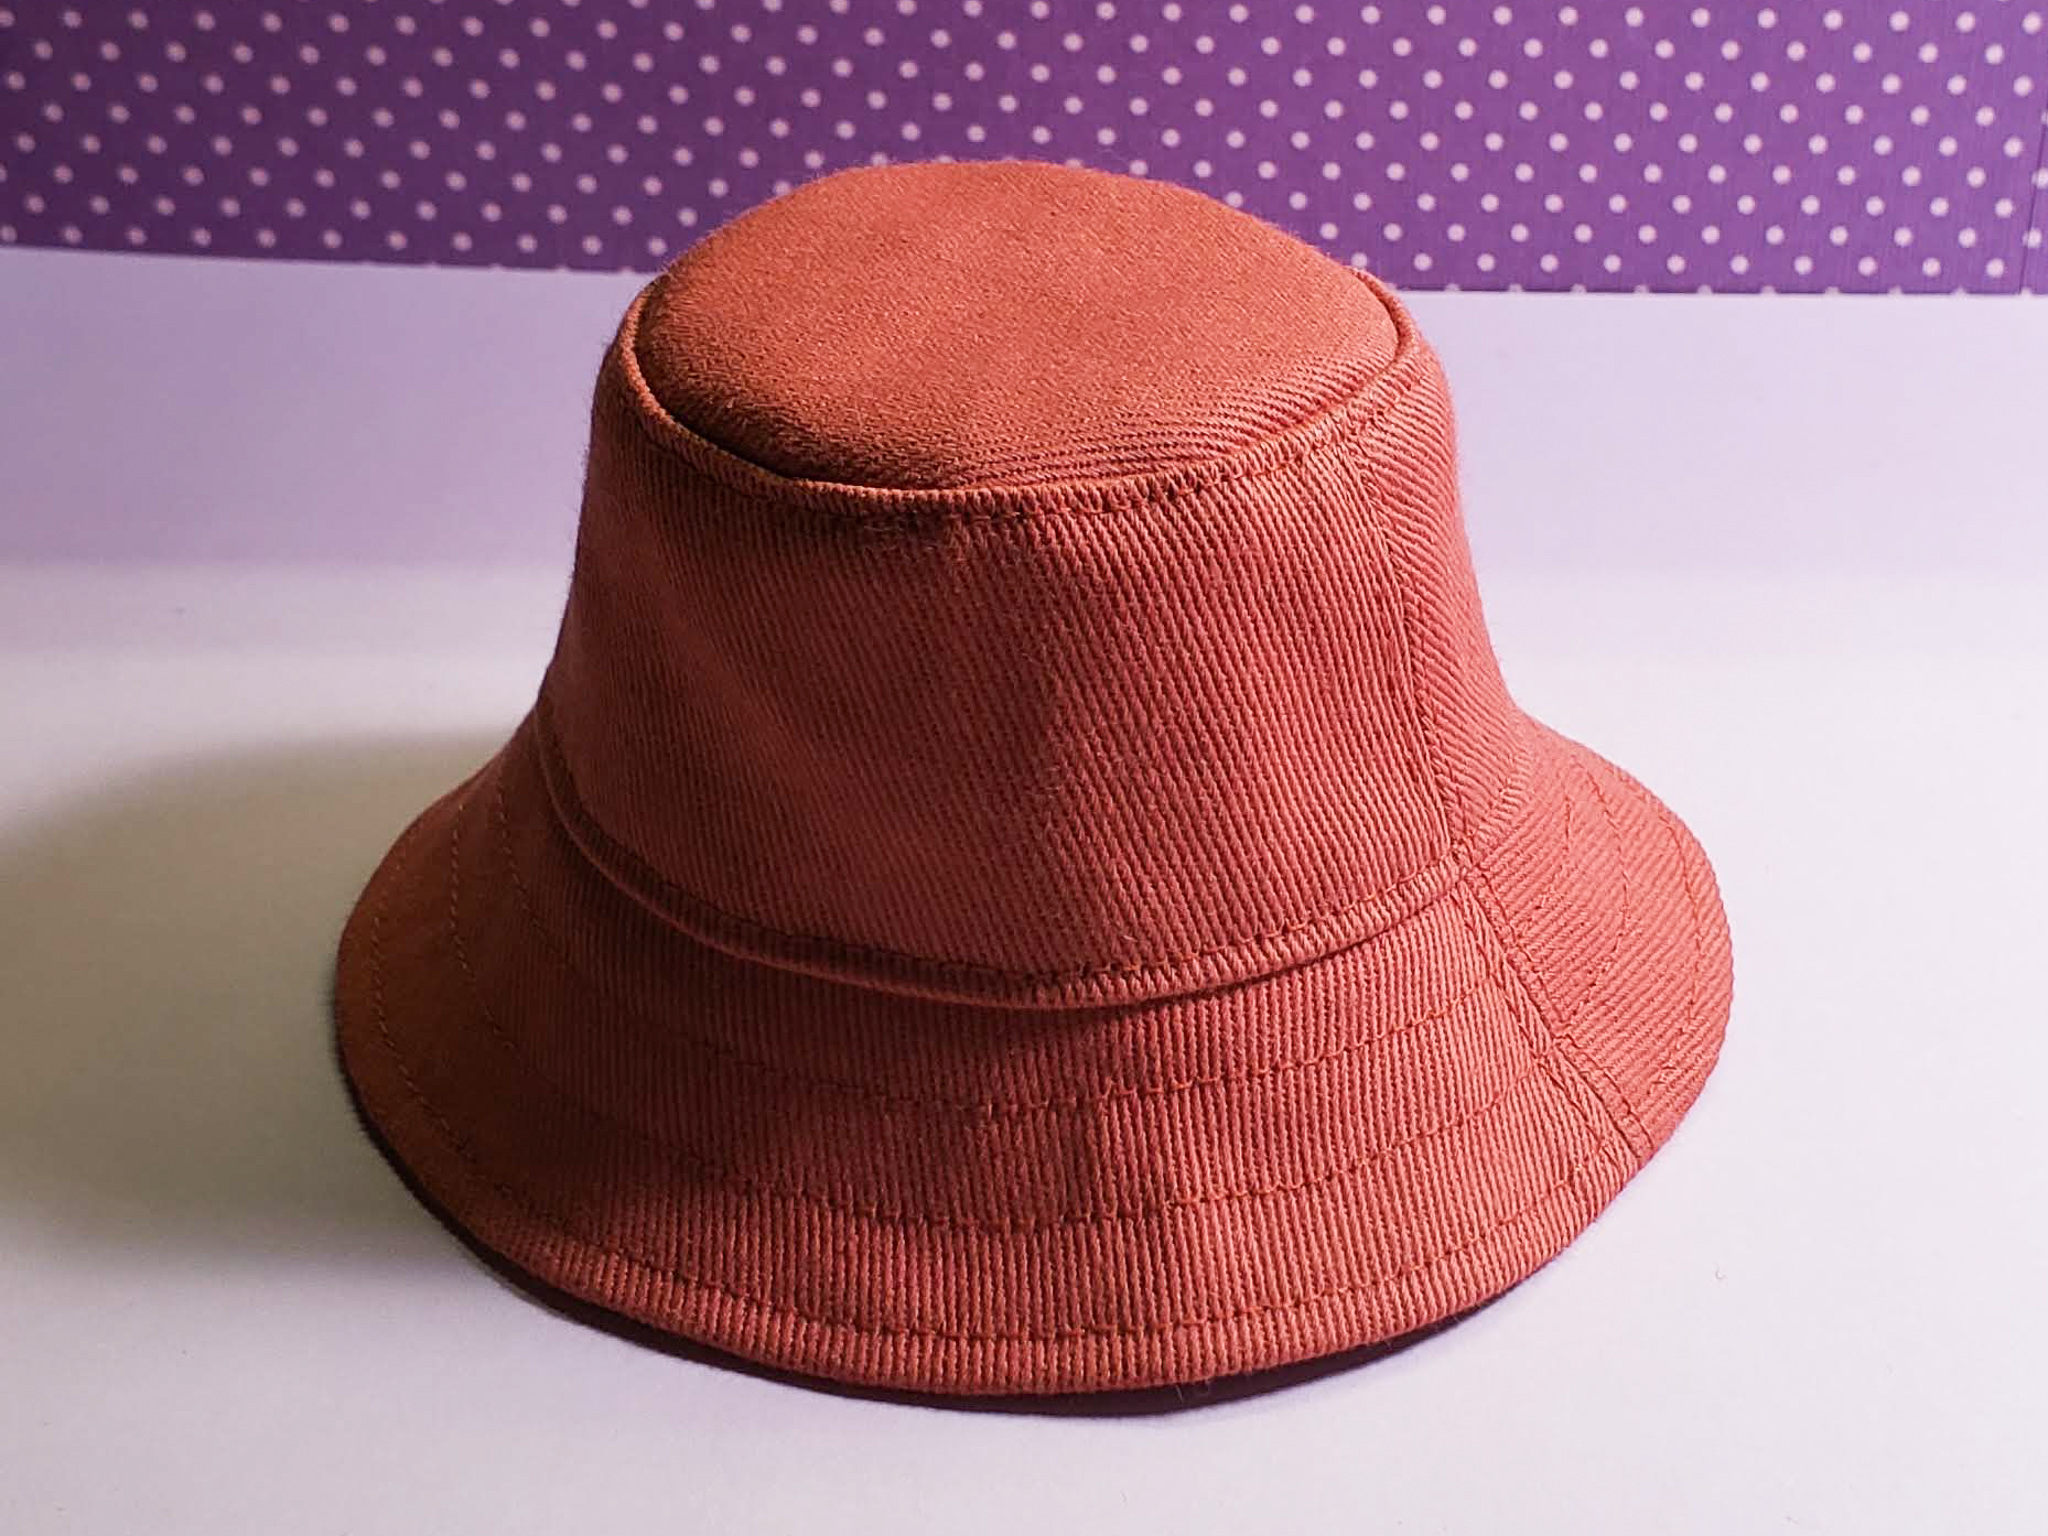
Smart Doll Bucket Hat
Smart Doll ·Hats are a fun accessory that can change the look of your Smart Doll. This simple bucket hat fits girls and boys, semi-real and anime.
Continue reading to learn how I drafted this pattern, or skip down to download a copy of my free Smart Doll Bucket Hat pattern and make your own.
How I Made this Pattern
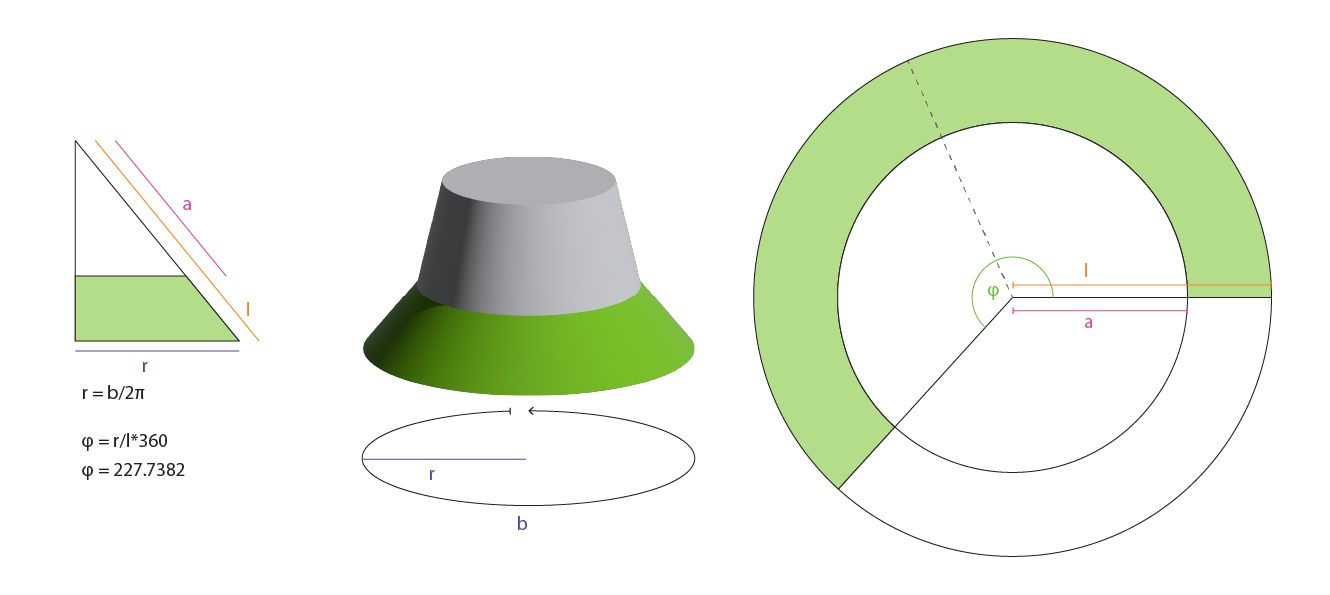
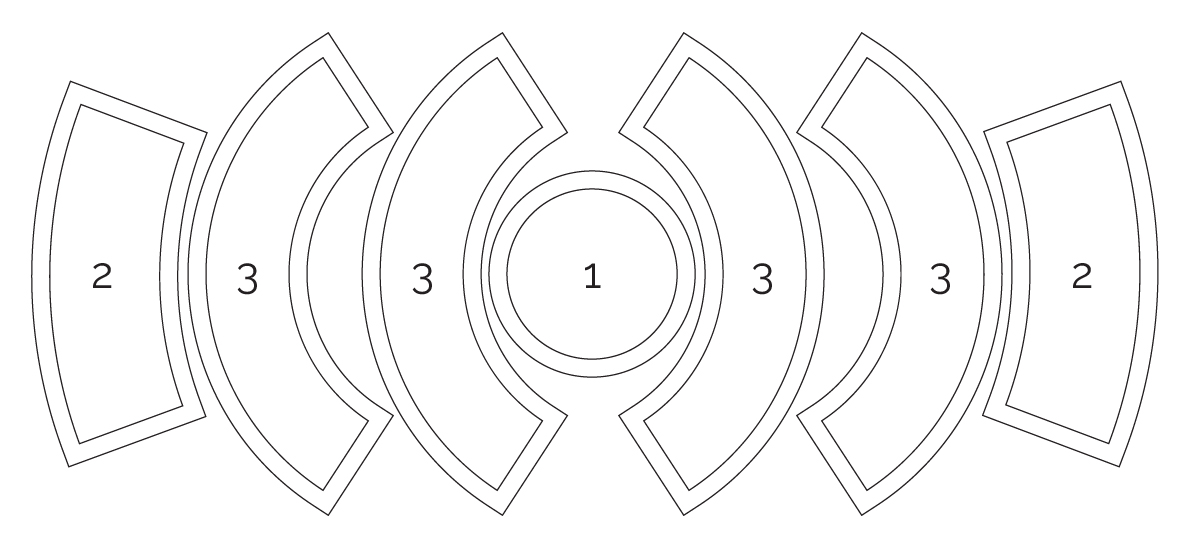
To draft this pattern I used geometry. The hat is made up of 2 truncated cones, which are cones with the top cut off. The surface of a cone can be unrolled into a sector of a circle. The “cut off” part is the same sector, just from a smaller circle. I measured my Smart Doll’s head and used those measurements in mathematical formulas to draft the top, side and brim of the hat.
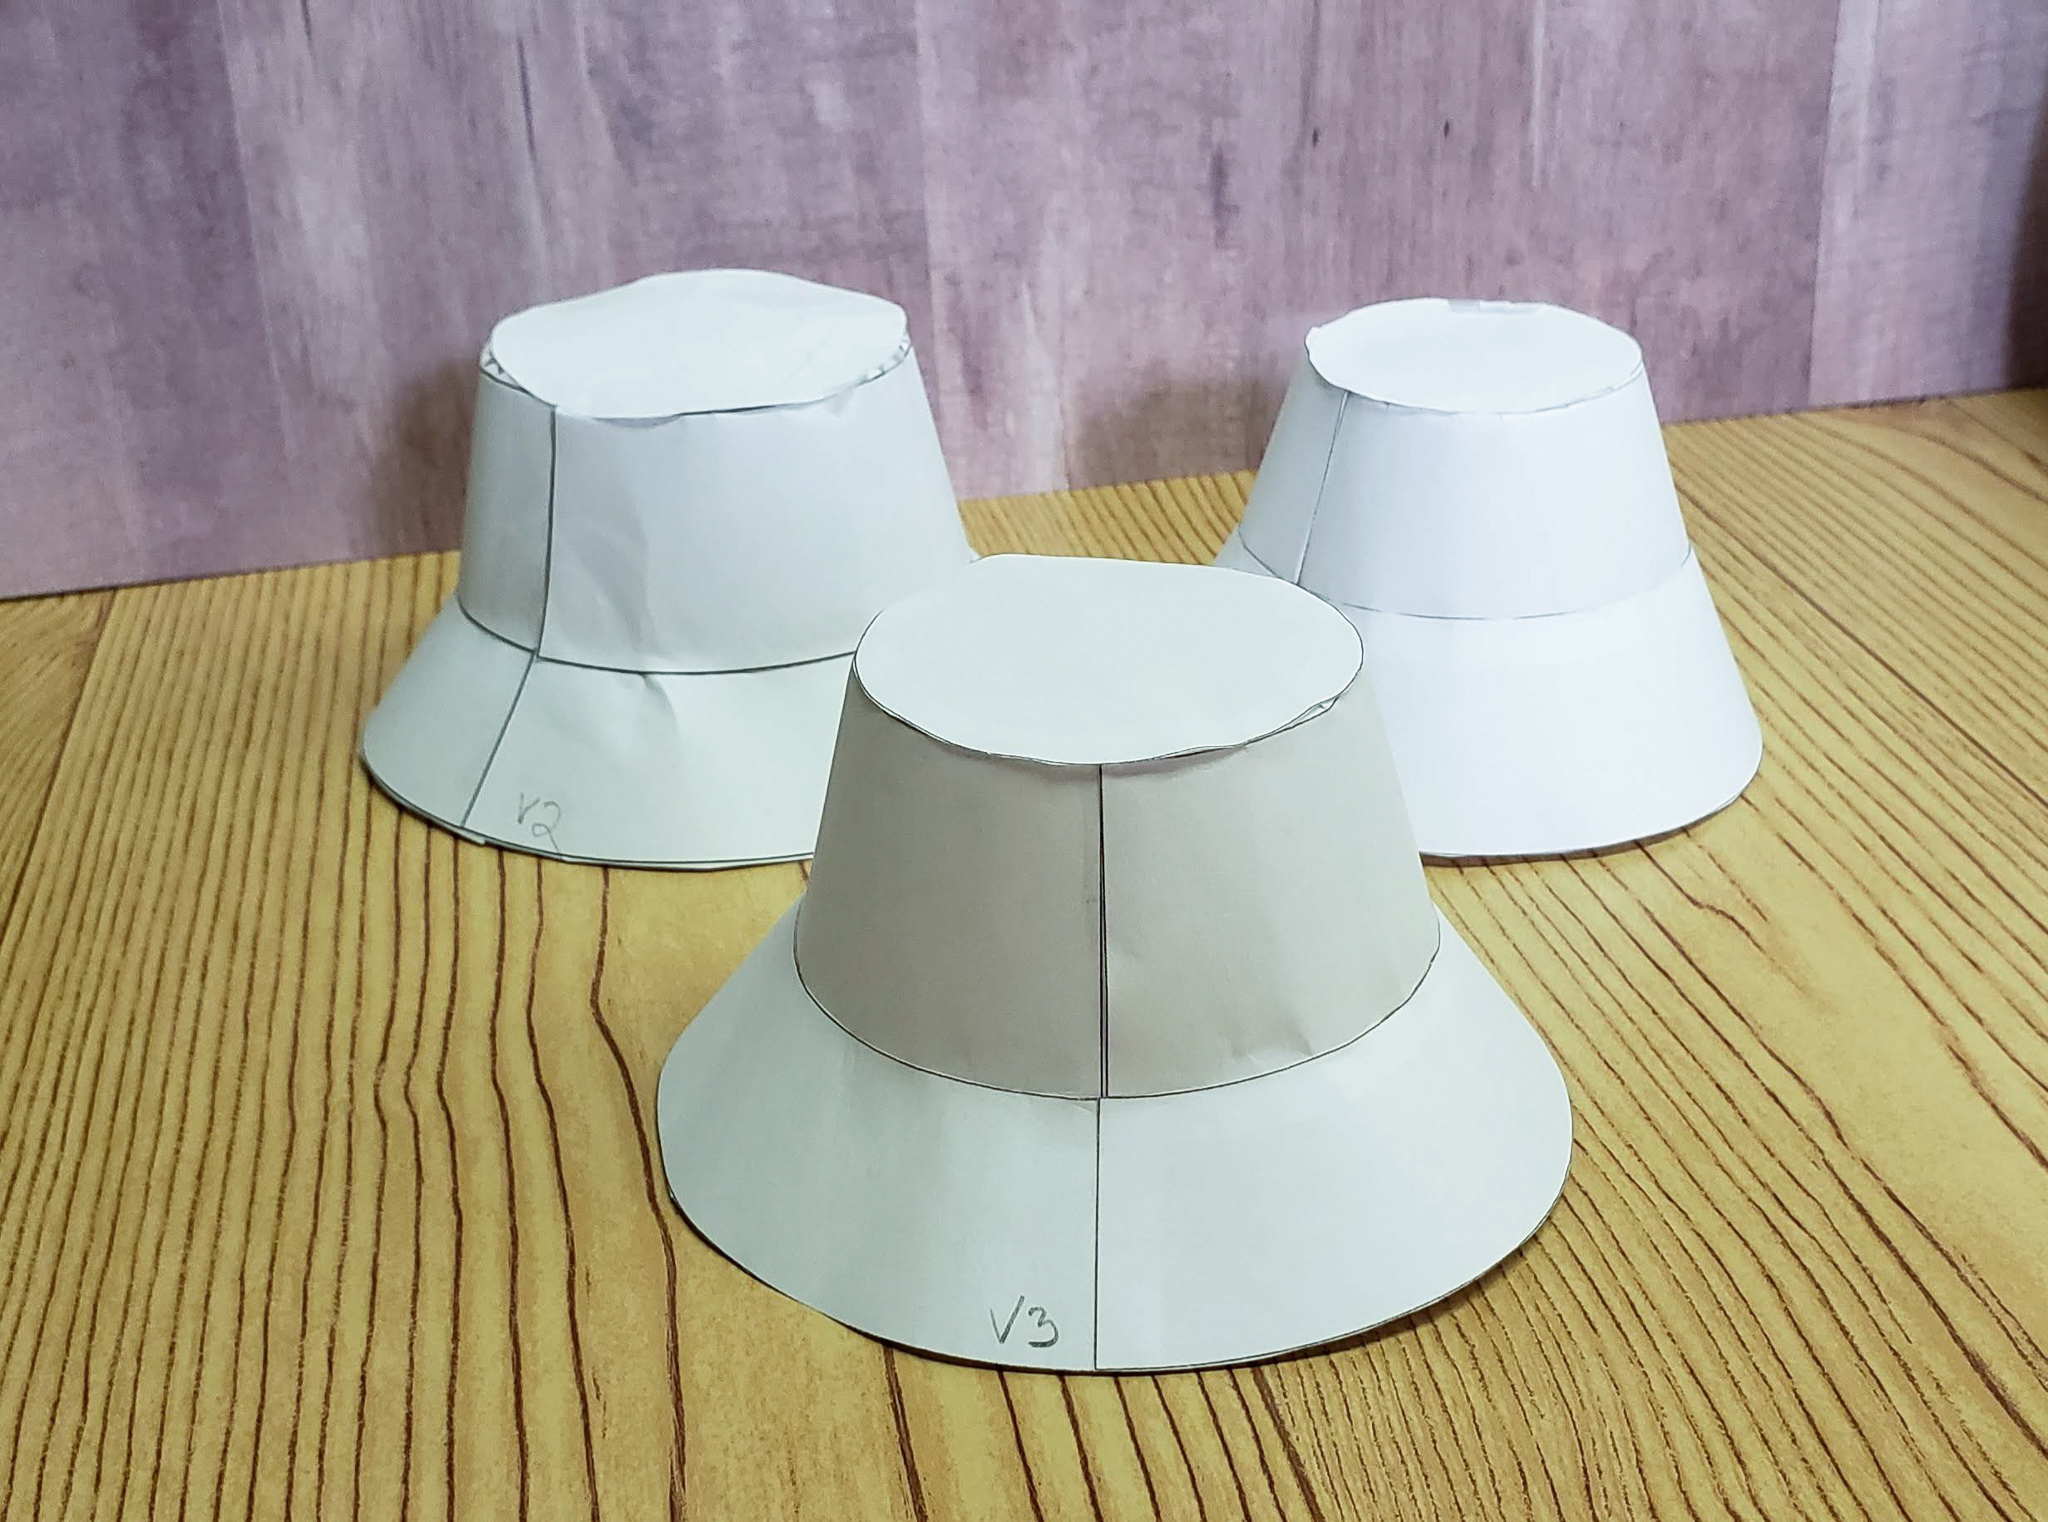
I printed my pattern shapes out and put them together as a papercraft. I was able to try this on my doll’s head.
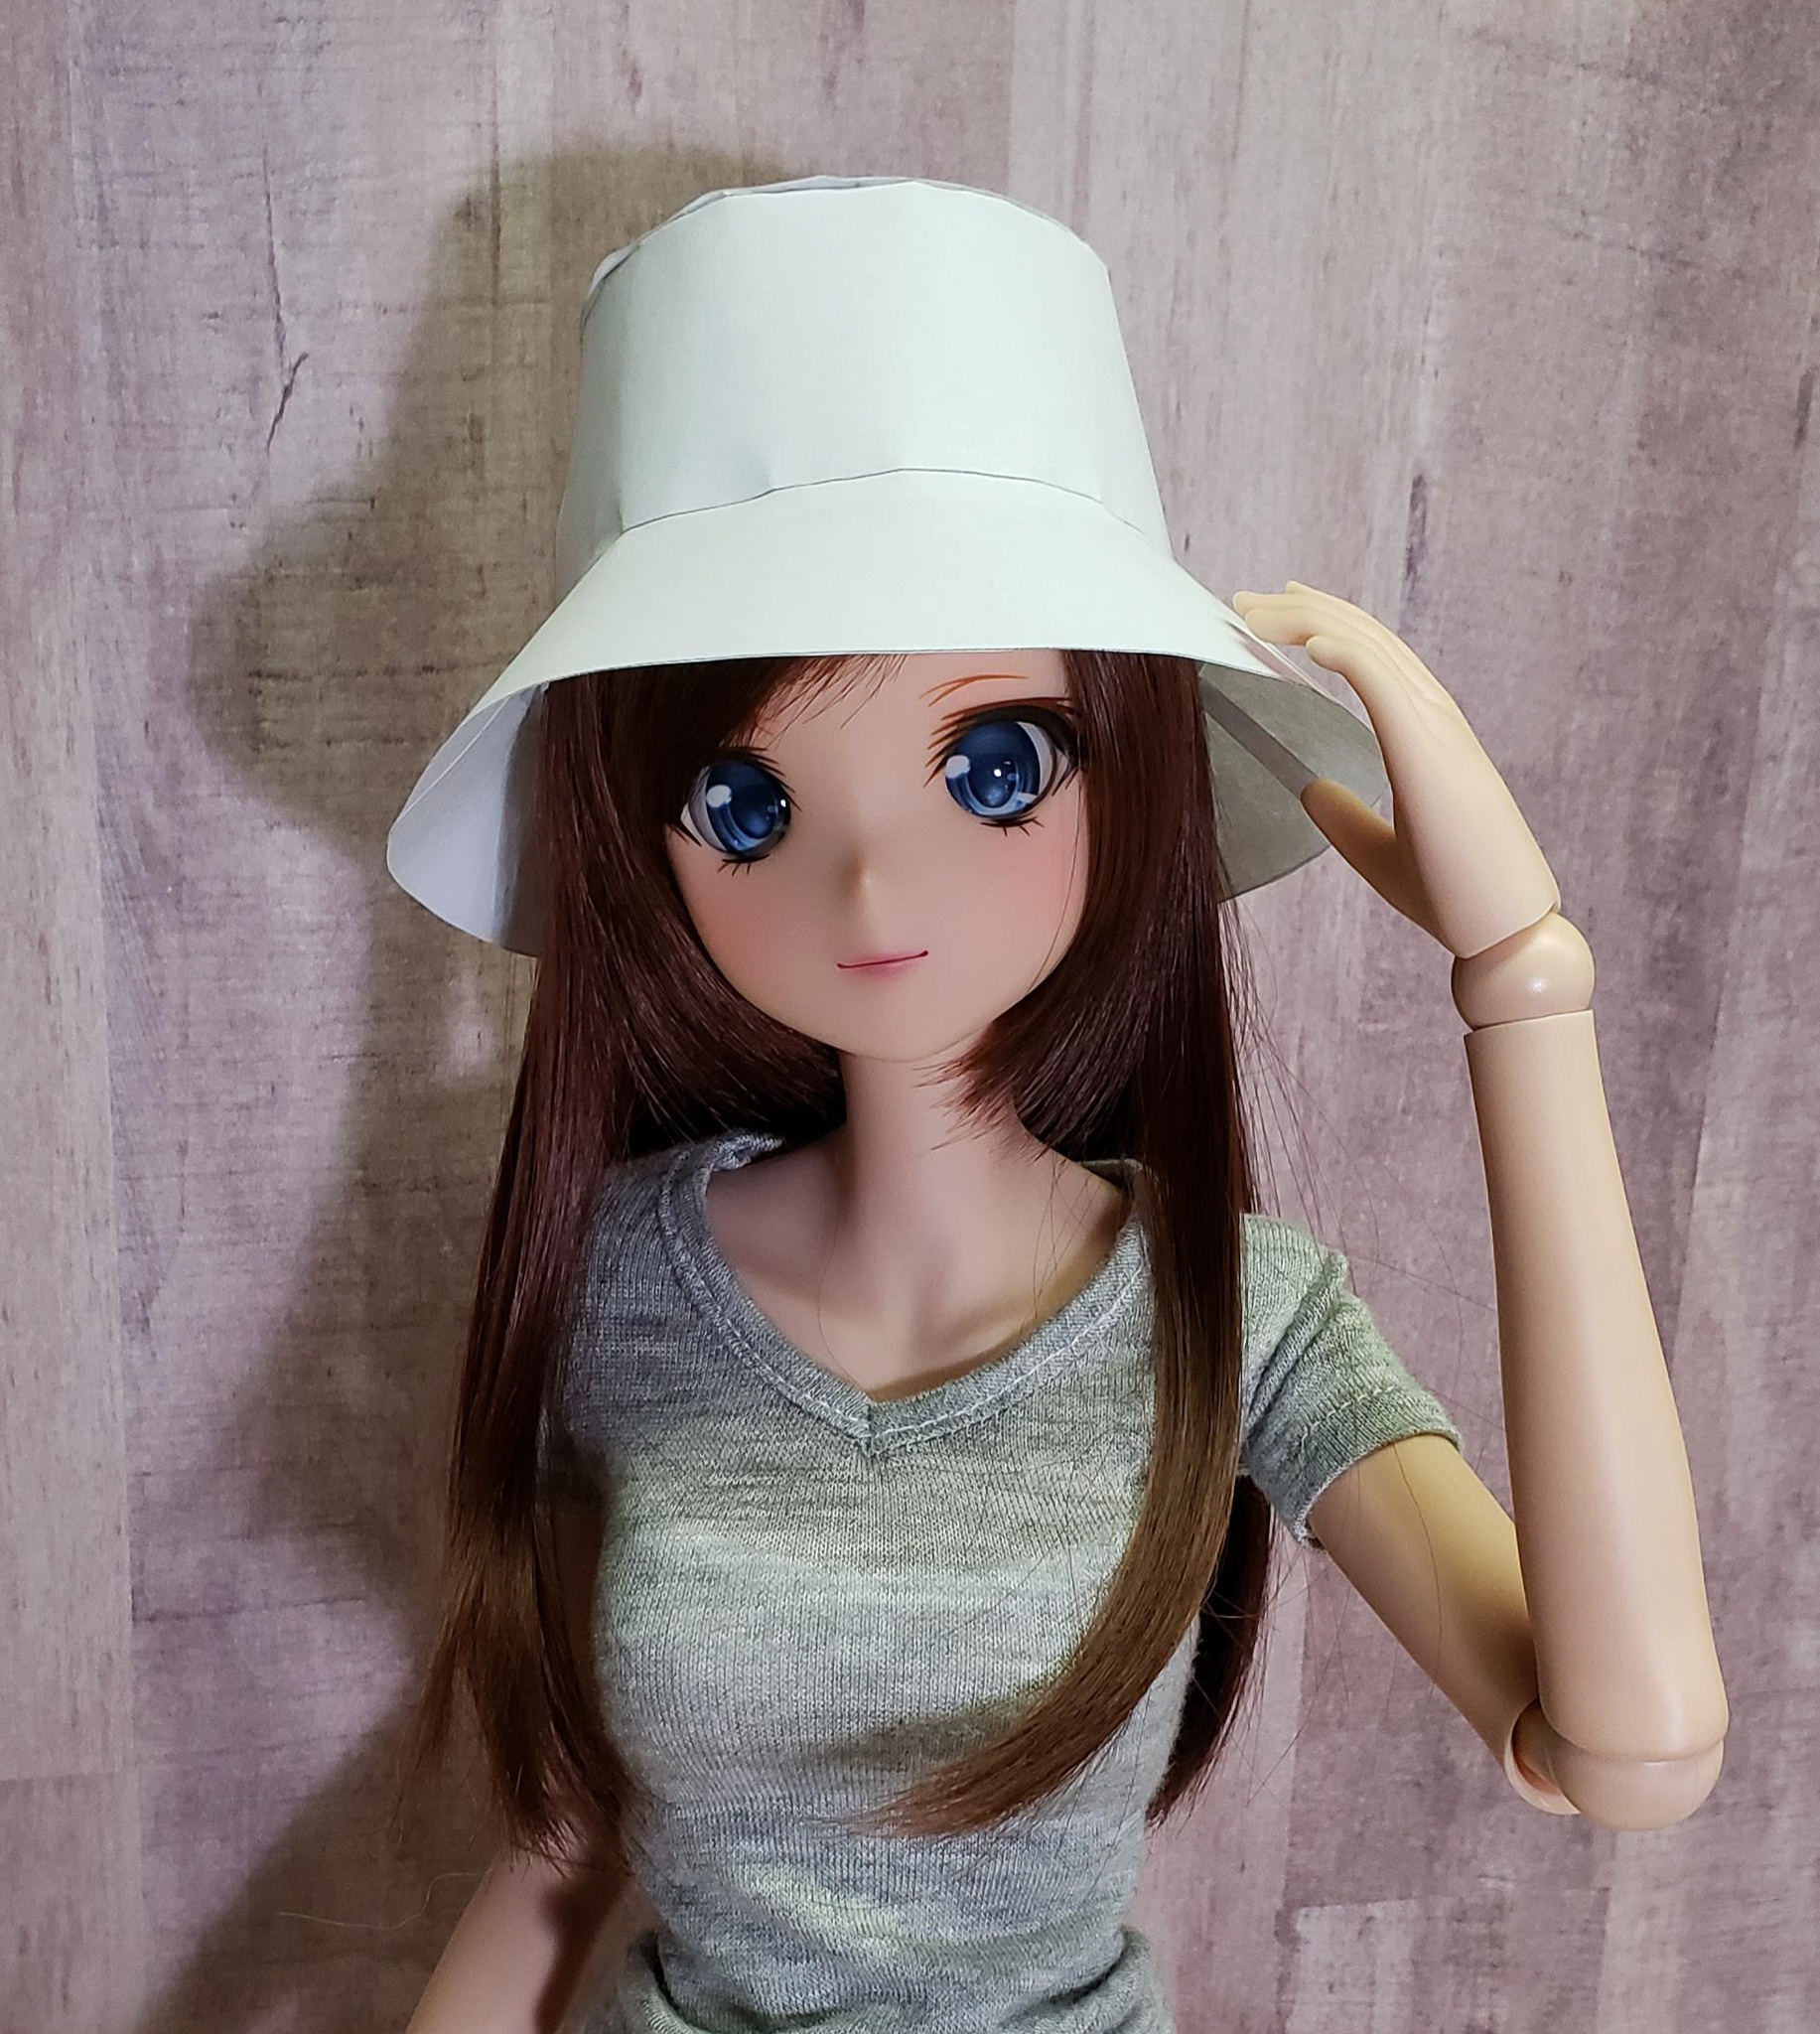
I made adjustments and after a couple tries I had a shape that I liked, that fit on both anime and semi-real heads.
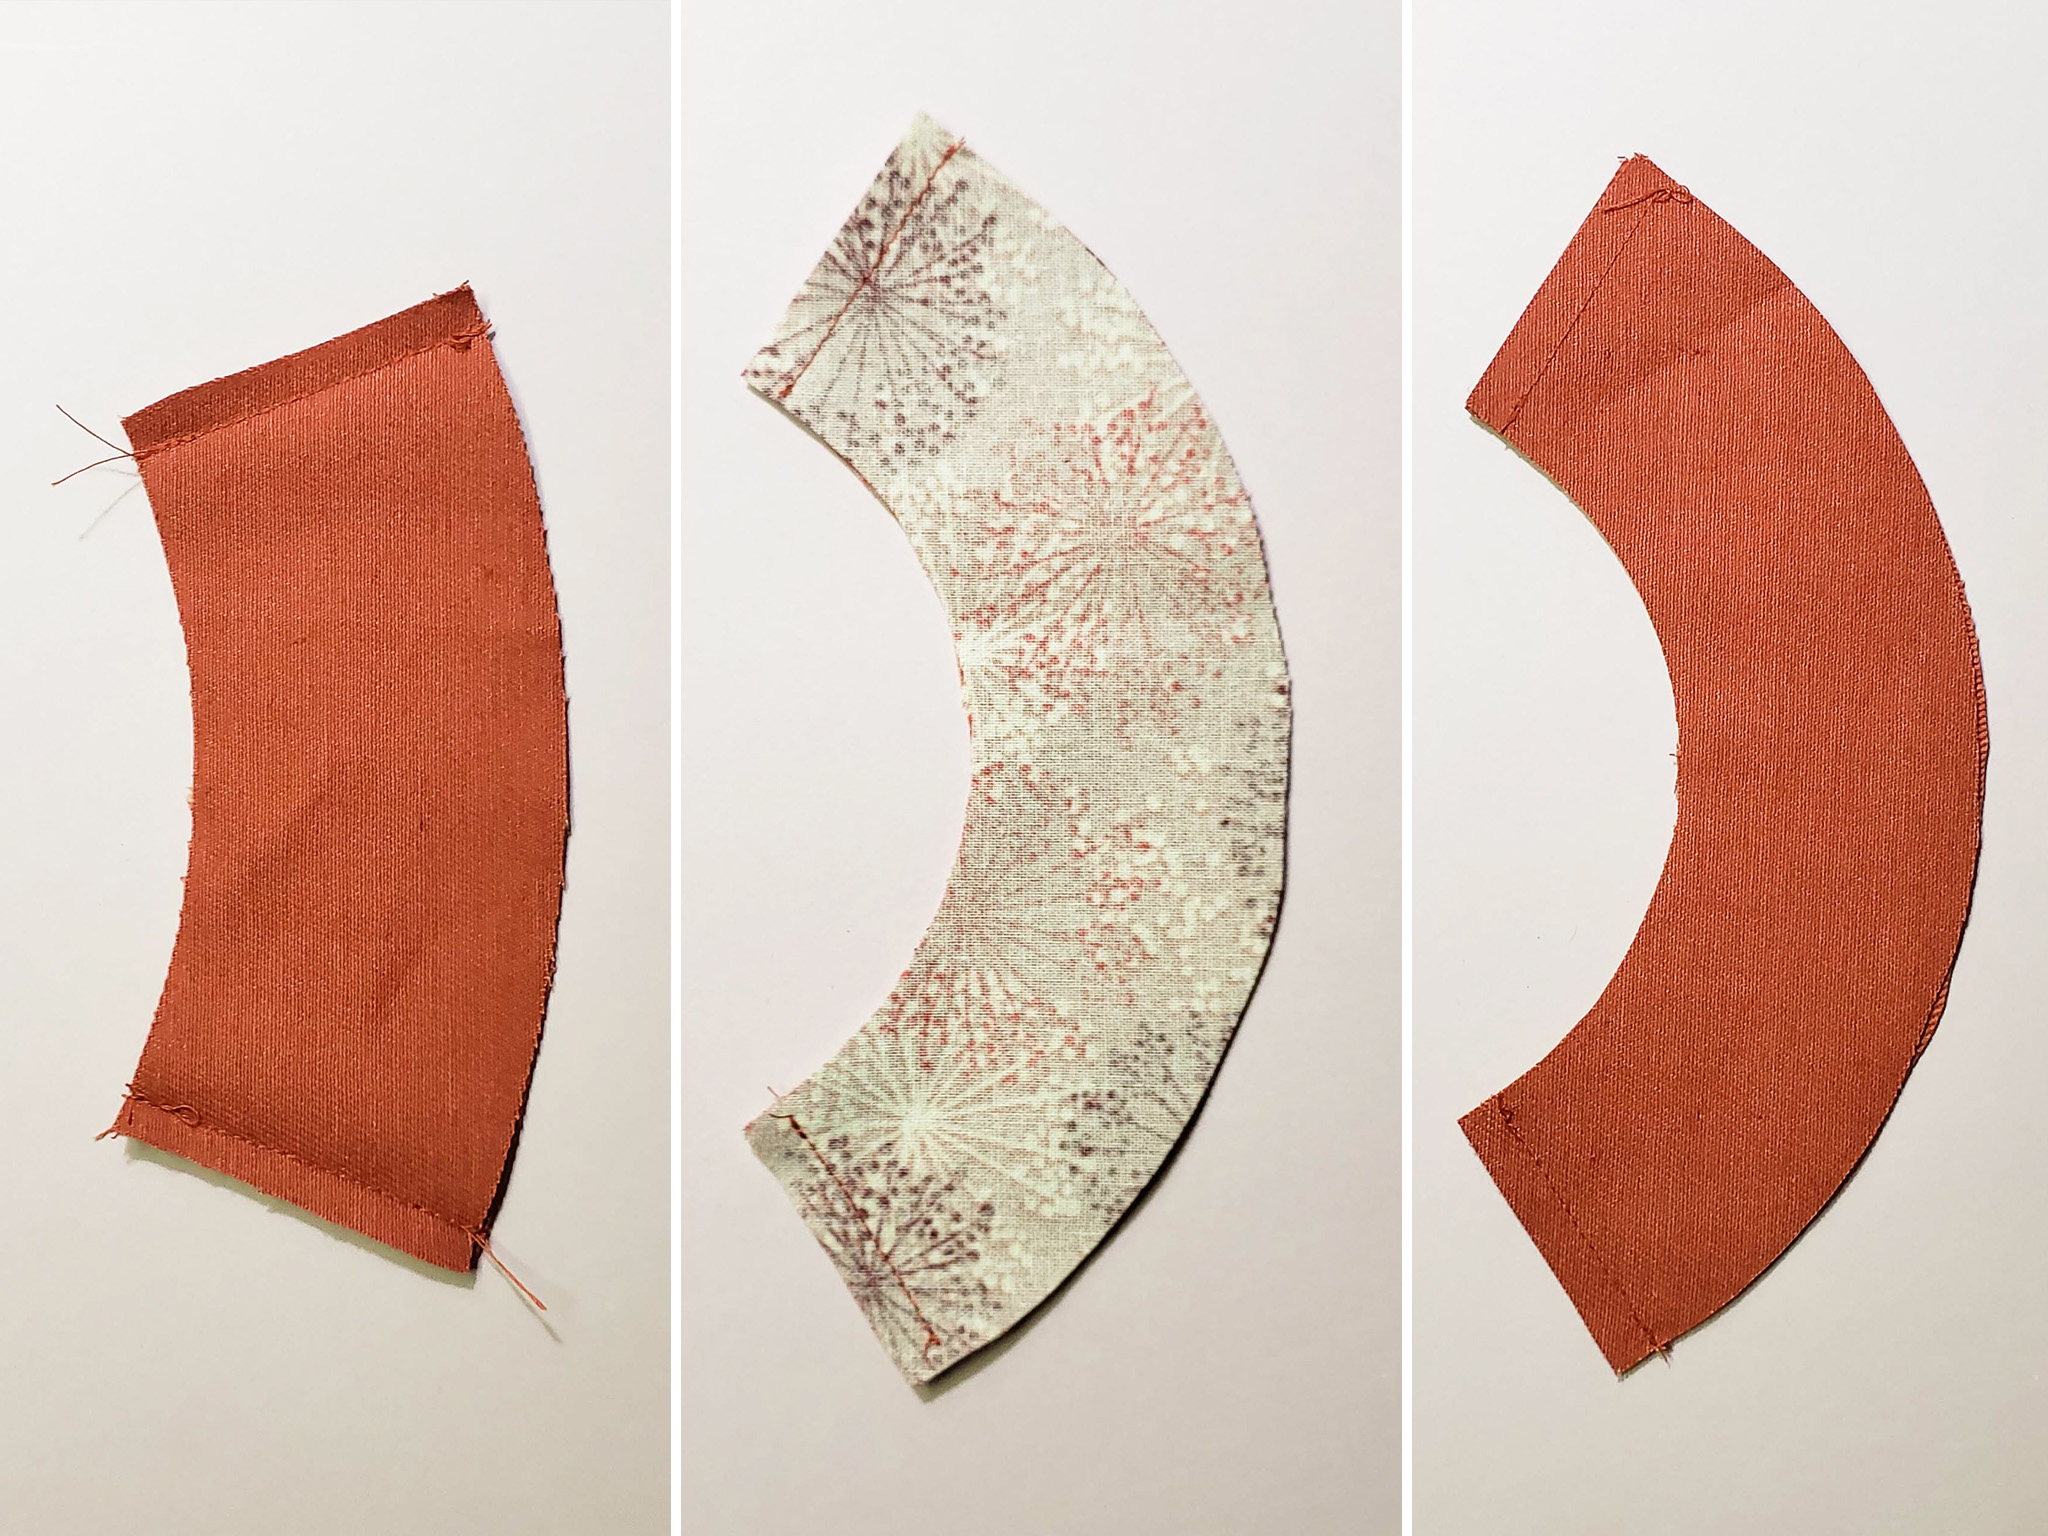
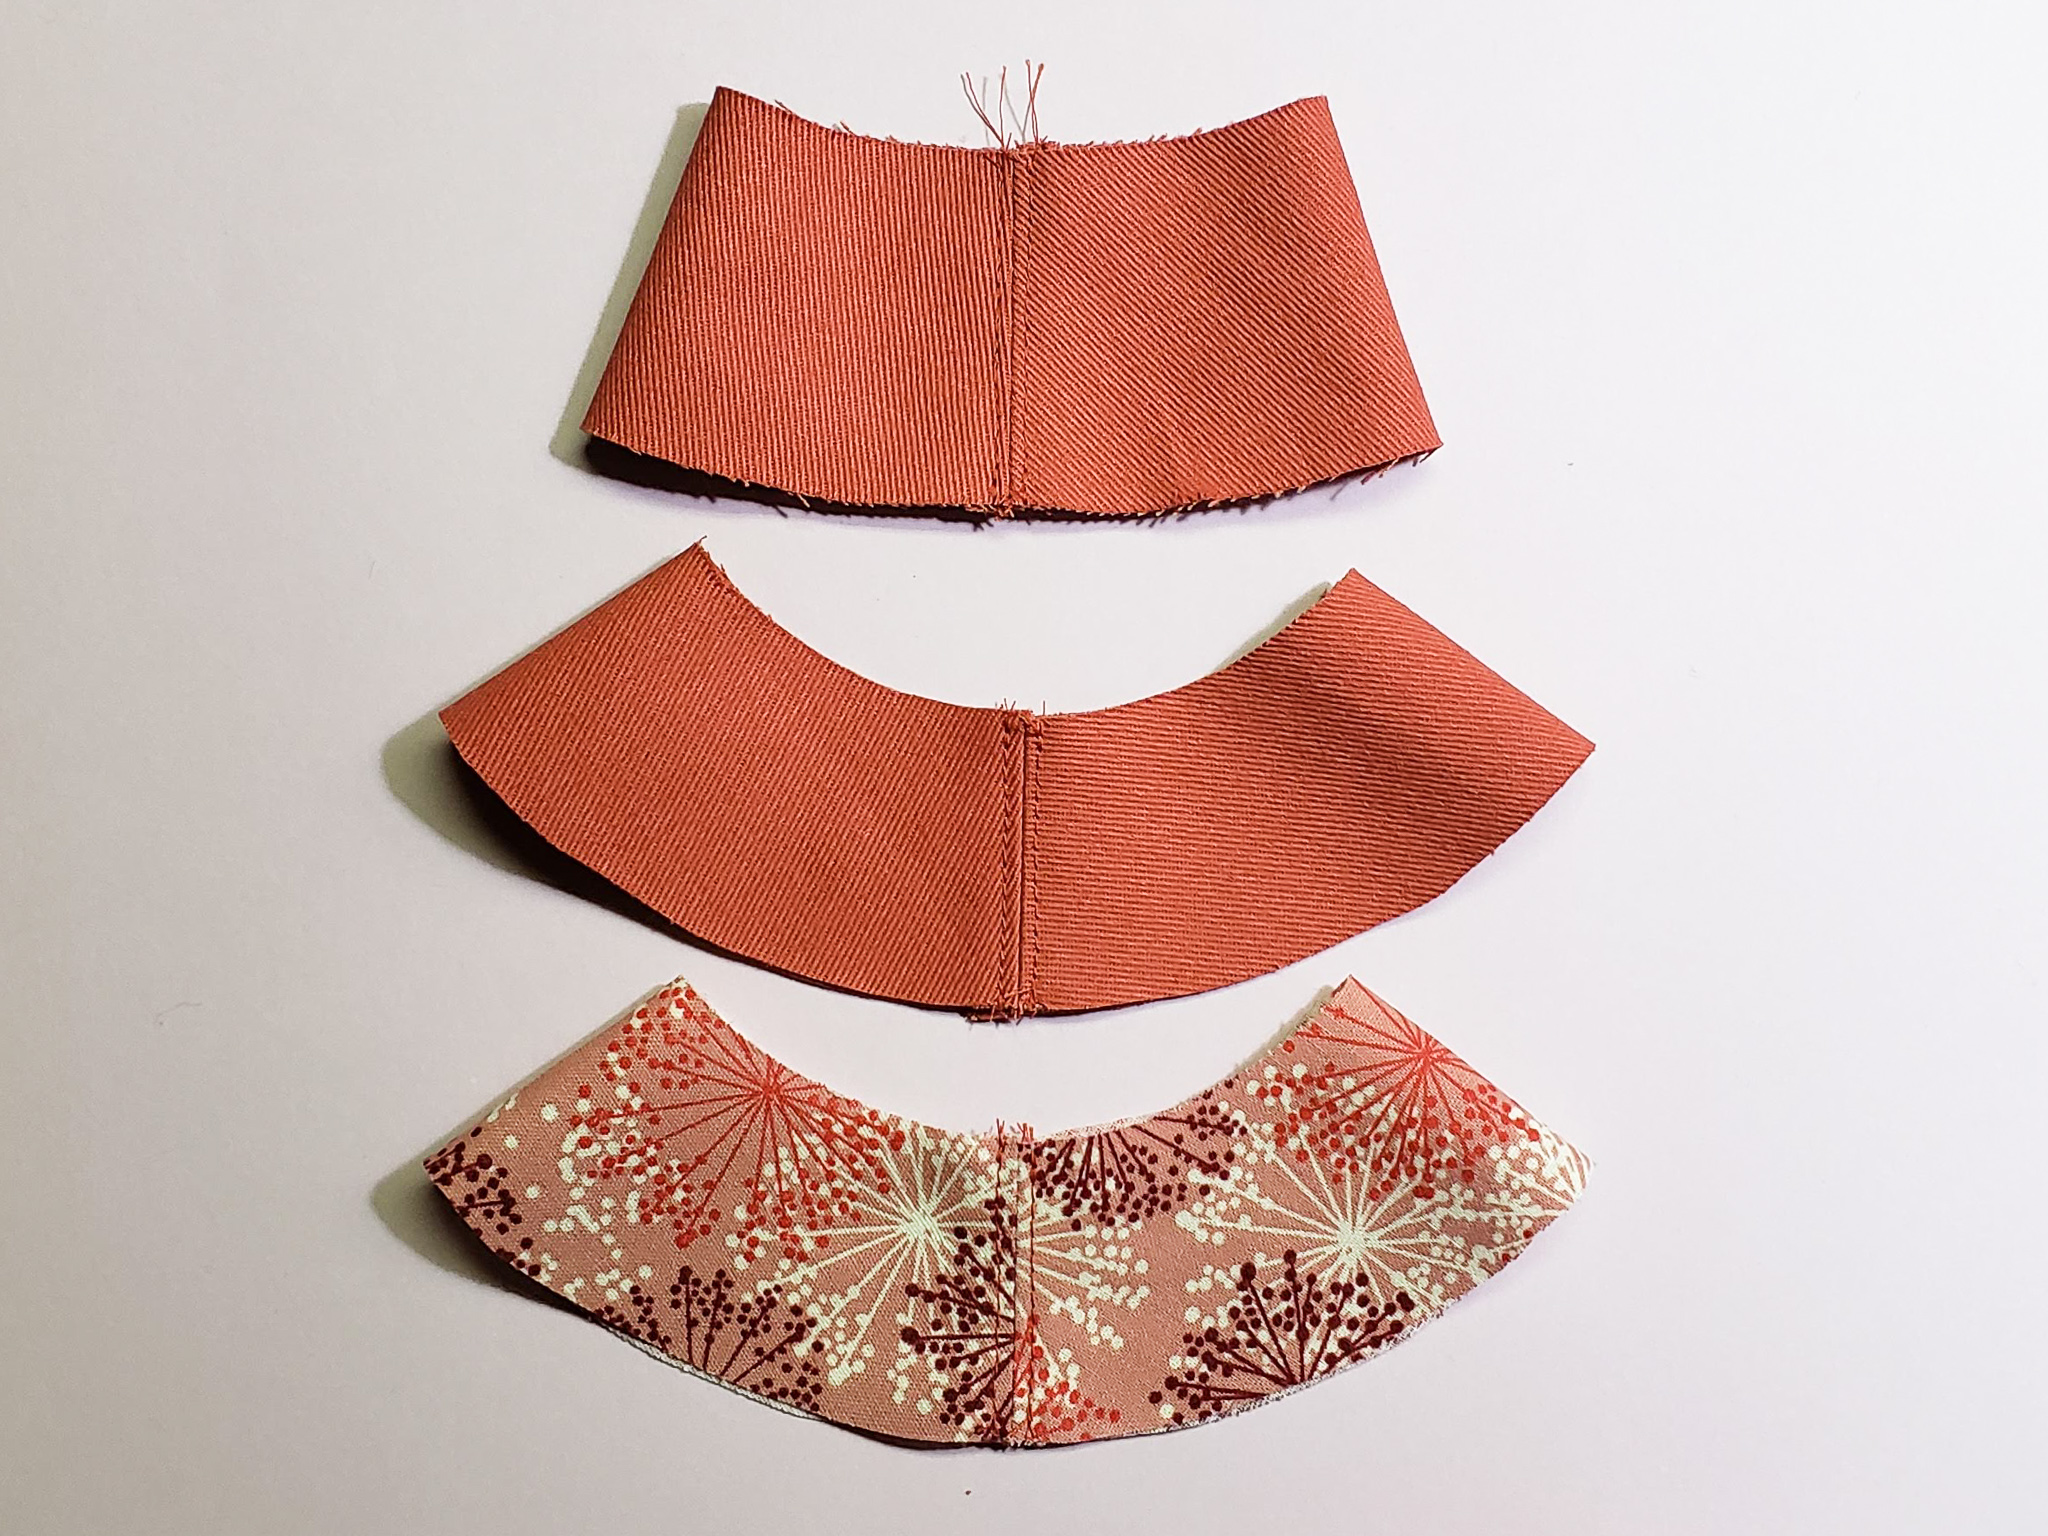
I cut the brim and side pieces in half, because large curved pieces would create a lot of fabric waste. Then I added a seam allowance to all the pieces and the pattern was done.
Download the Pattern
Use this free pattern to make items for personal use, items for sale and new free patterns. Do not use it to make new patterns for sale. If you need help printing this pattern, make sure to read my digital pattern printing tips.
Materials
I’ve made these hats in a few different fabrics. One version was made of a light cotton twill, another out of denim lined with quilting cotton. I recommend using a stiffer fabric for the outer pieces.
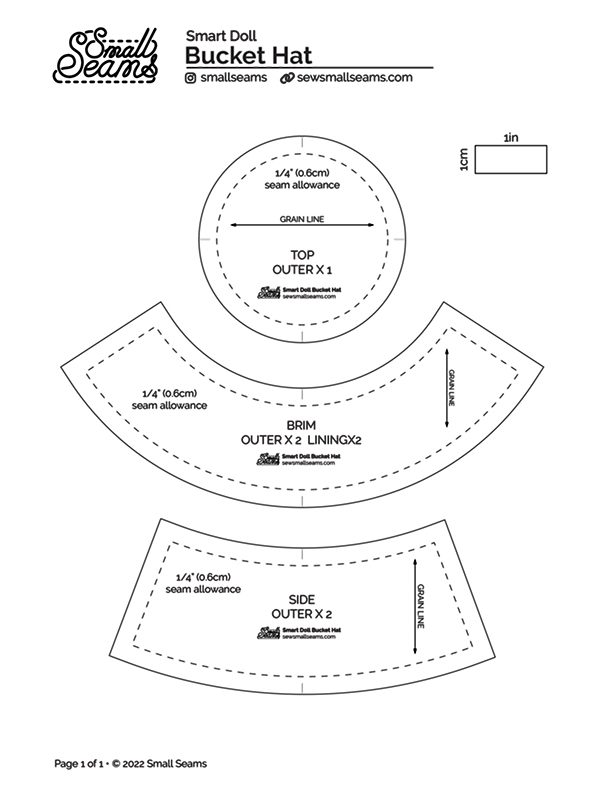
Pattern Pieces
These are the pieces:
- Top x 1 in main fabric
- Side x 2 in main fabric
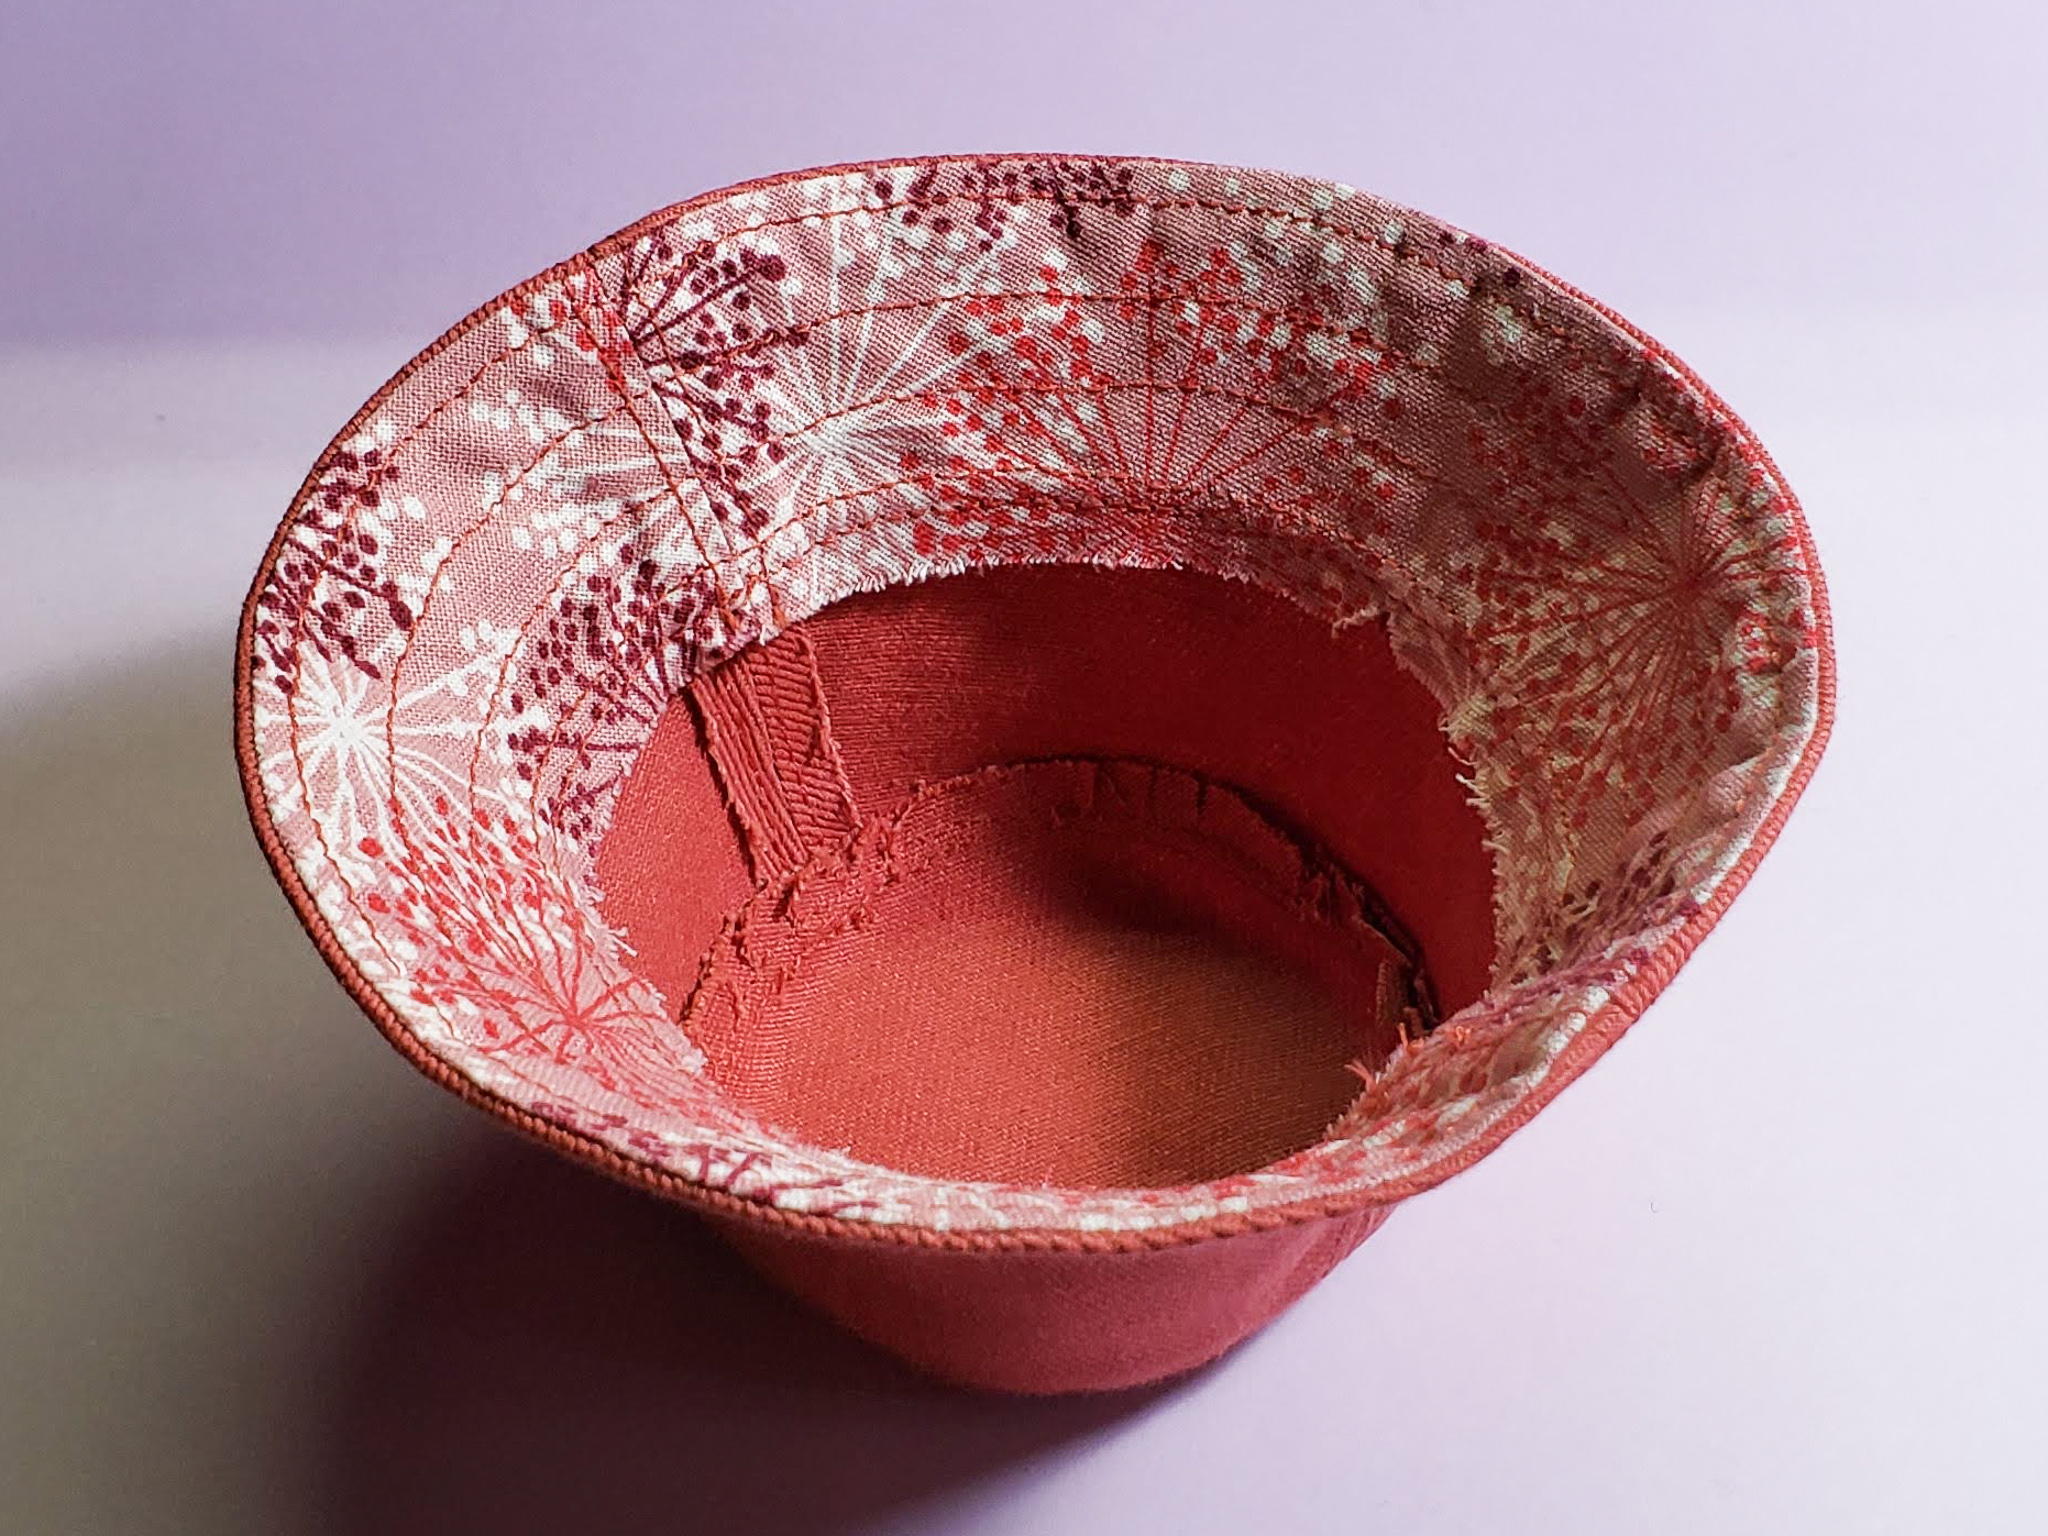
- Brim x 4 (2 x outer, 2 x lining) in the same main fabric, or the lining can be different
Basic Assembly Instructions
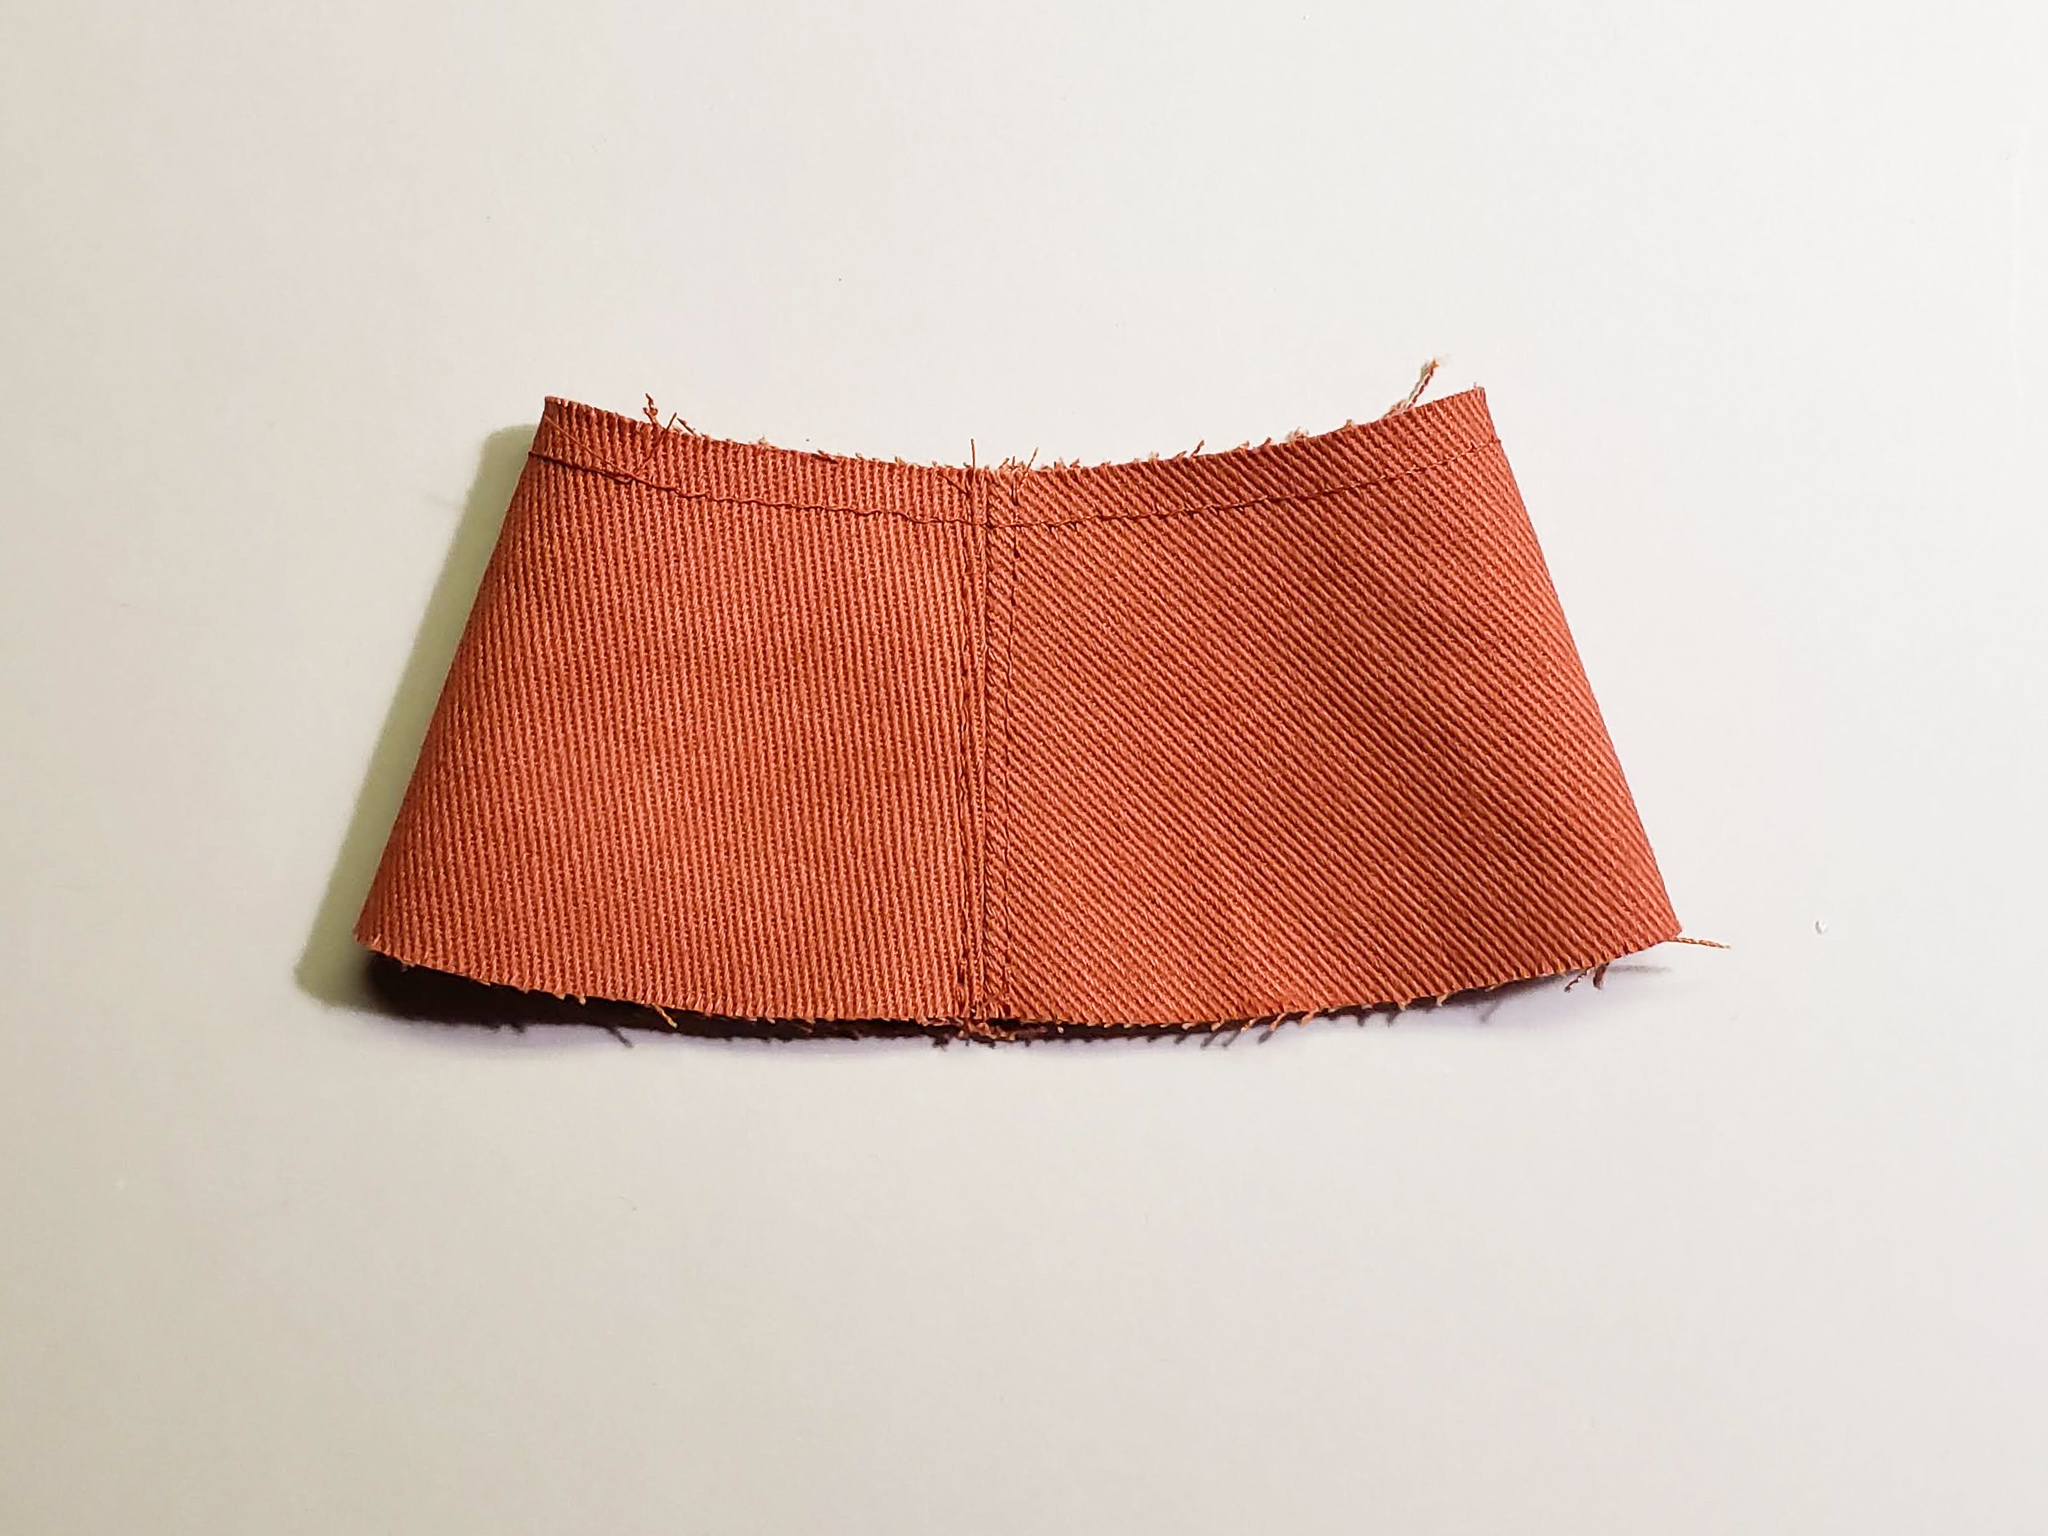
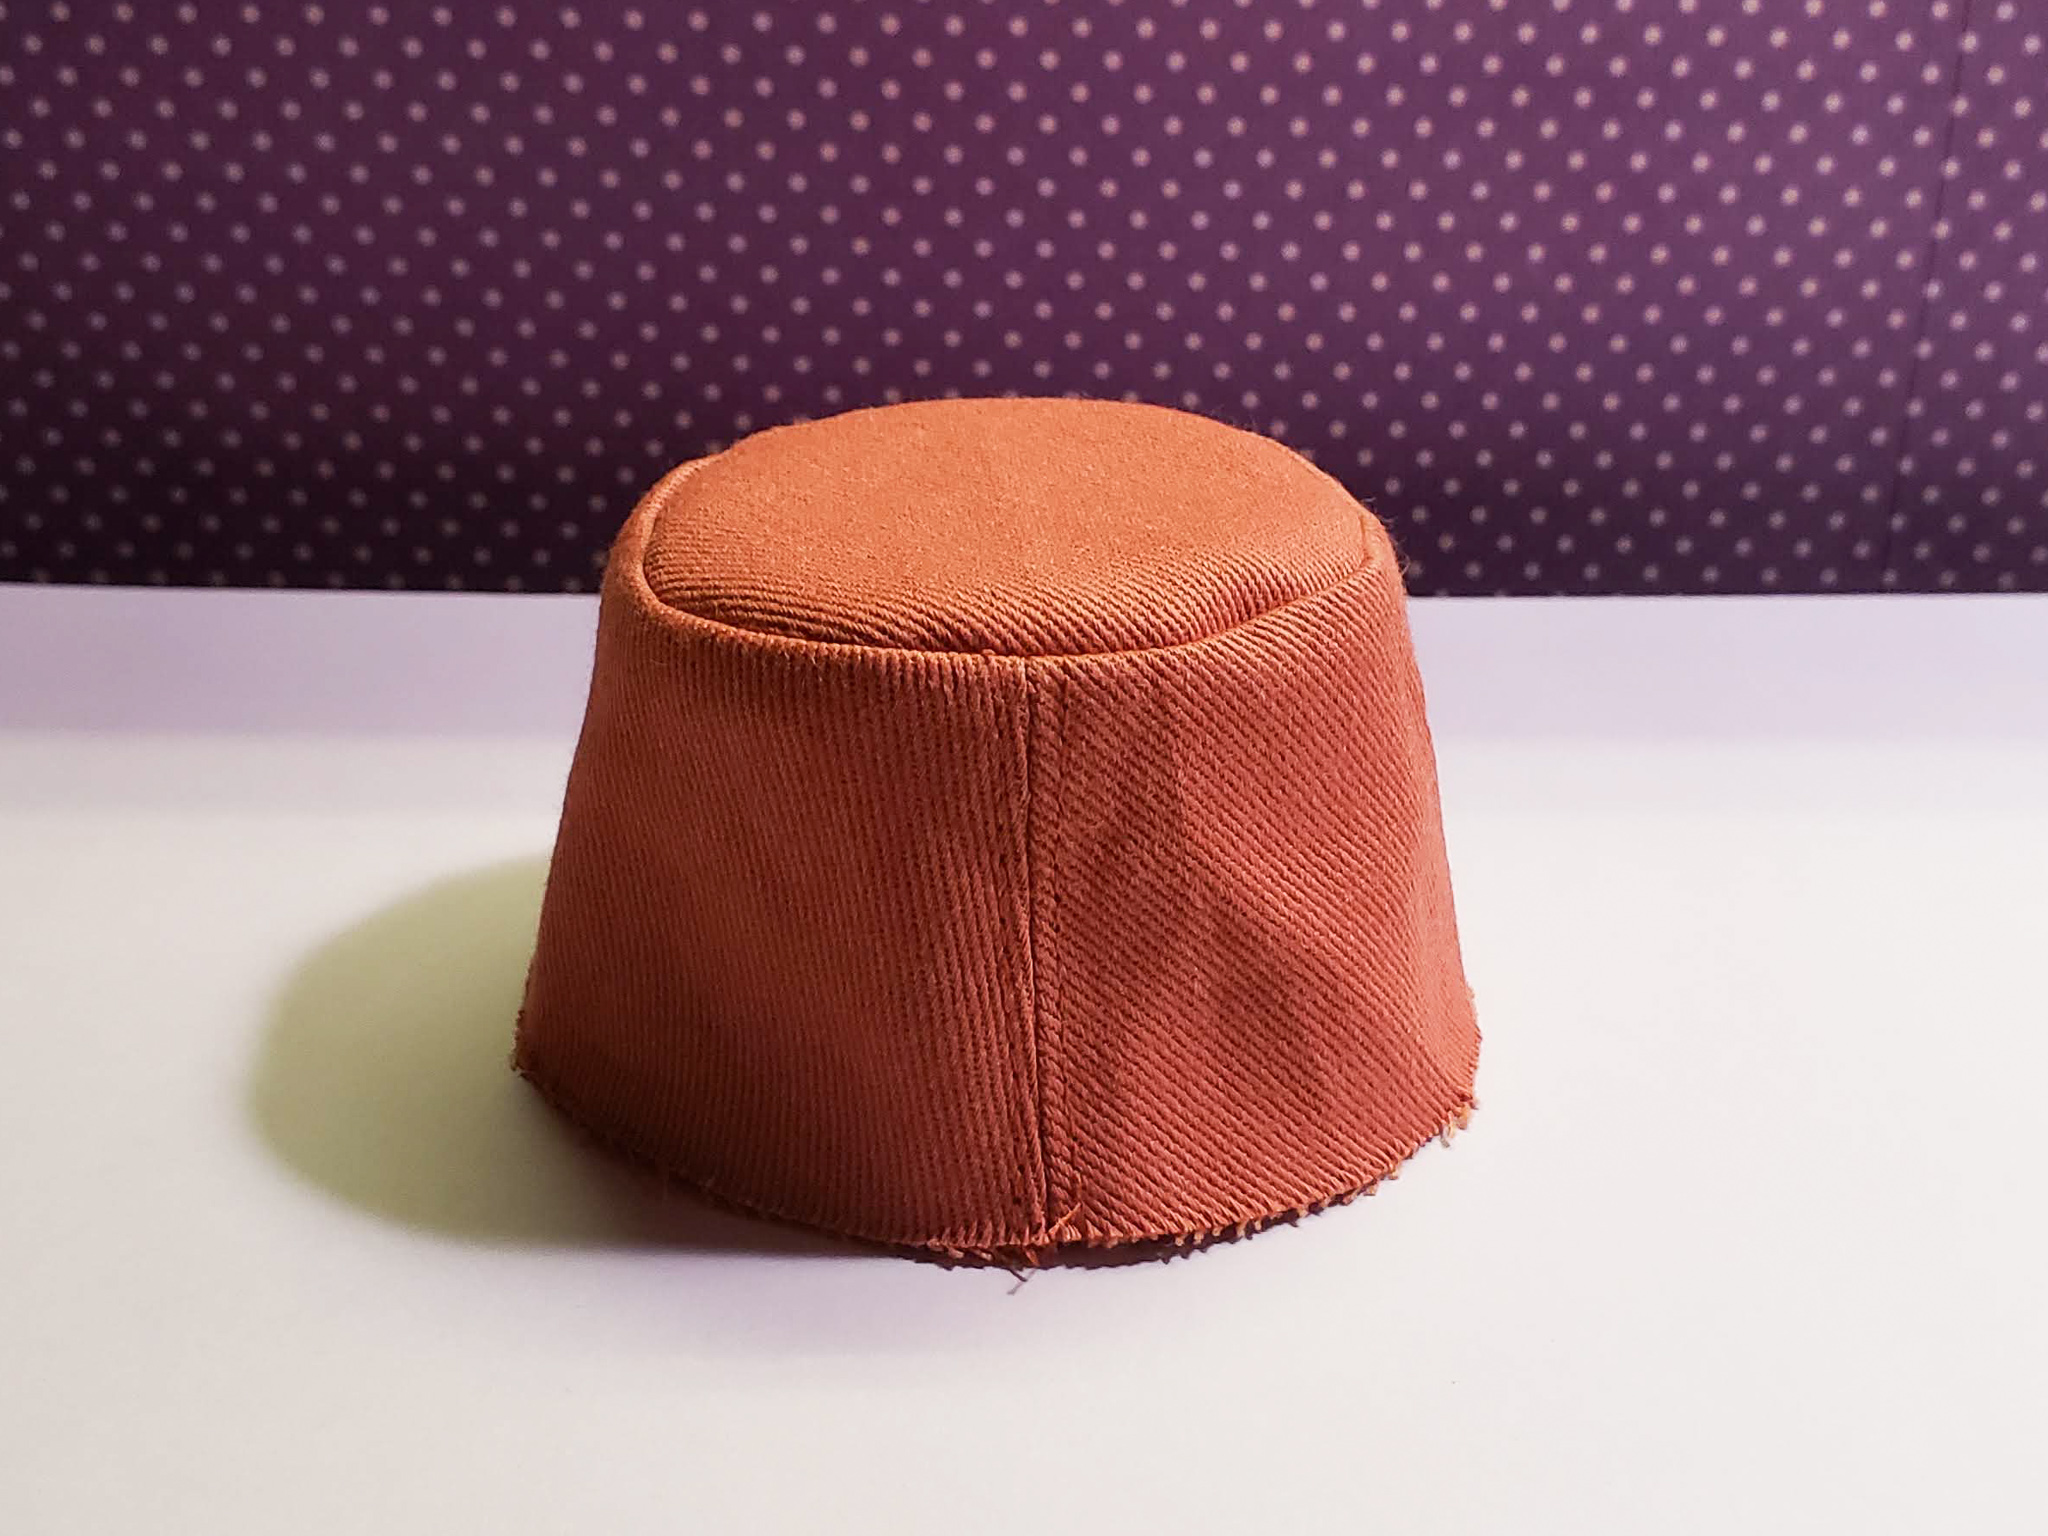
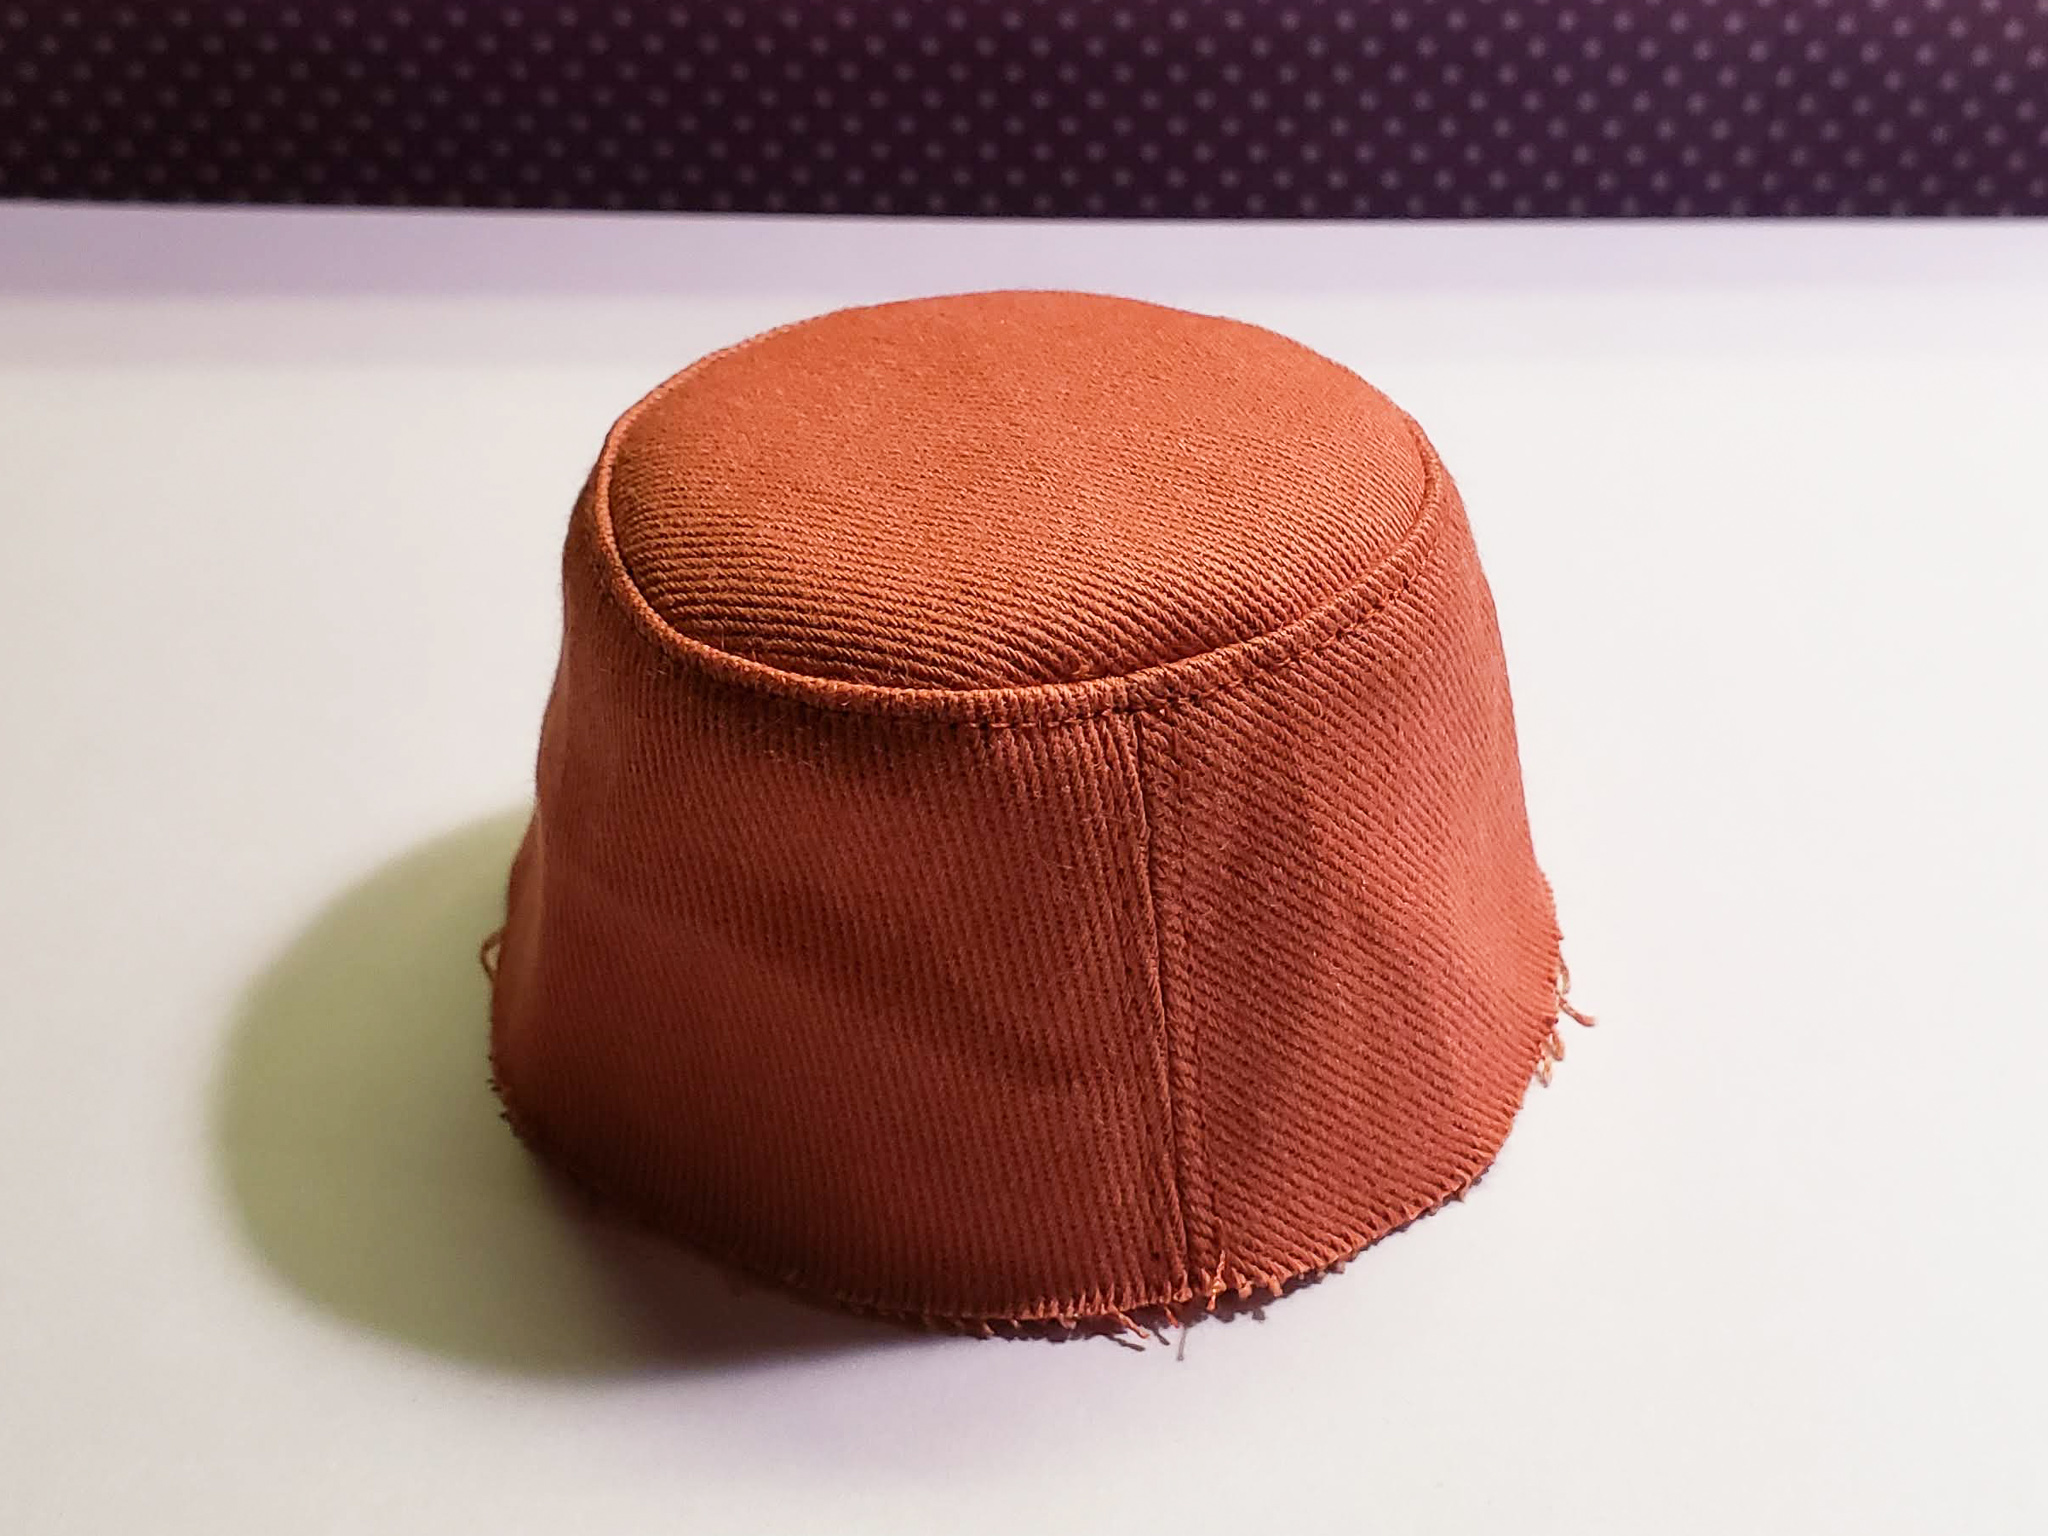
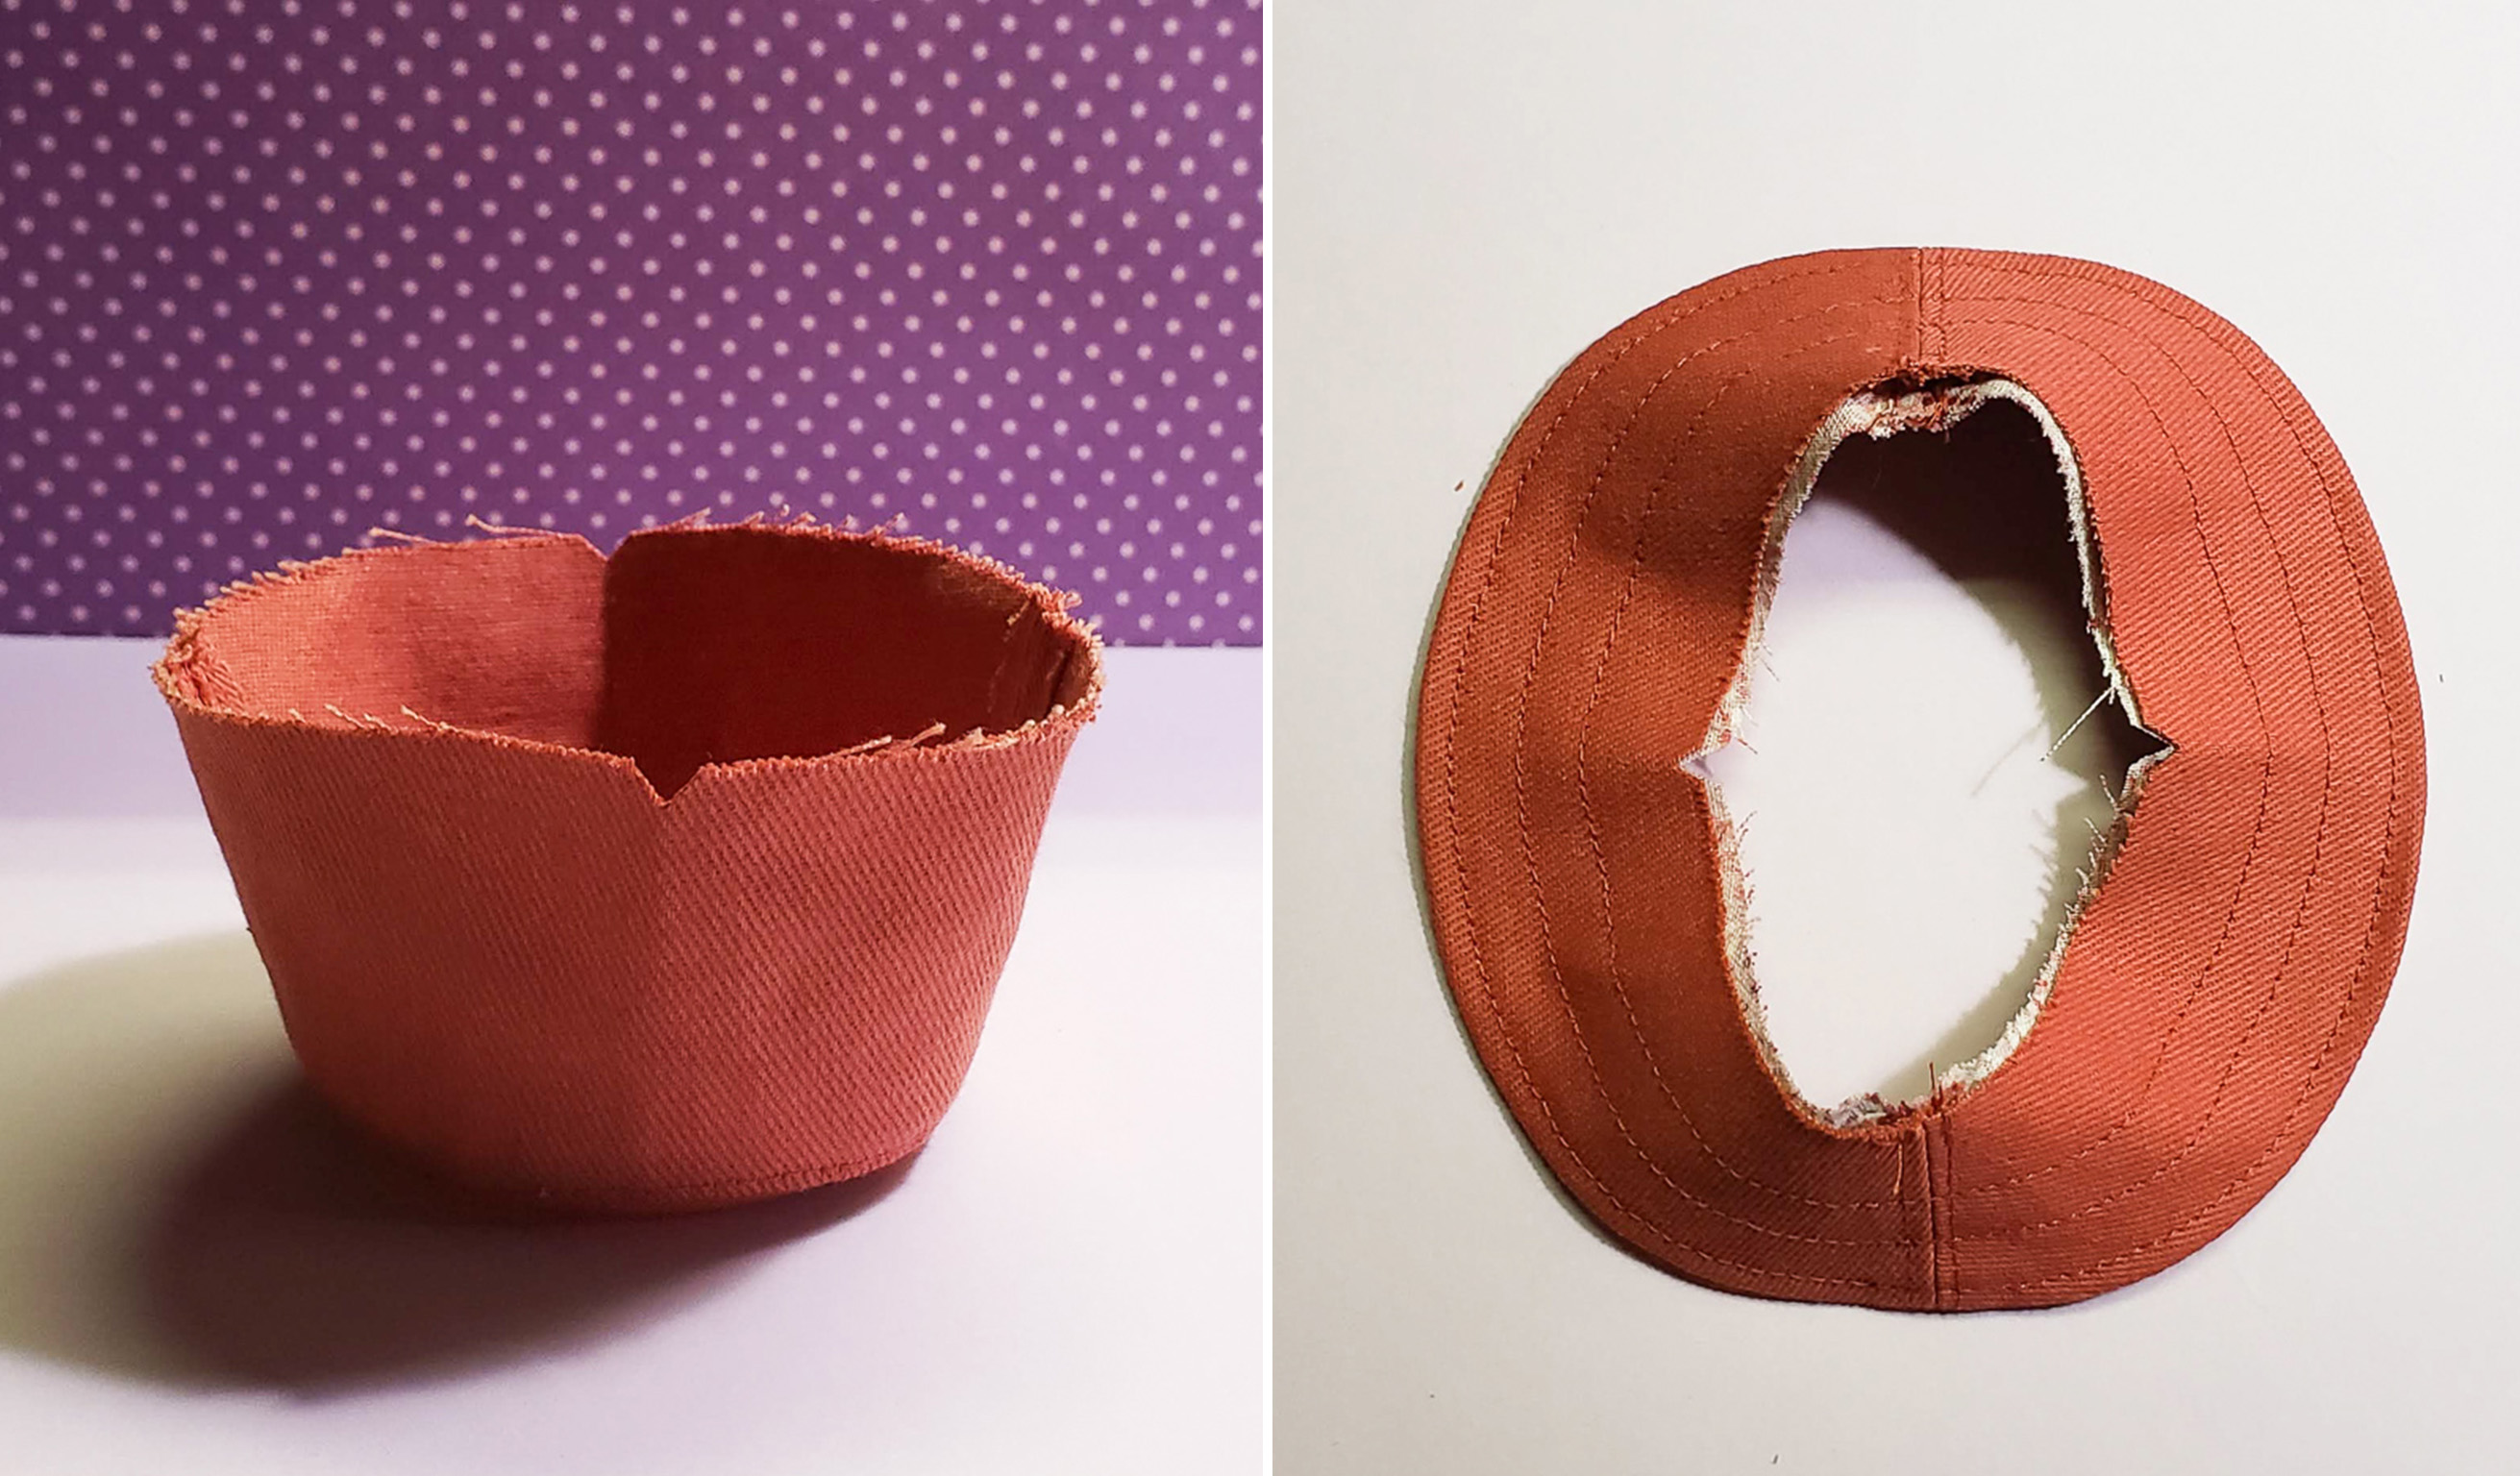
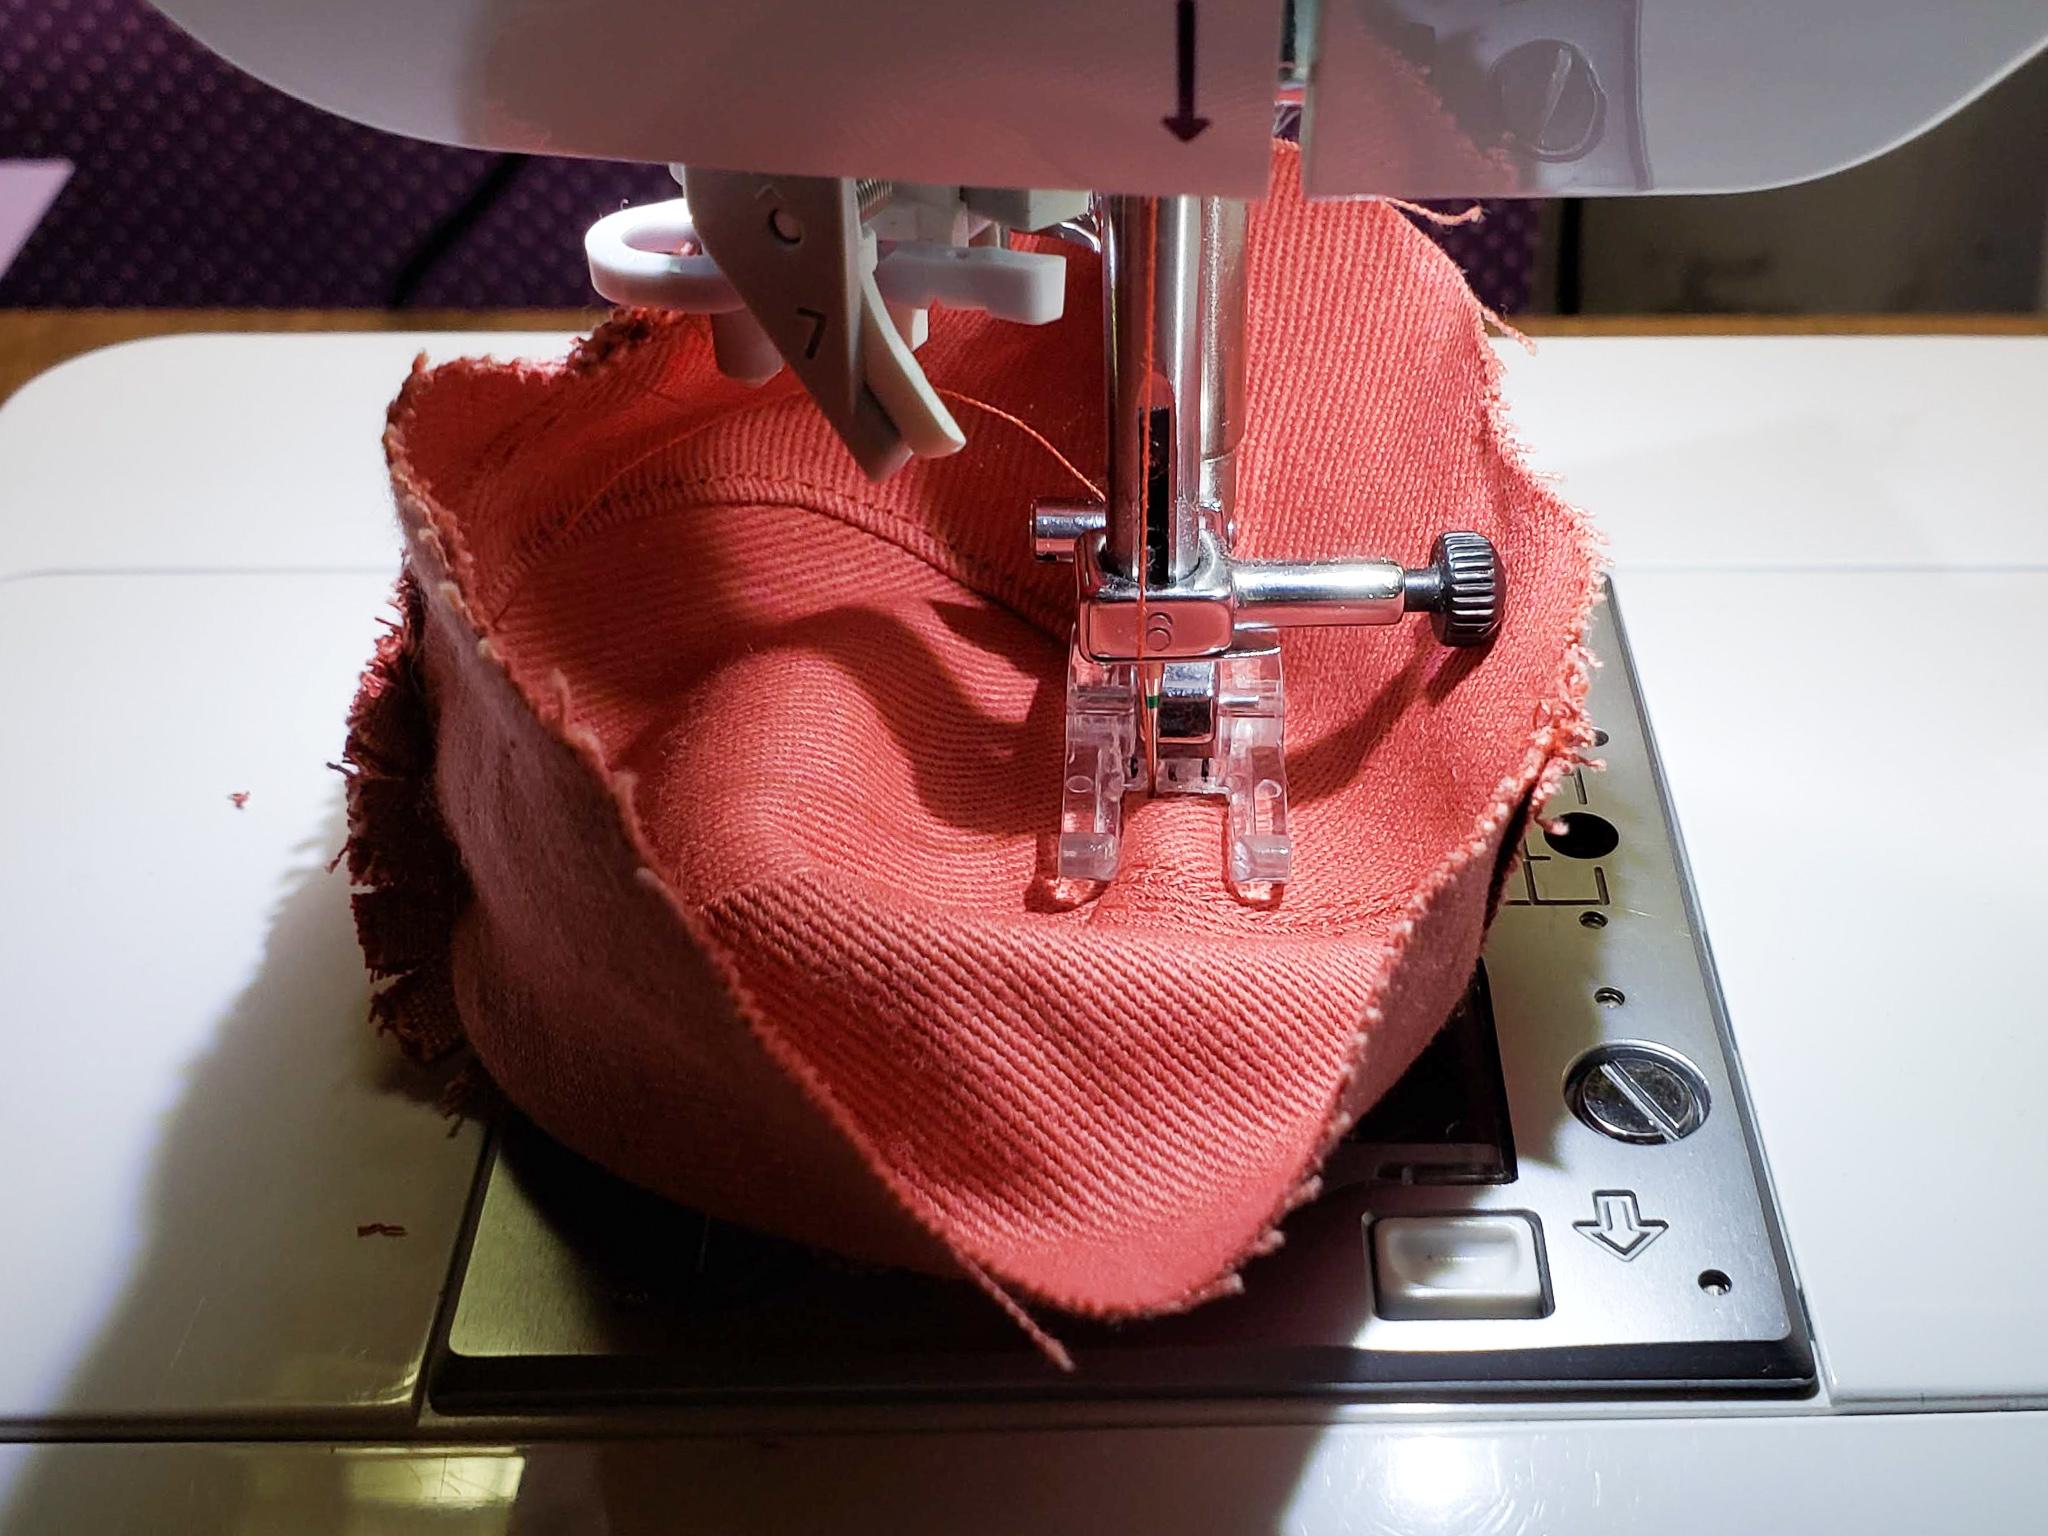
- Sew the three pairs of sides/brims together, right sides facing, along the straight edges. Spread the seams and topstitch on each side.
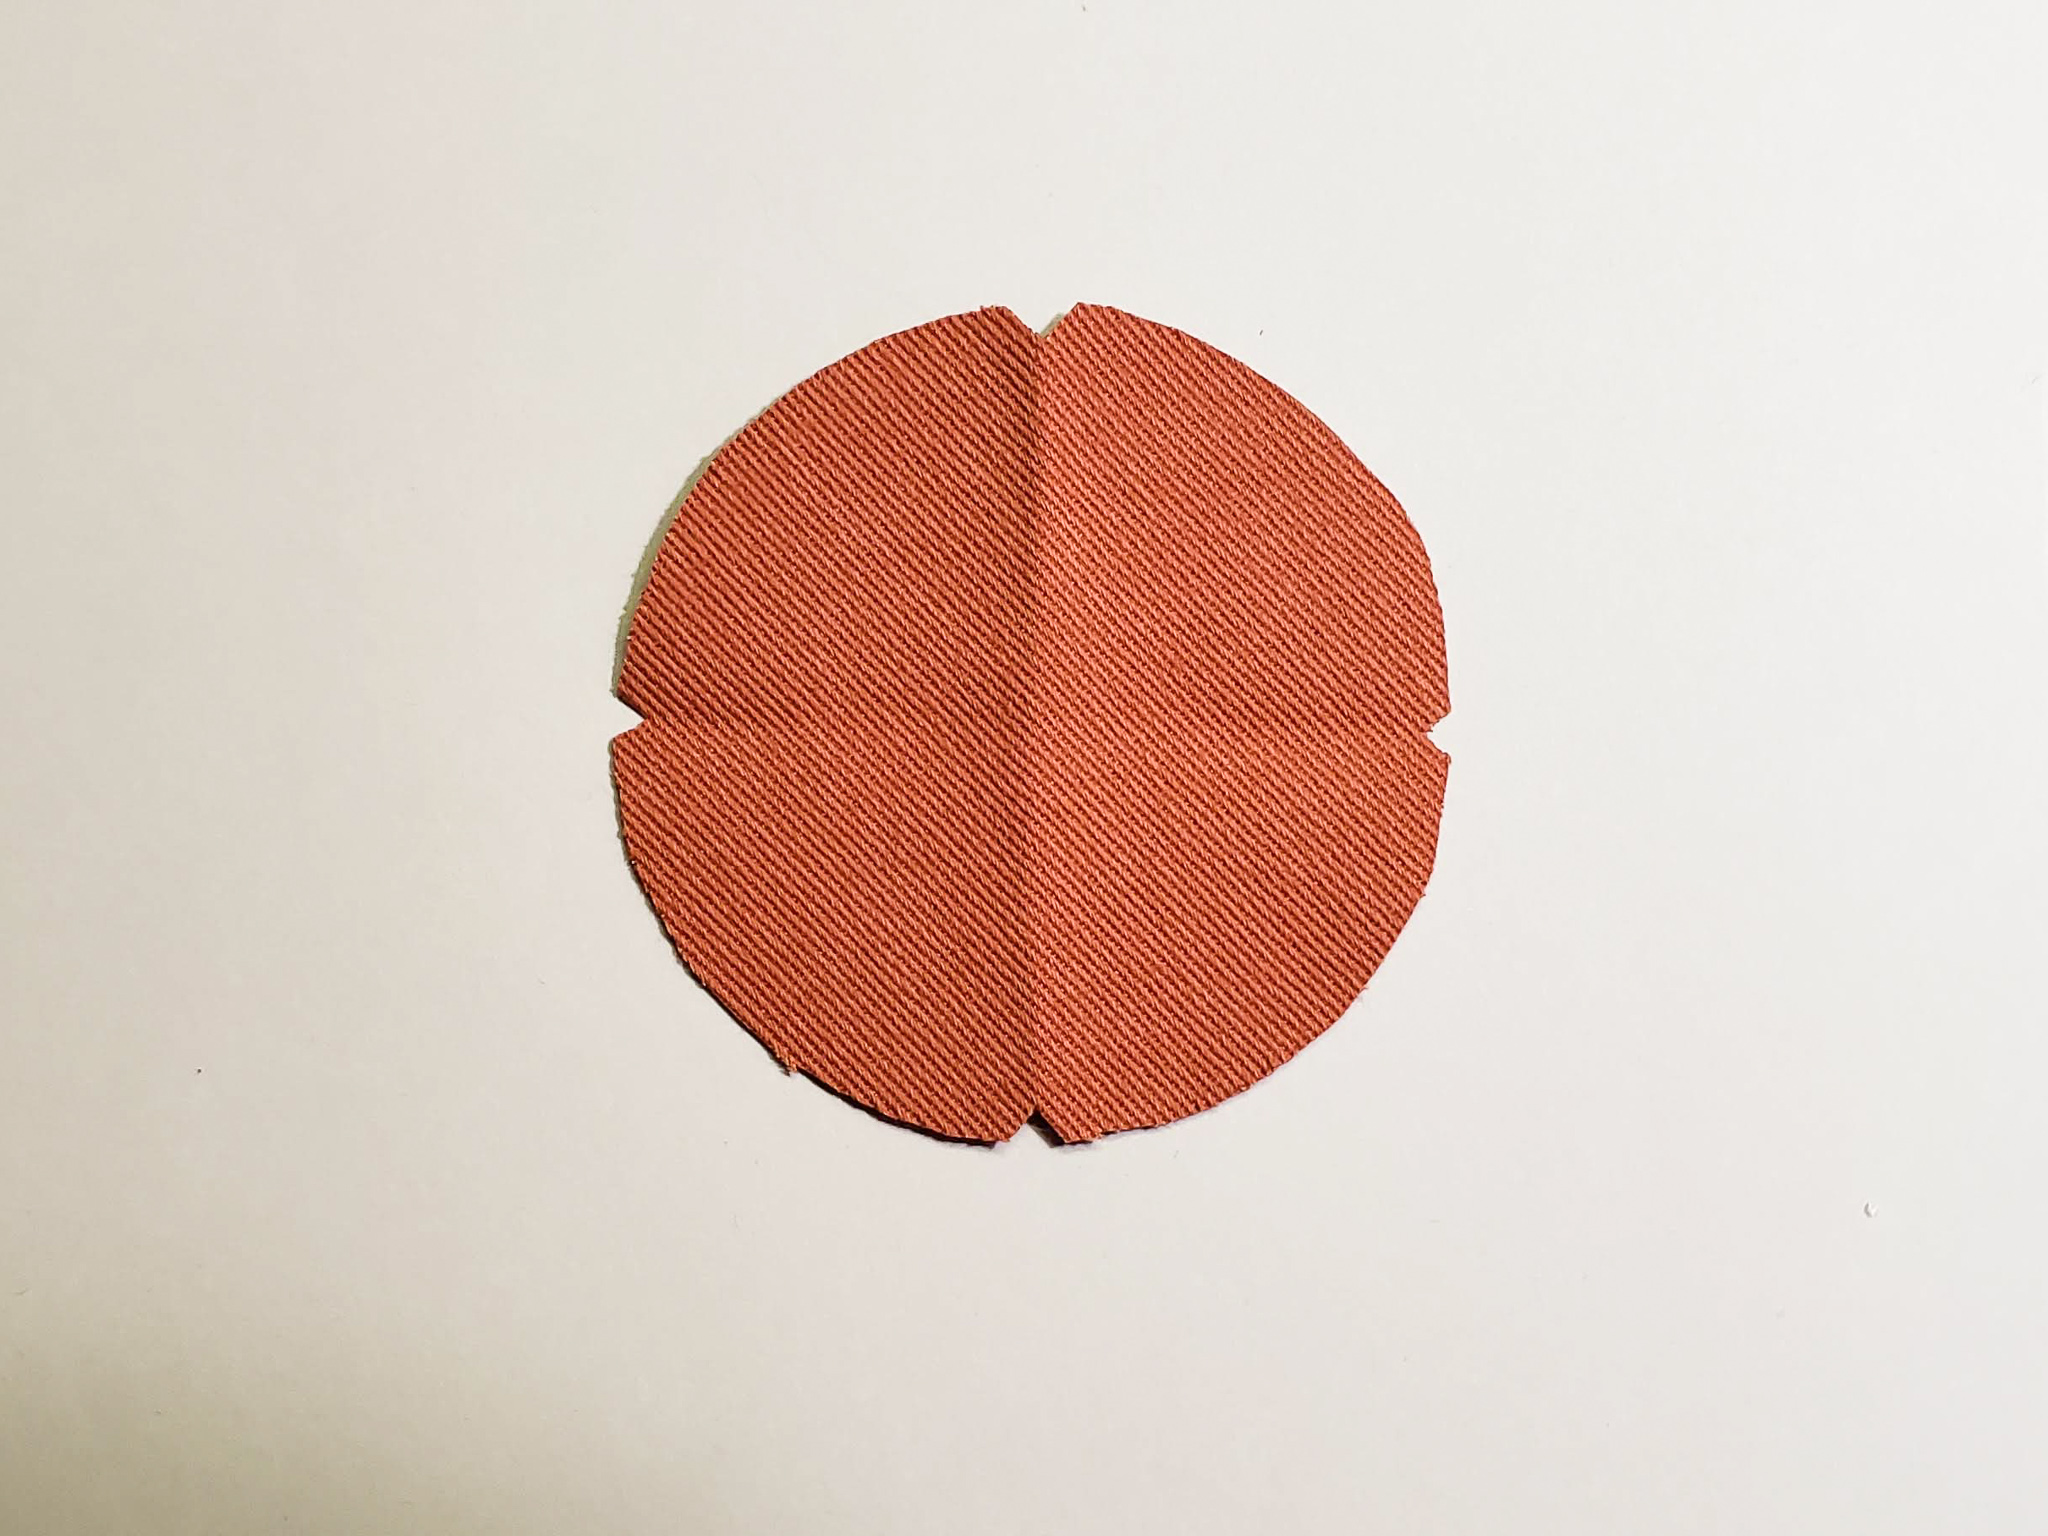
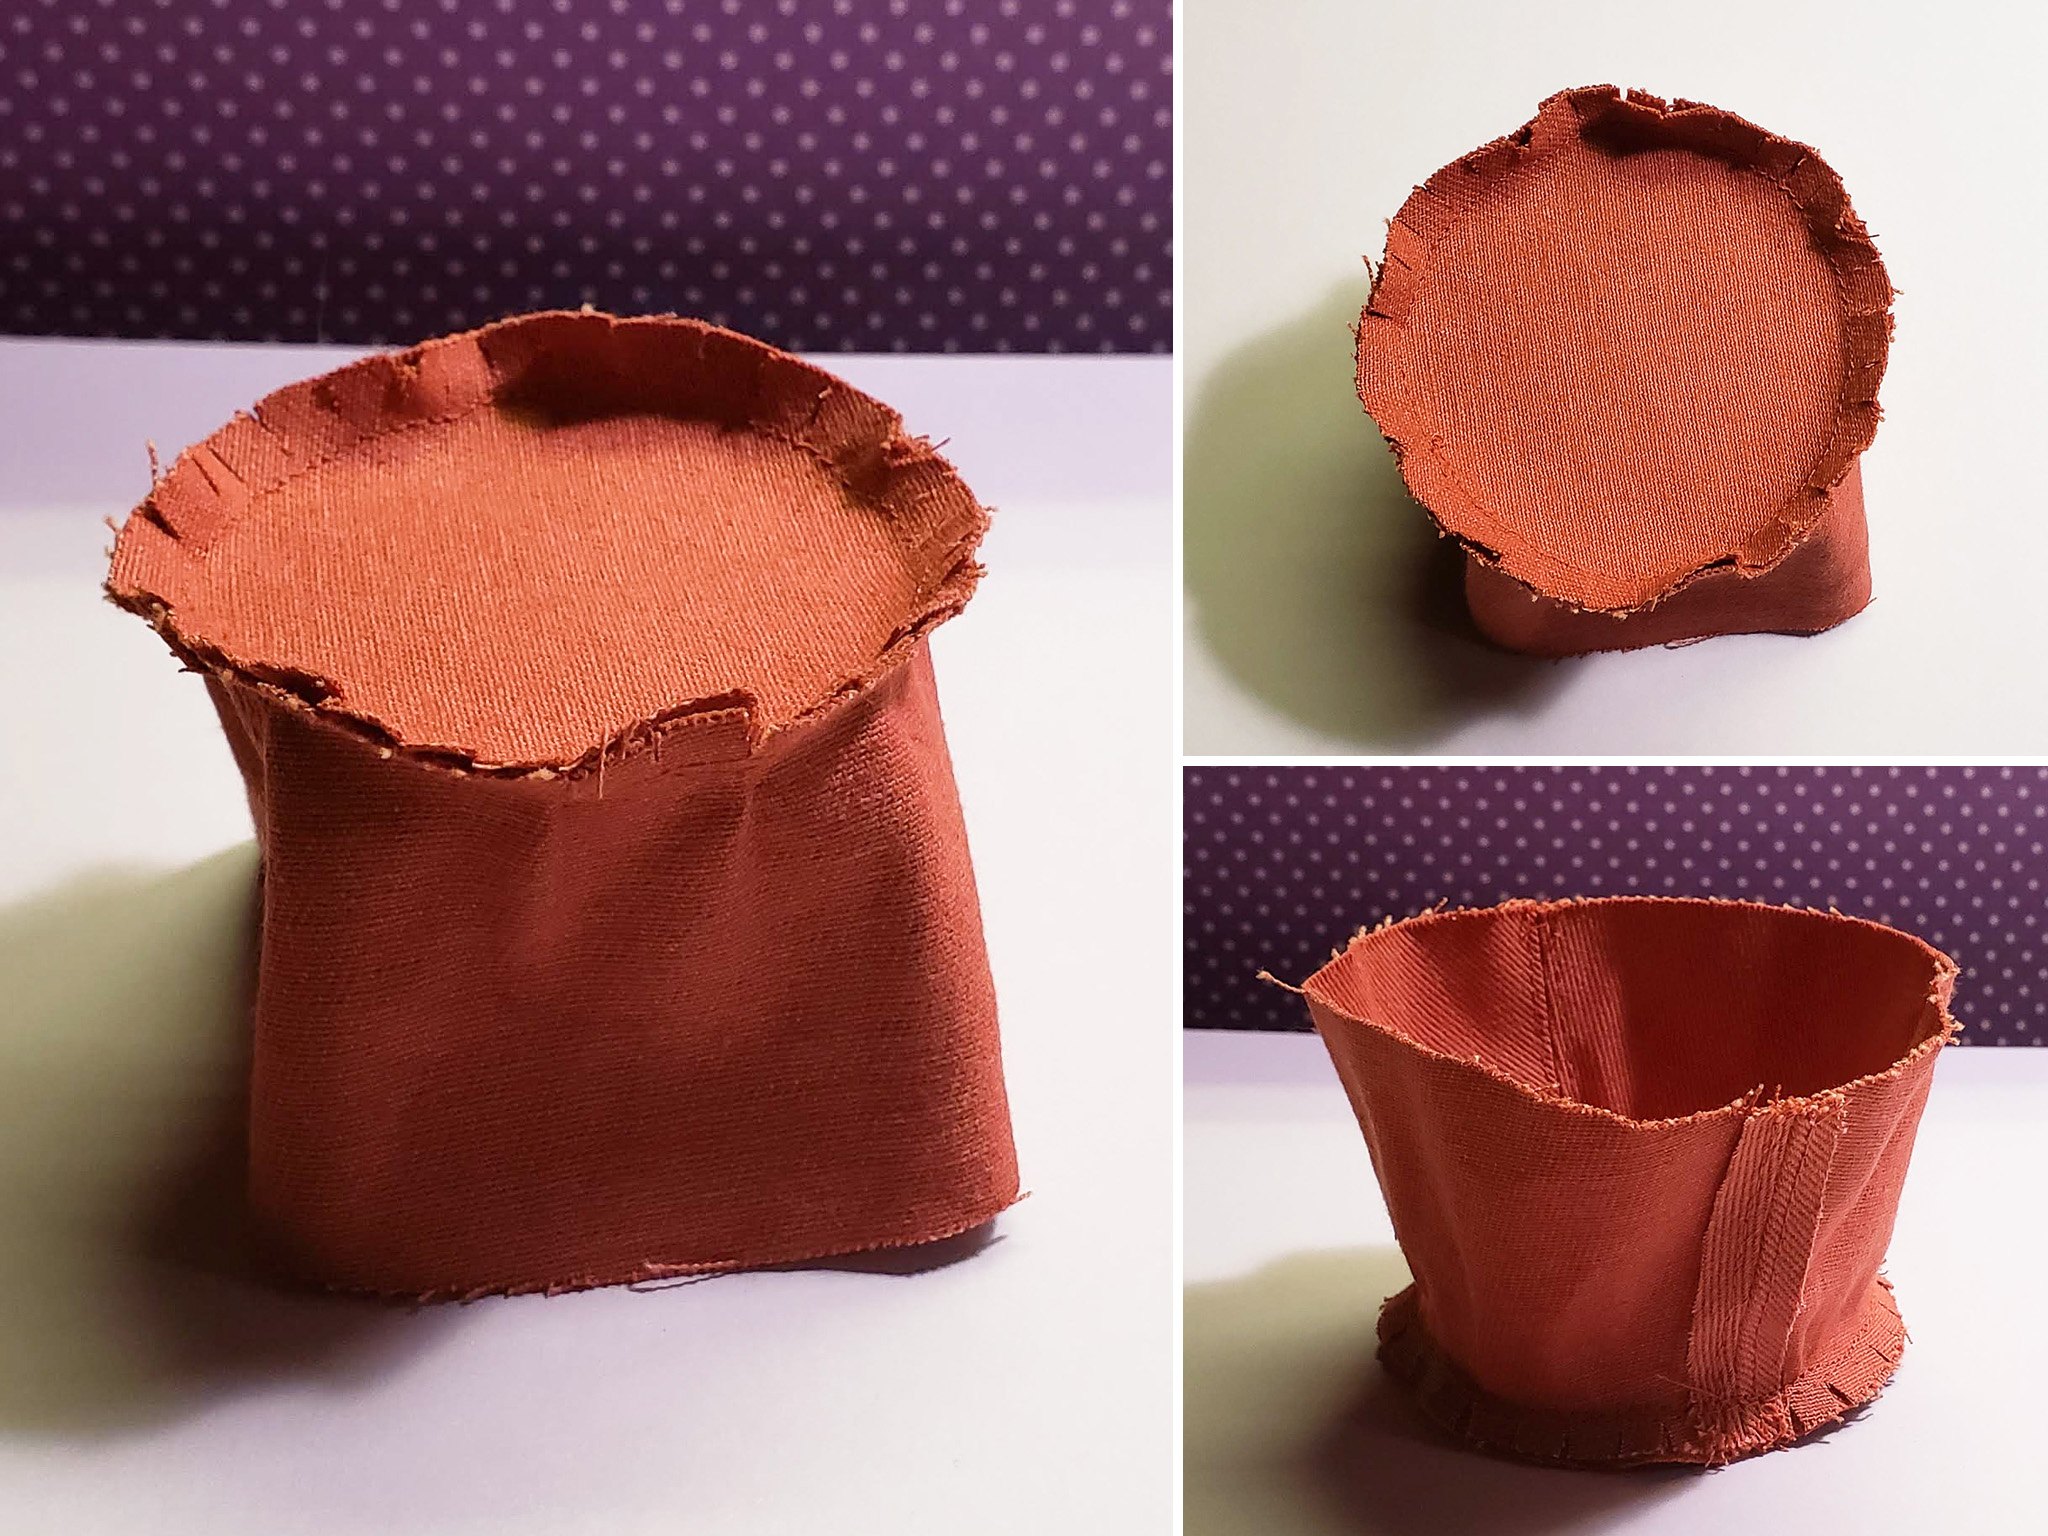
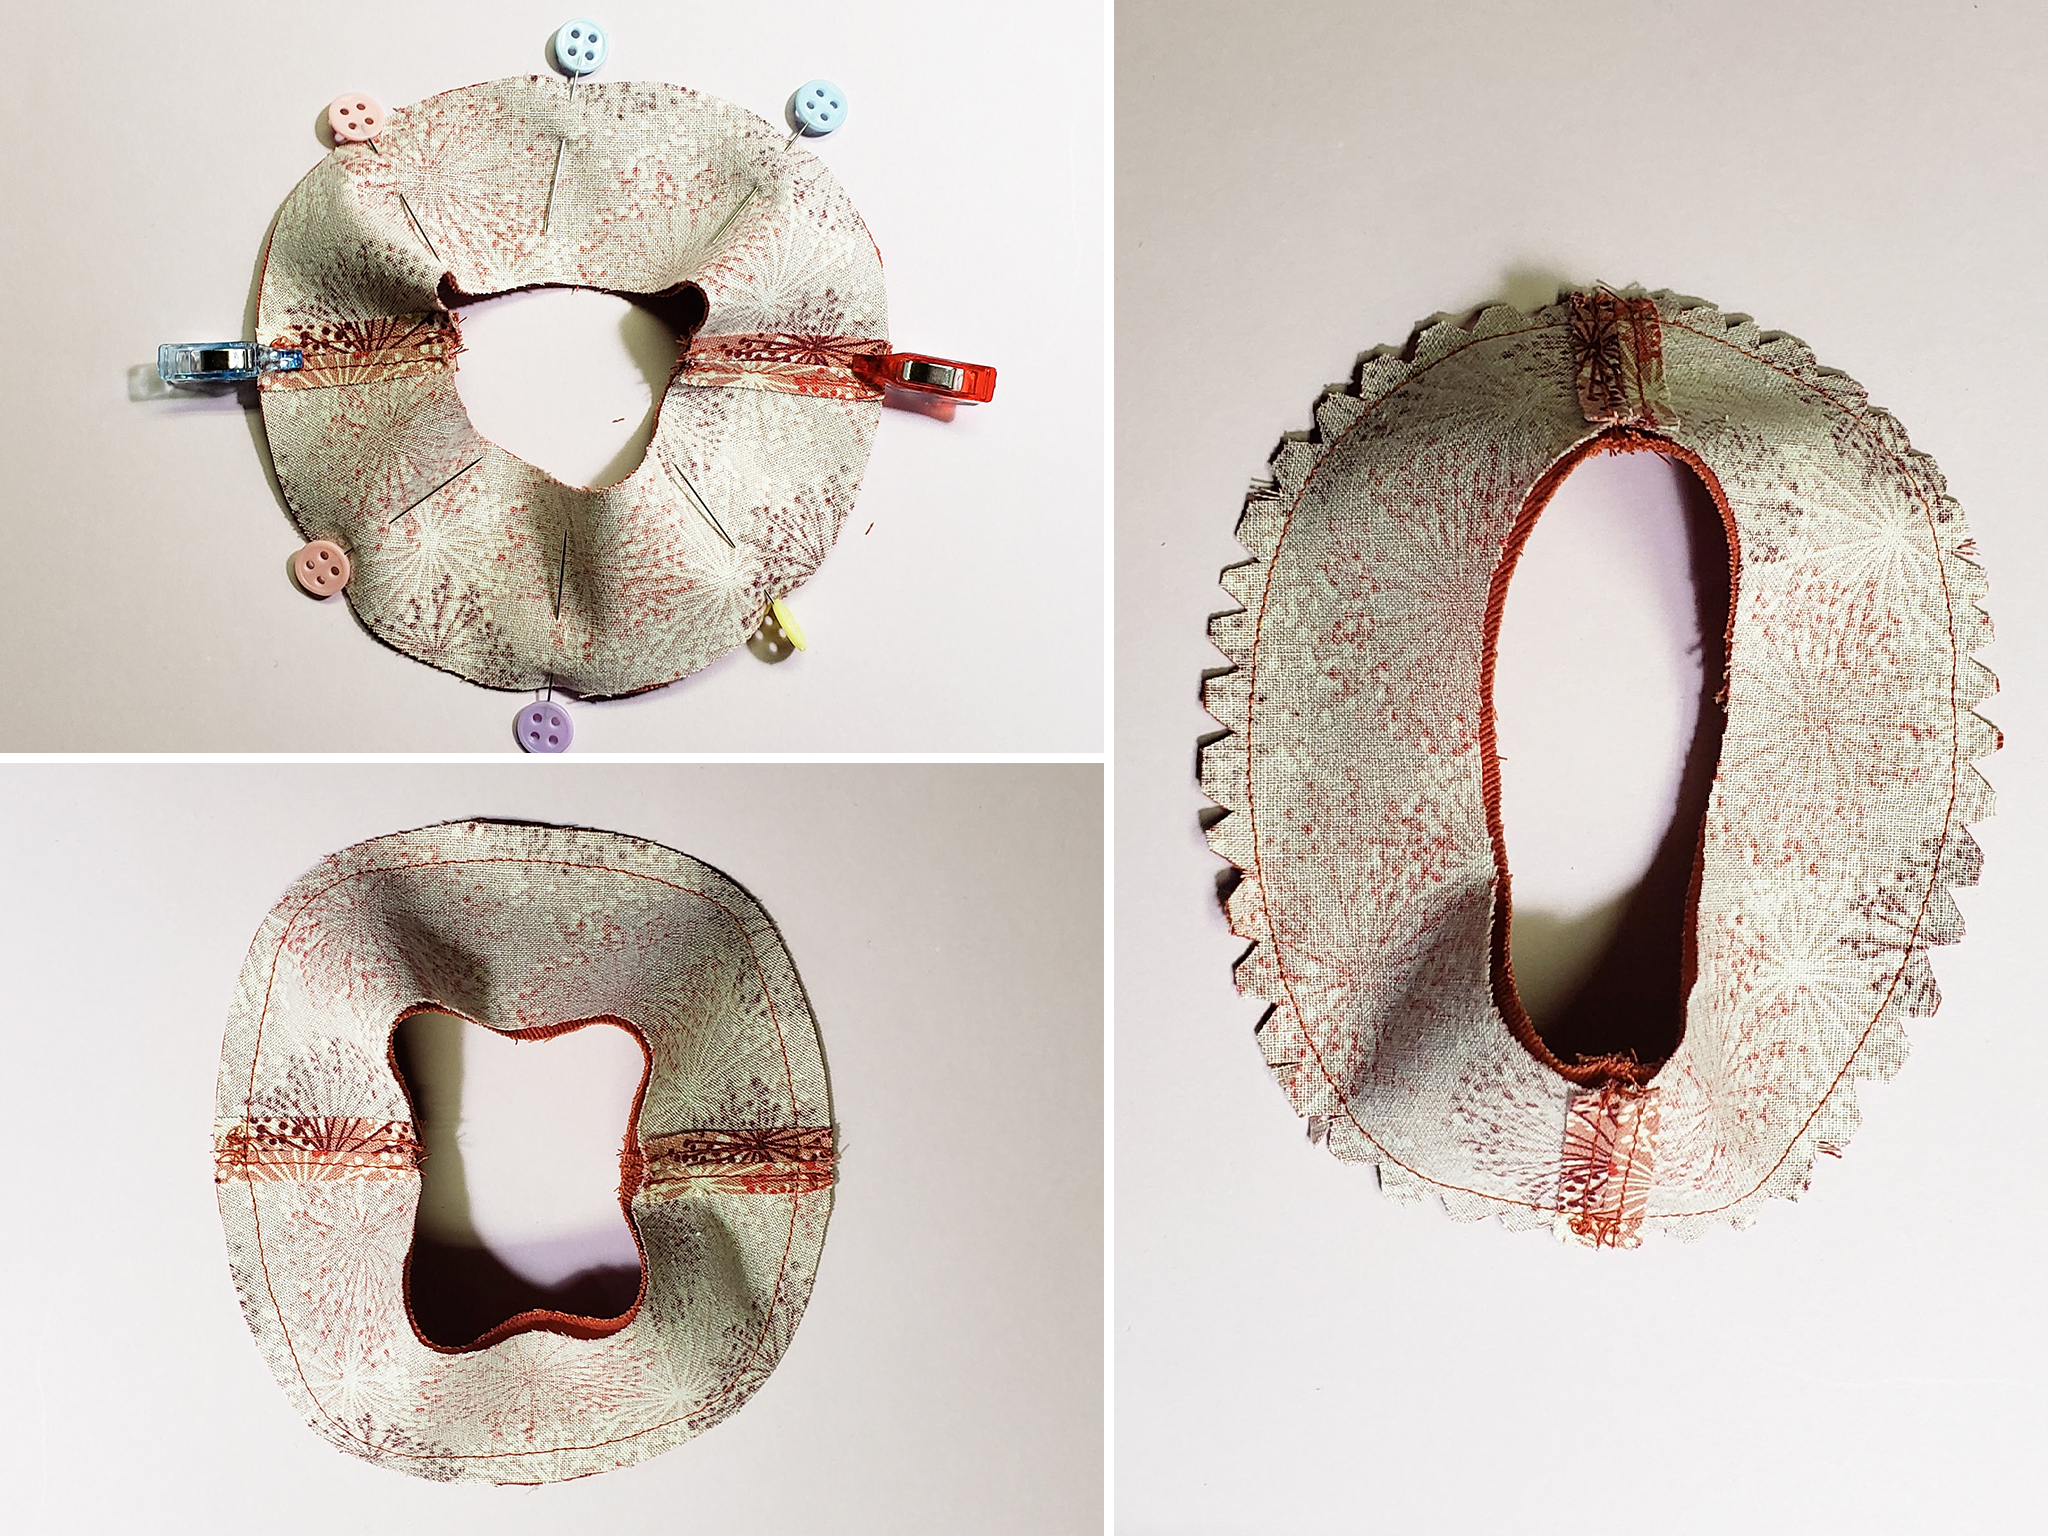
- Sew the top to the side pieces to form the crown. Clip the seam allowance, fold it down towards the side and topstitch.
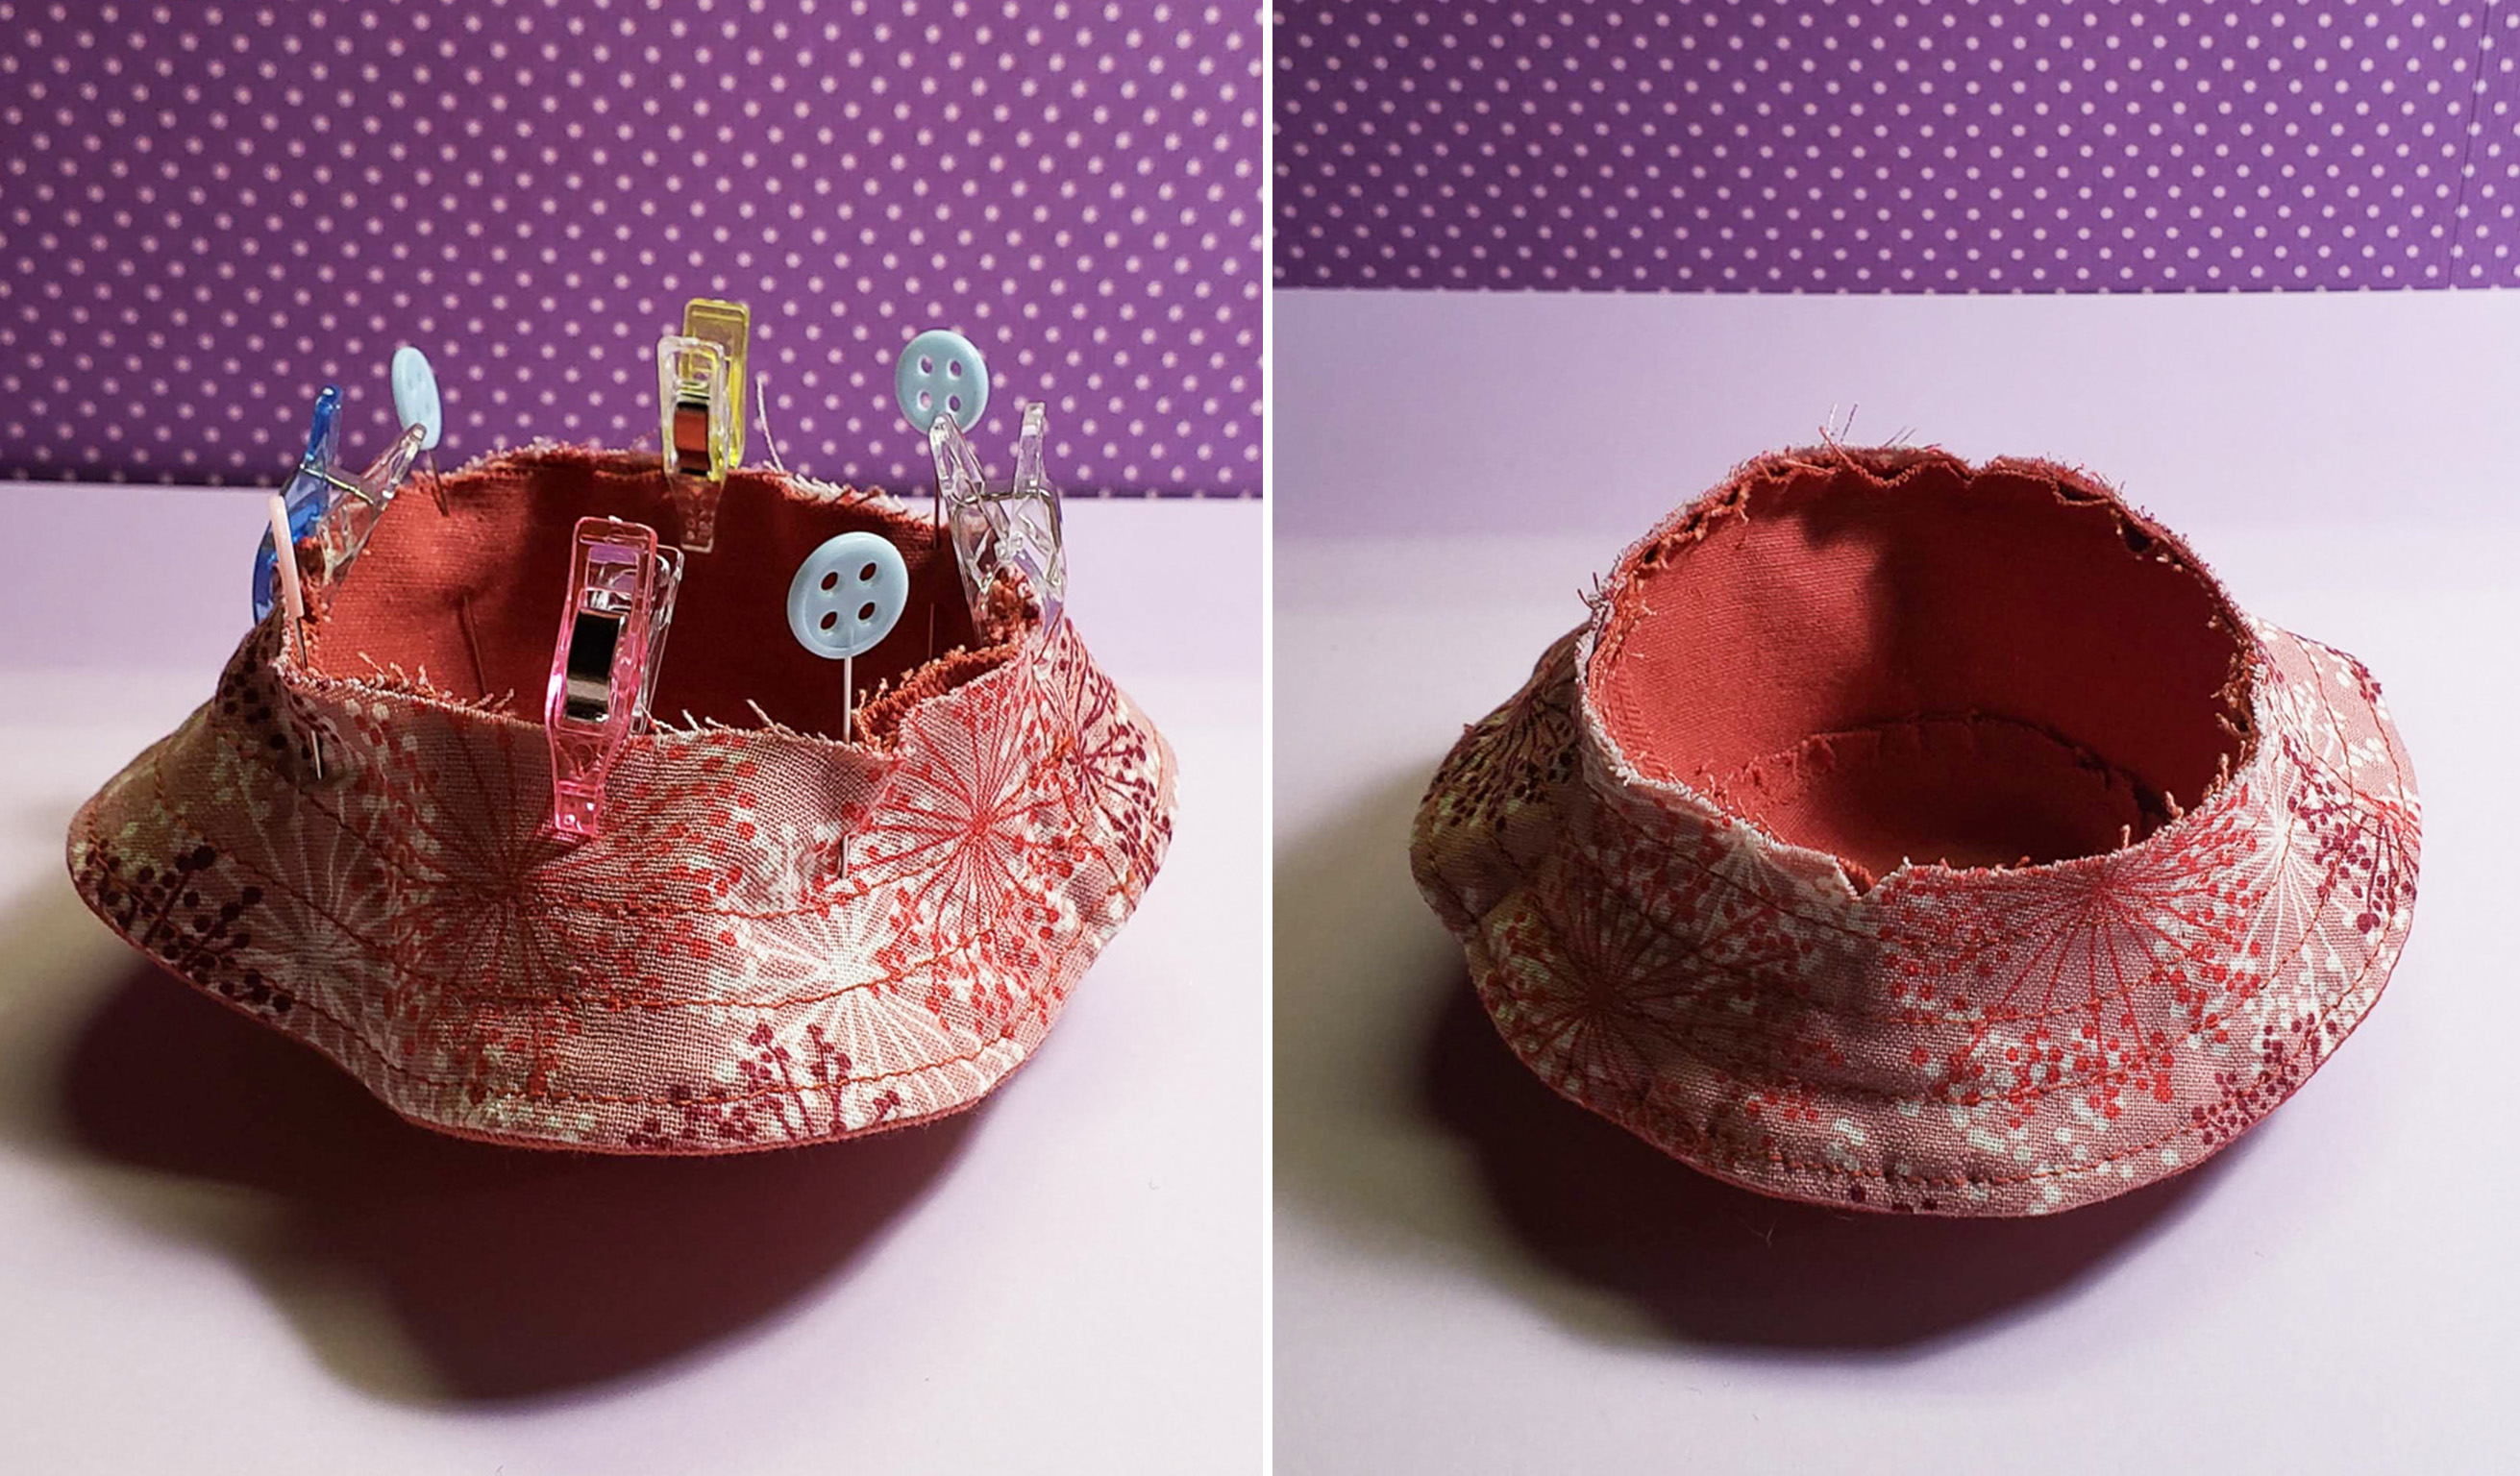
- Sew the brim and brim lining, right sides facing, along the outer edge. Notch the seam allowance, turn right side out, press and topstitch.
- Sew the brim to the crown, press the seam up towards the side and topstitch.
Sewing Tips
All my patterns have 1/4” seam allowances unless noted otherwise. This means you can use a 1/4” foot or a 1/4” seem setting on the sewing machine to easily sew all the seams.
I don’t always finish seams on doll clothing because it can add a lot of bulk and isn’t necessary unless the fabric frays very easily. You can of course use a zigzag stitch or serger to finish any seams you wish.
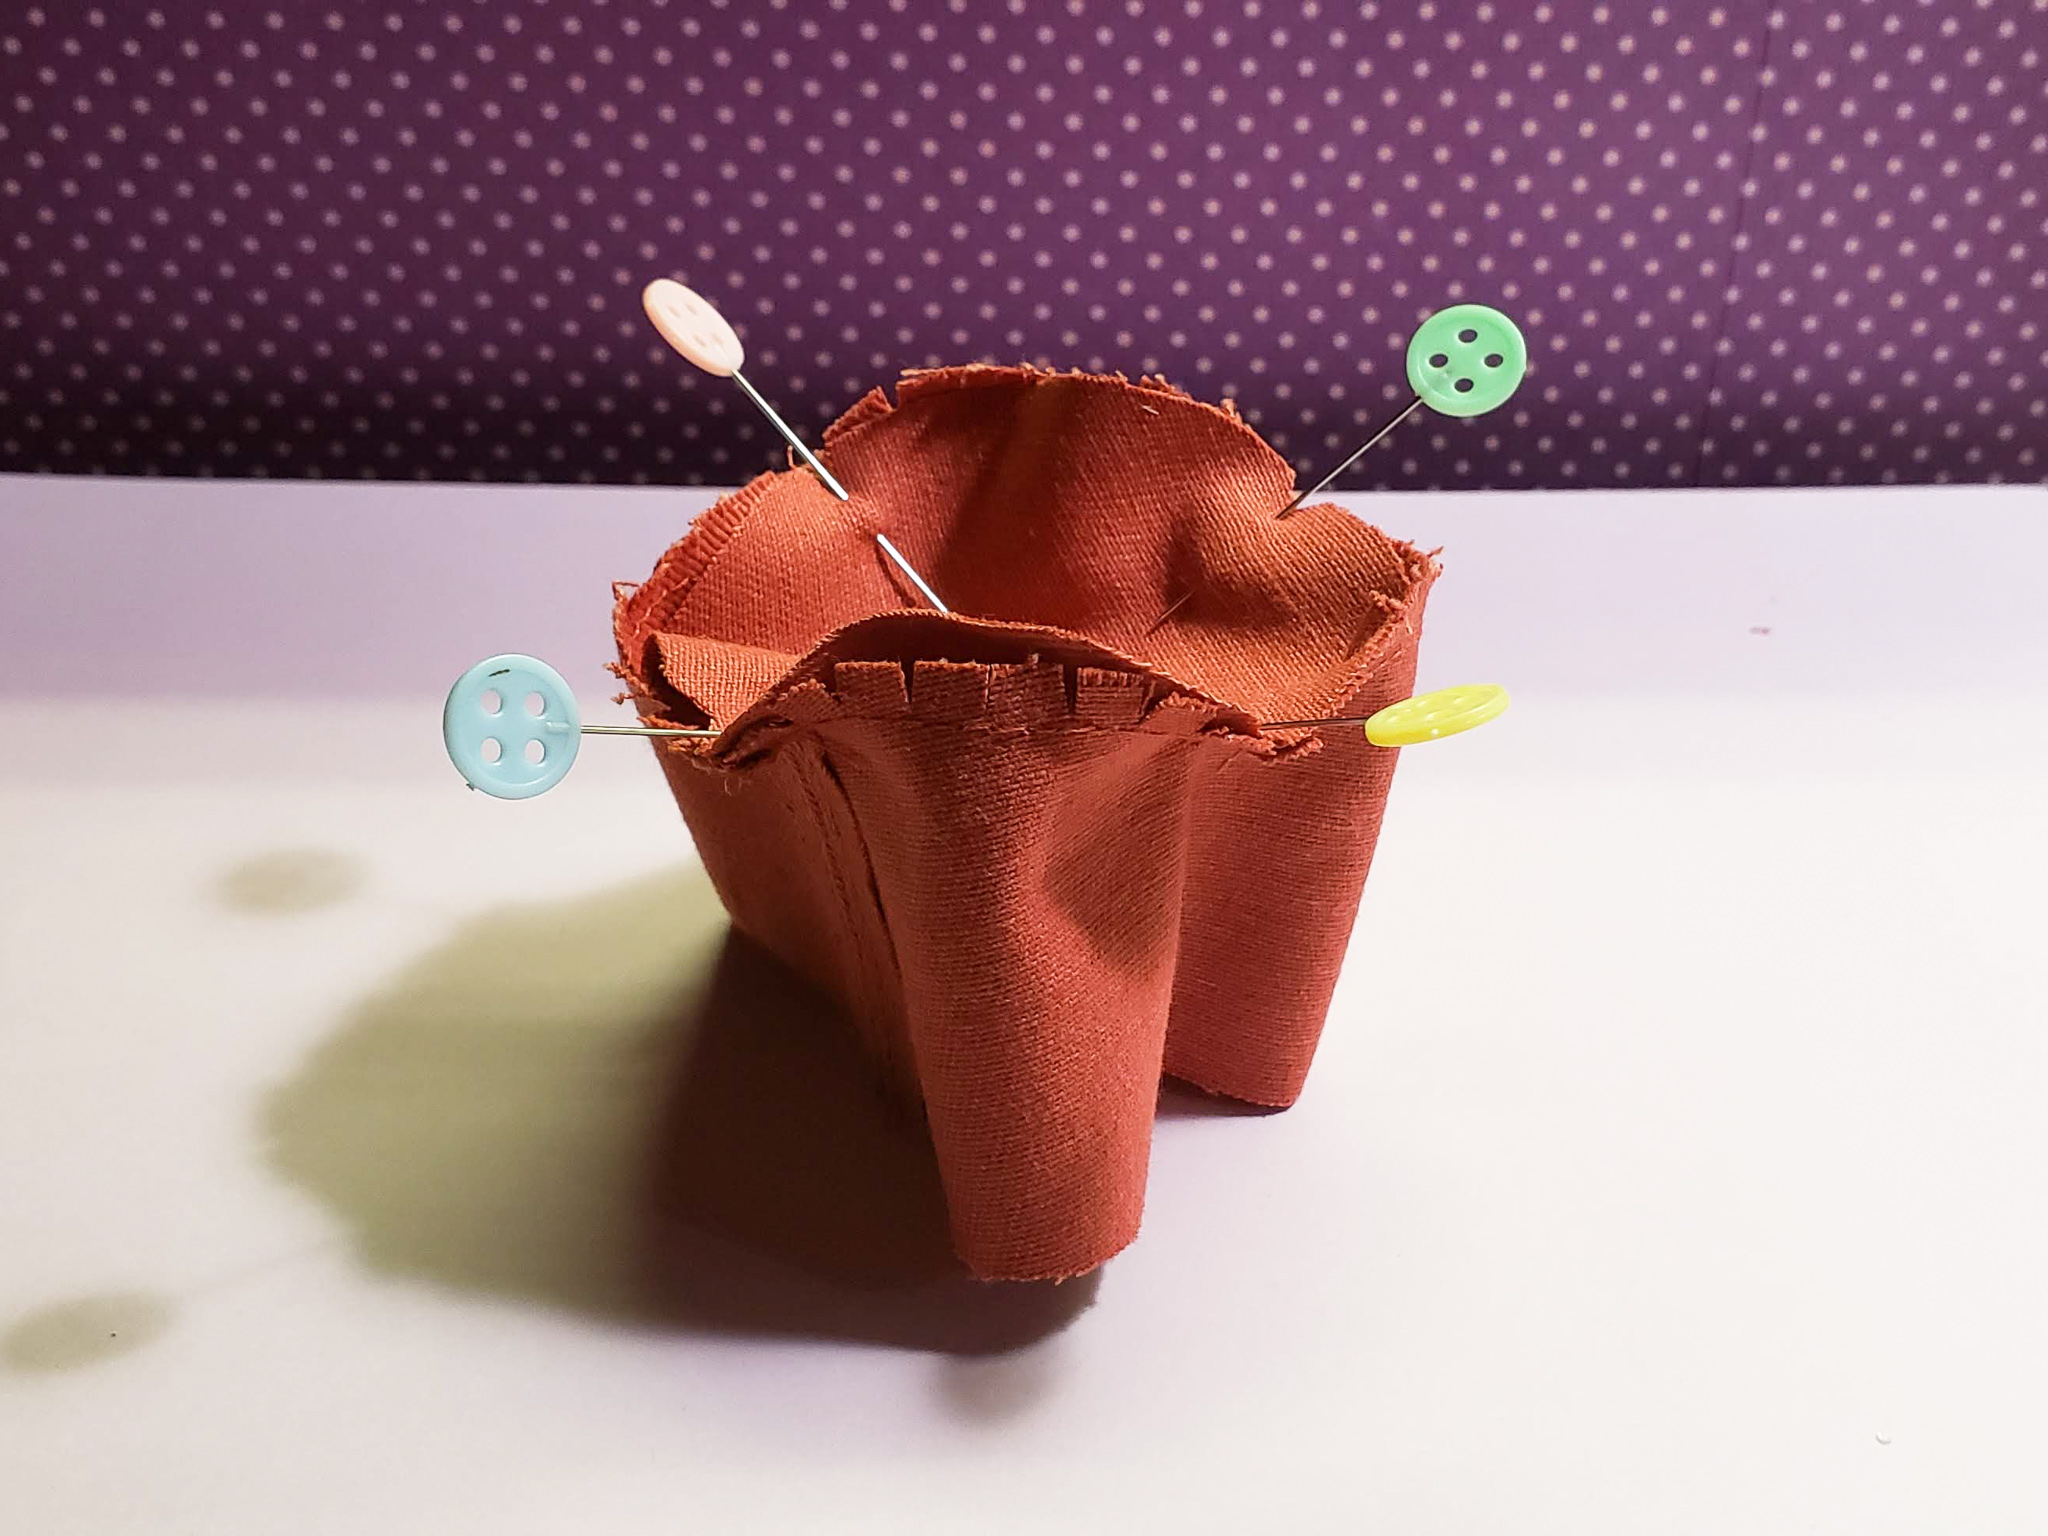
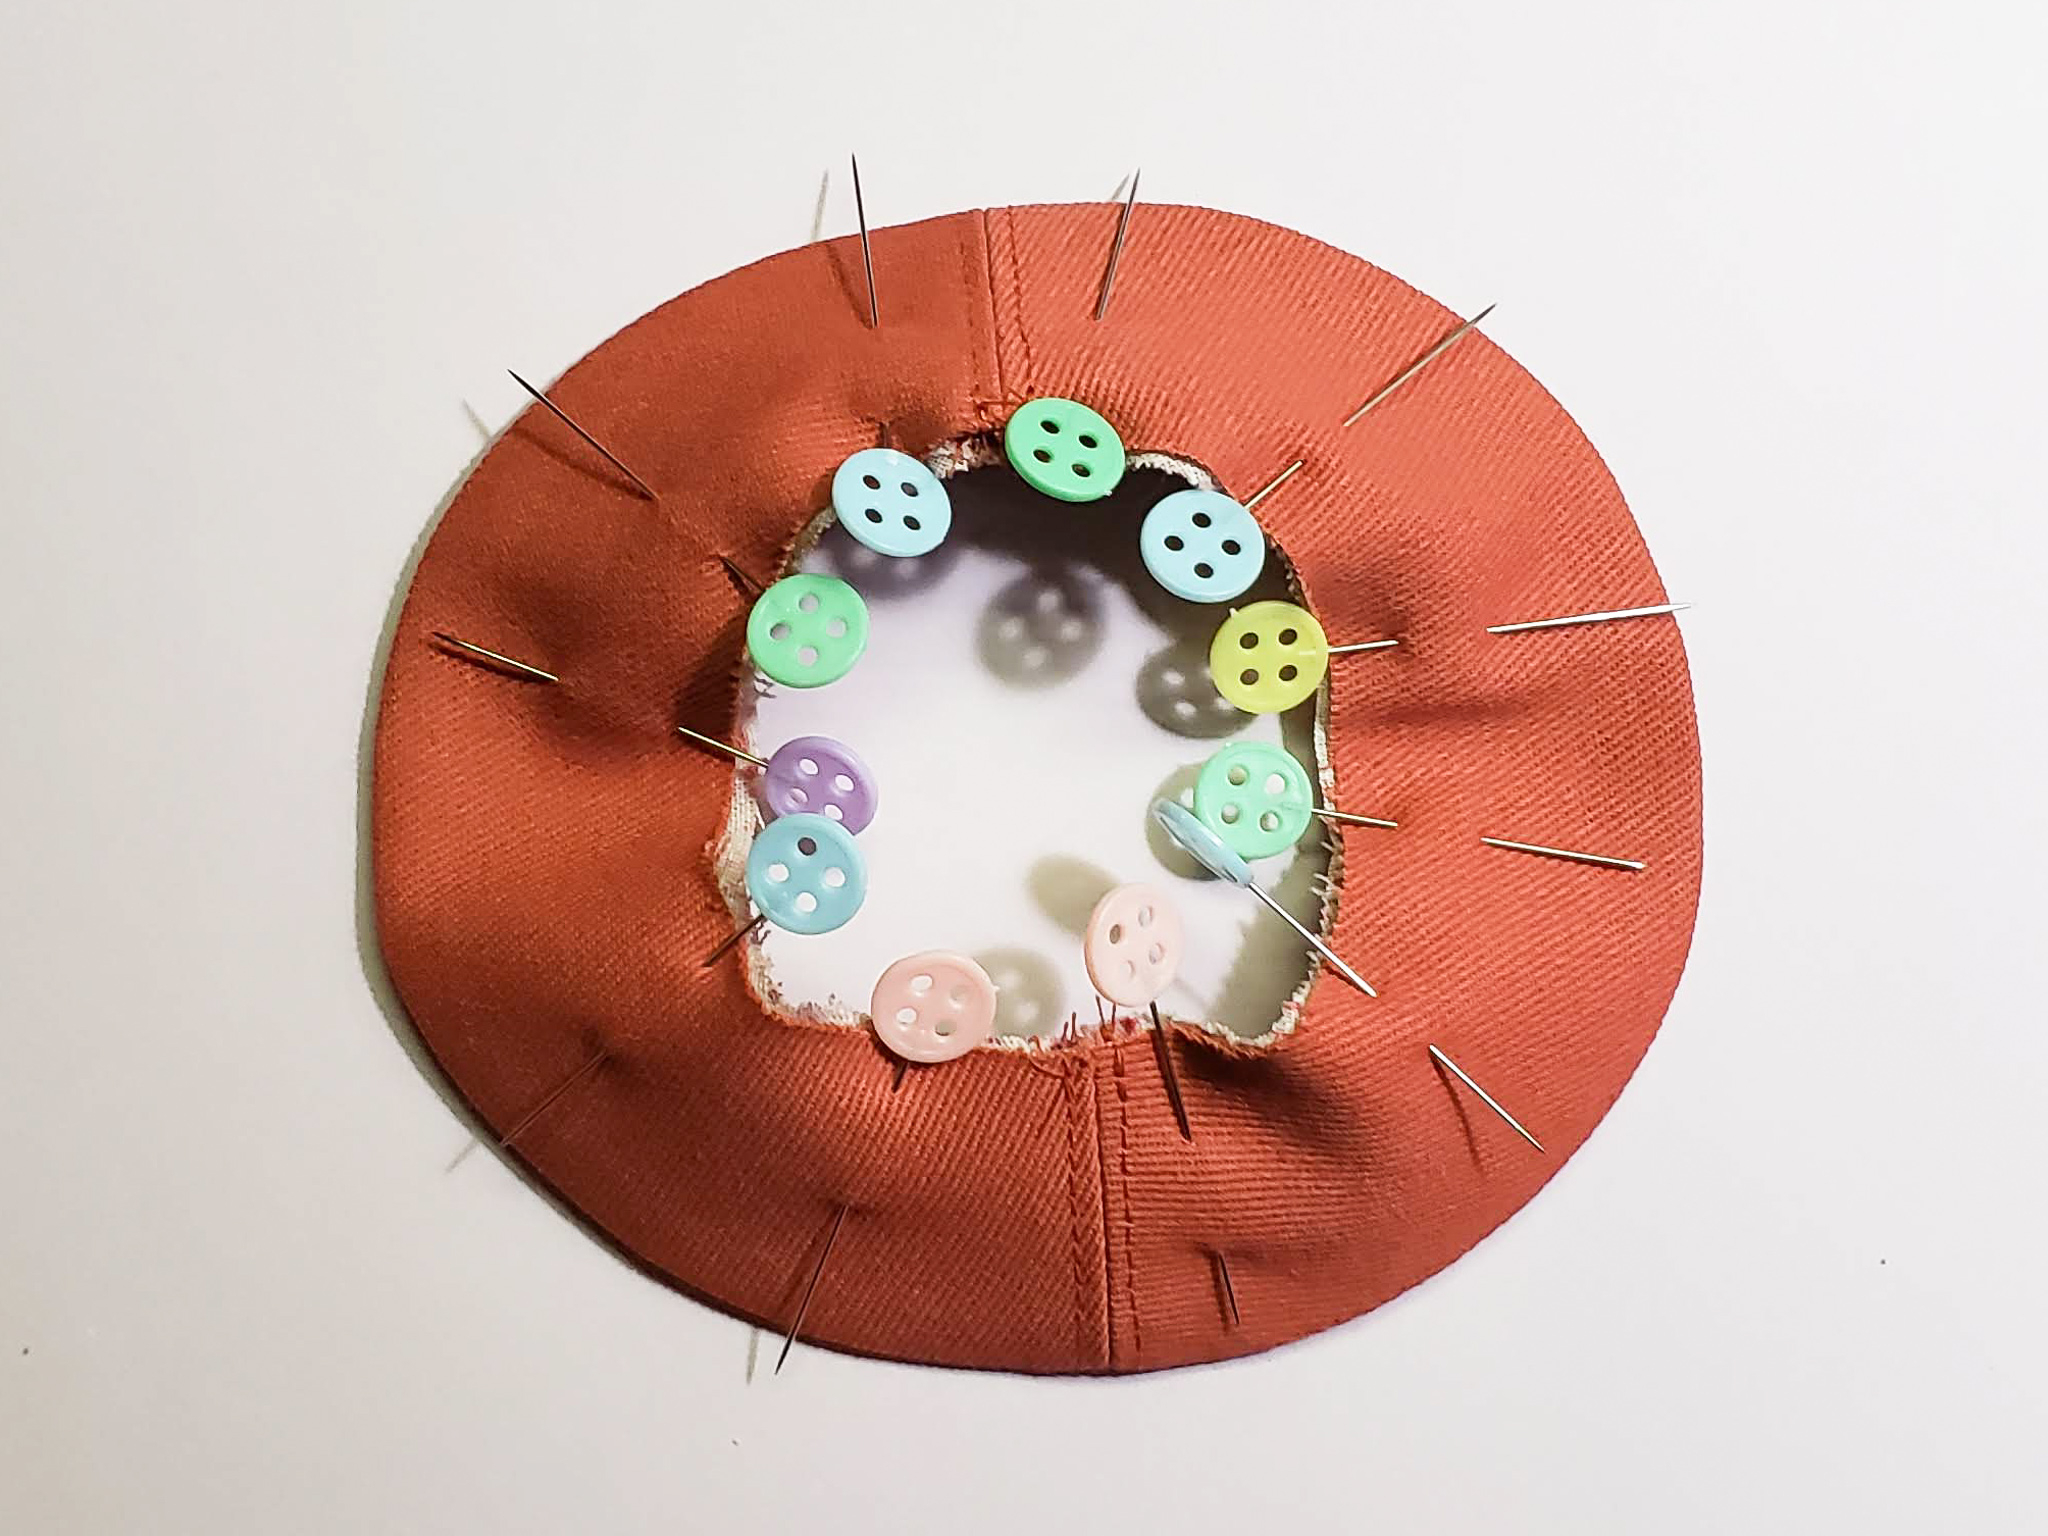
When sewing the sides of the hat to the circular top piece, it’s easier if you clip the top seam of the side before pinning it to the top. Sew a line of stitching along the top edge of the side piece just inside the seam allowance (less then 1/4” away from the edge). Clip into the seam allowance up to the stitches. Pin the top to the sides, then sew together with the top piece on the bottom.

To align the pieces, it helps to mark the centers of each piece (with pins, a marker or notches). Fold each side piece in half and mark on the folds. Fold the circular piece in half twice, so you have a quarter of a circle. Then mark the folded edges. Align the 4 markings on the top and the side pieces (the two seams and the center mark on each side piece) and pin them into place. You can use as many additional pins in-between as you want, but I found that adding too many makes it harder to sew.
When sewing top stitching I use an open toe embroidery foot. I align the seam to the inside edge of the foot and adjust the needle position to get the distance I want.
I added 3 rows of topstitching on the brim, but you can do less/more, sew a spiral or other pattern.
My brim did not need interfacing, because I used sturdy fabric for the outer pieces. If your fabric seems flimsy, you can add some interfacing to give it more structure.
Step by Step Gallery