Smart Doll Gathered Shoes
Smart Doll ·These cloth shoes fit Smart Doll girls and boys. They are made of materials that are easy to find: fabric, craft foam and cardstock. Your dolls will never have to go barefoot again!
Continue reading to learn how to make your own, or skip straight to downloading the Smart Doll Gathered Shoes pattern.
How I Made this Pattern
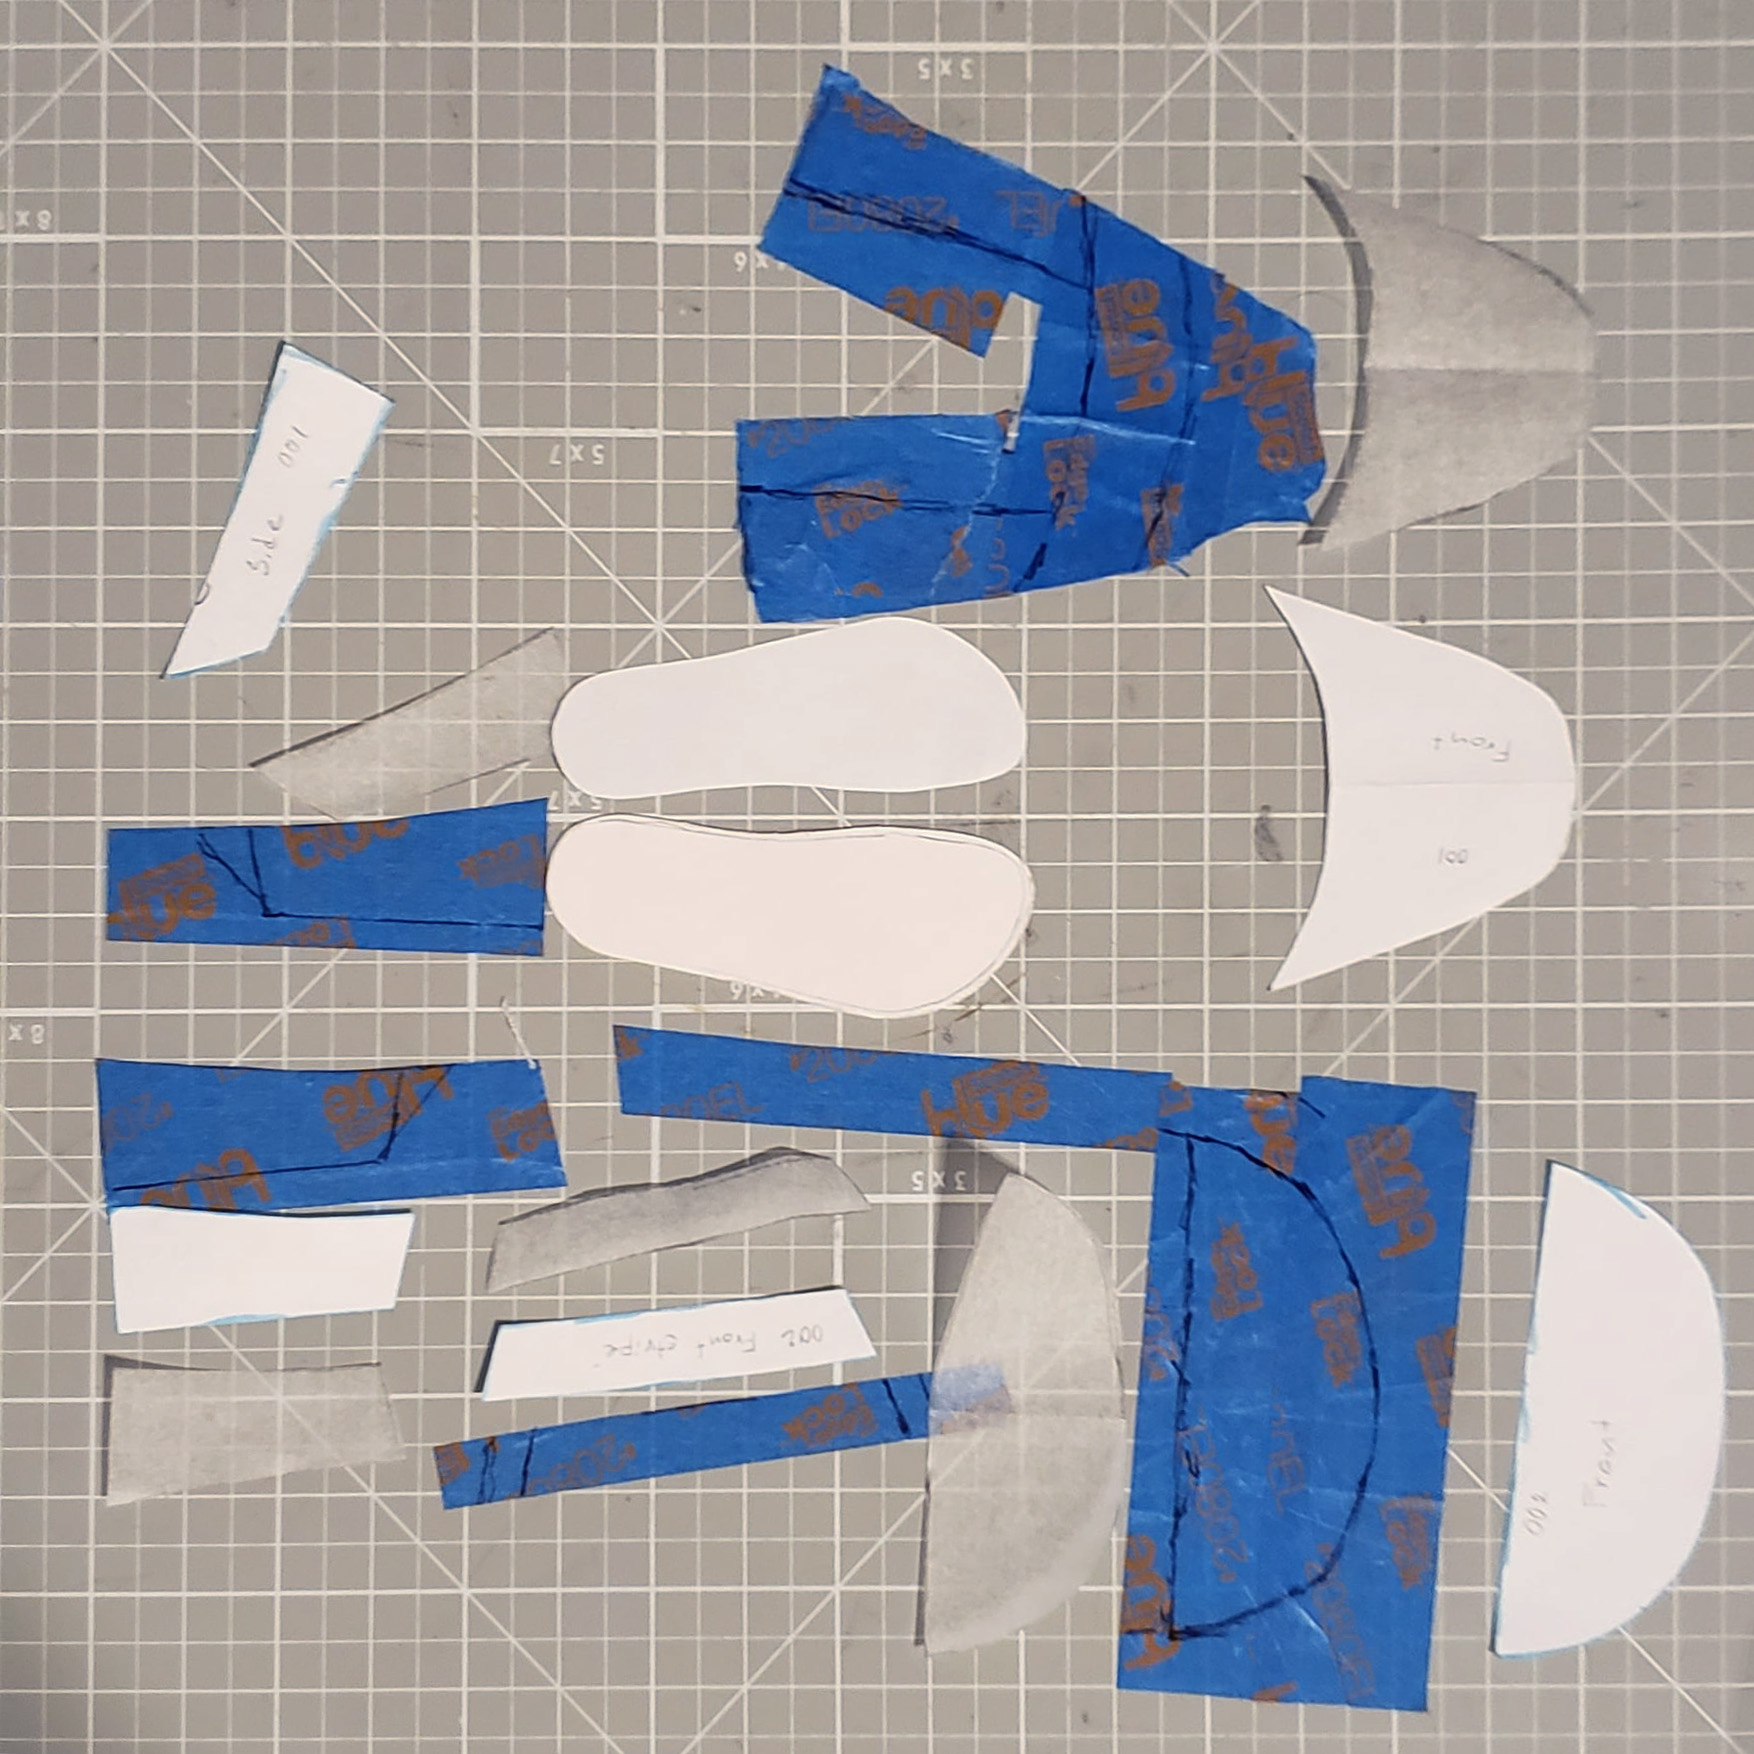
To make this shoe pattern, I first removed my Smart Doll’s foot. I then traced around the foot to have a basic shape for the sole. I looked at photos of real shoes for reference and evened out the shape, making sure the foot will still fit inside. Next, I wrapped the foot in plastic wrap and used pieces of masking tape to mimic where the actual pattern shapes would go. I drew the pattern shapes on the tape with marker, then peeled them off the foot and stuck them to a cutting mat. Finally, I was able to trace the pattern pieces onto tracing paper and add a 1/4 inch seam allowance.
Materials:
- Cotton or other lightweight fabric in one or more colors for the outer parts and the lining
- Cardstock for the insoles
- Craft foam for the soles
- Fabric glue or other quick drying glue that will attach fabric to paper
- Superglue or other glue that will attach craft foam to paper
- Sewing clips or other type of clip to temporarily hold the pieces while the glue dries
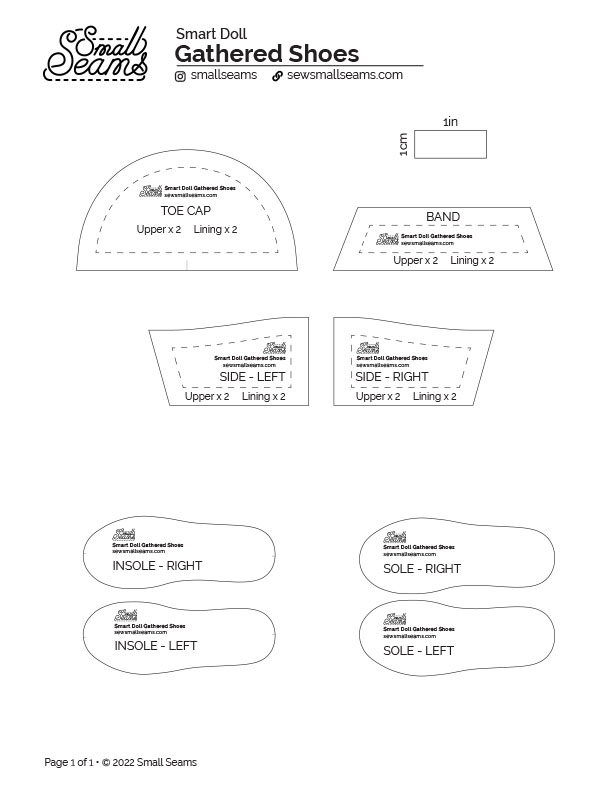
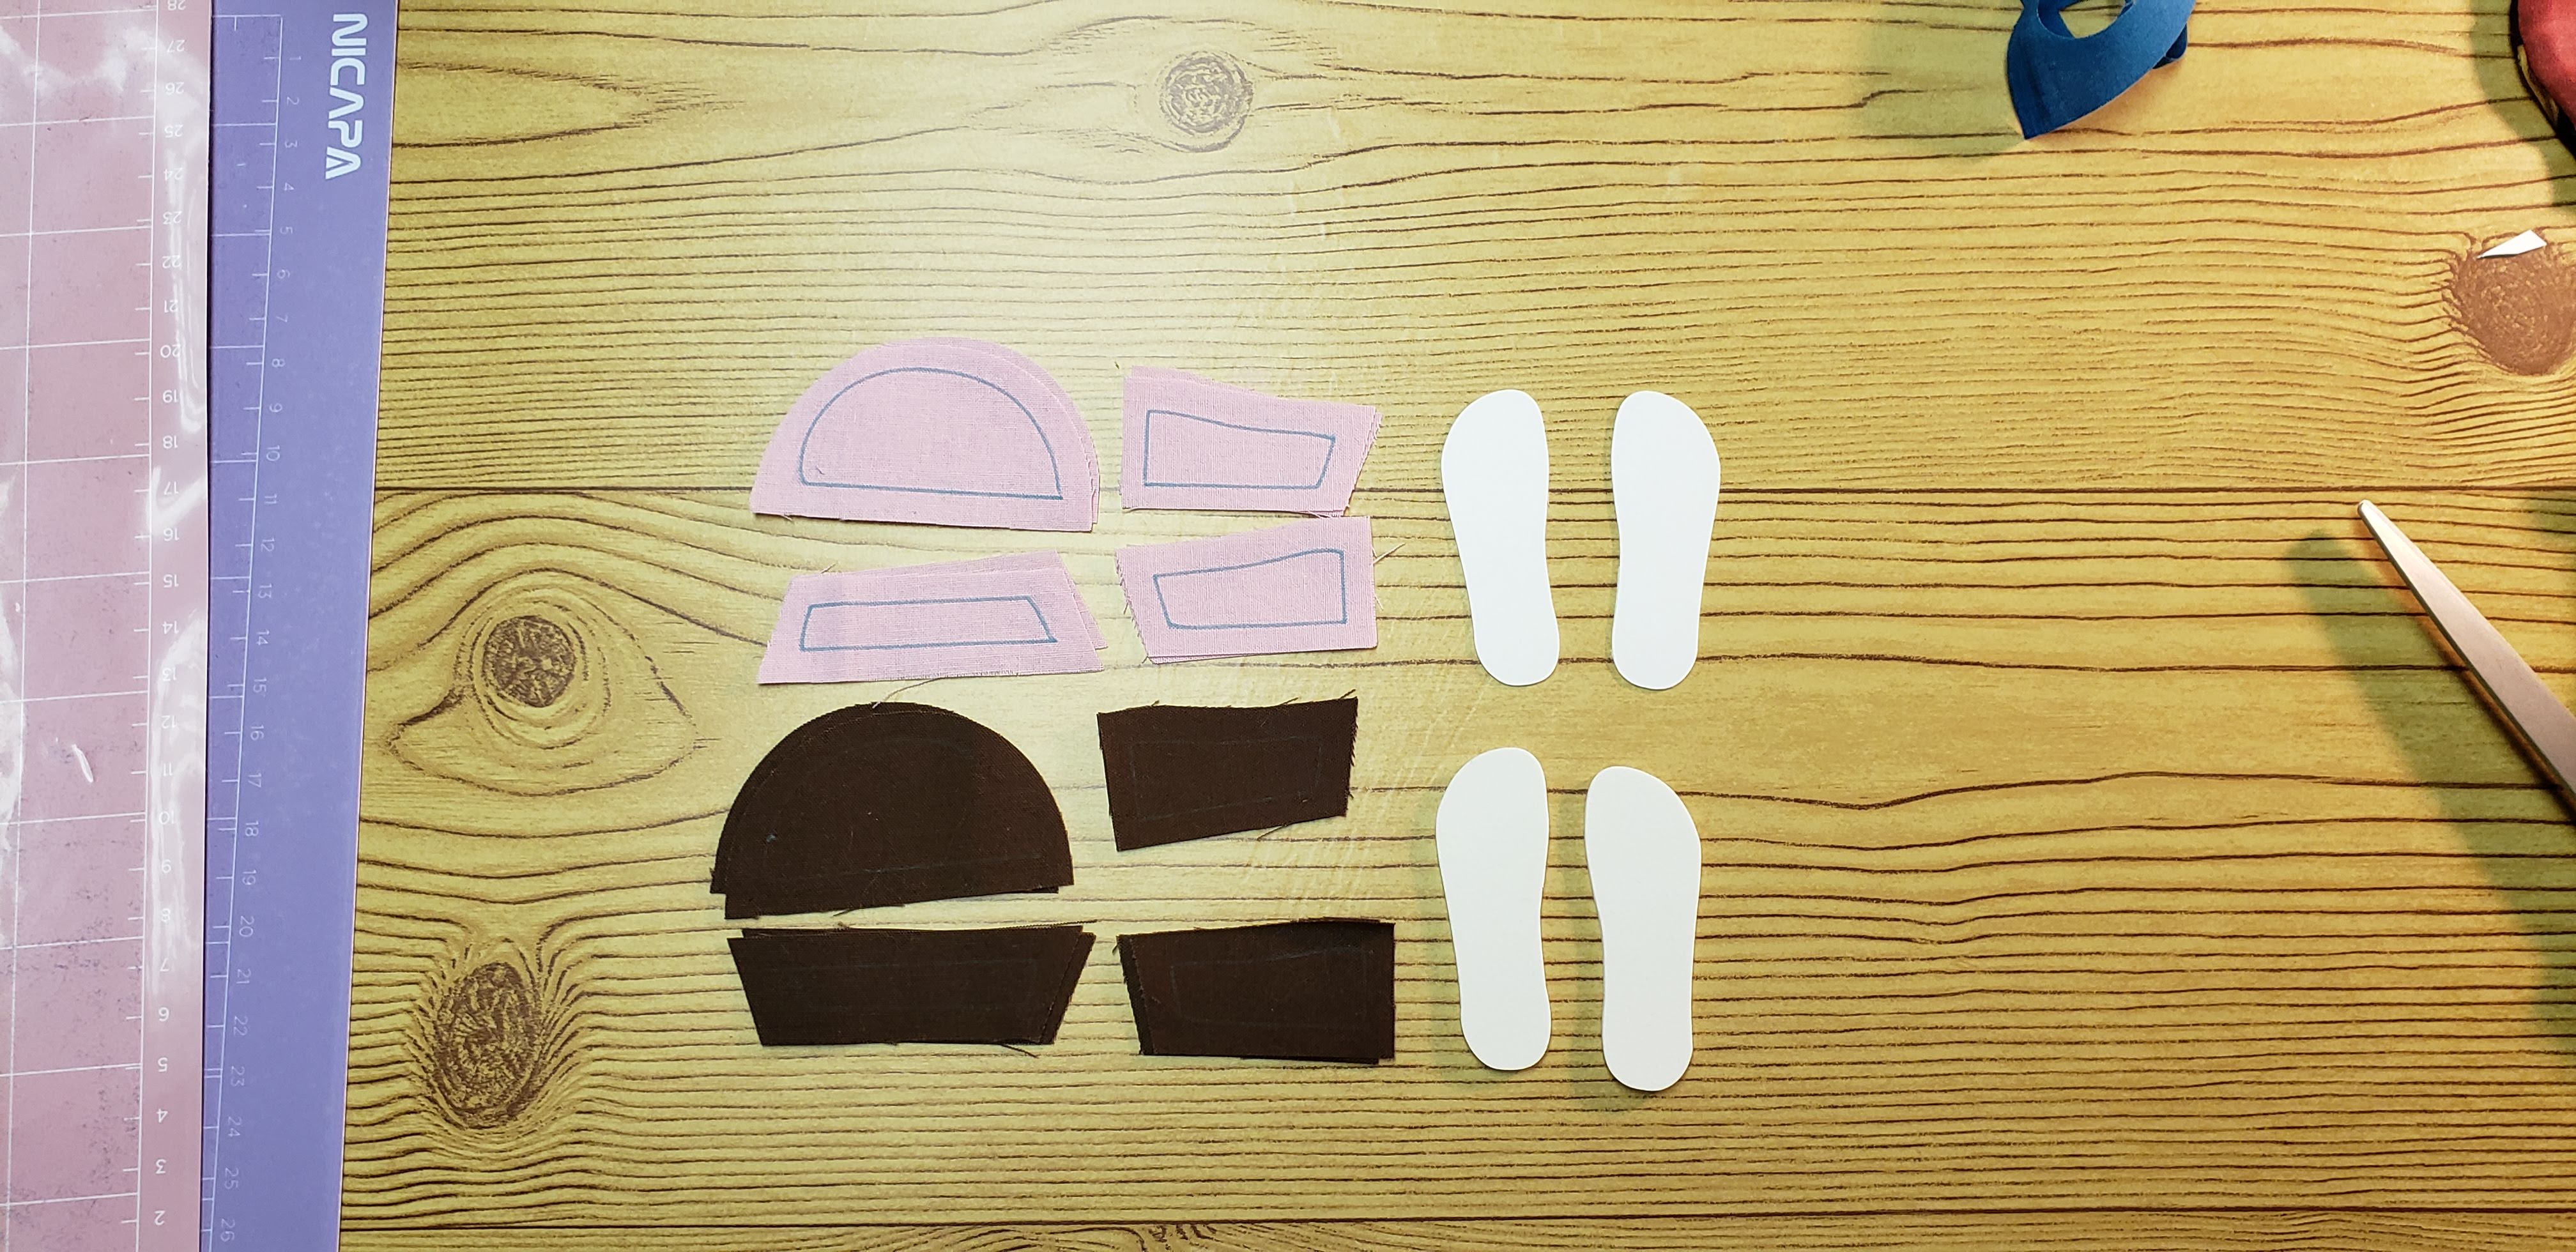
Pattern Pieces
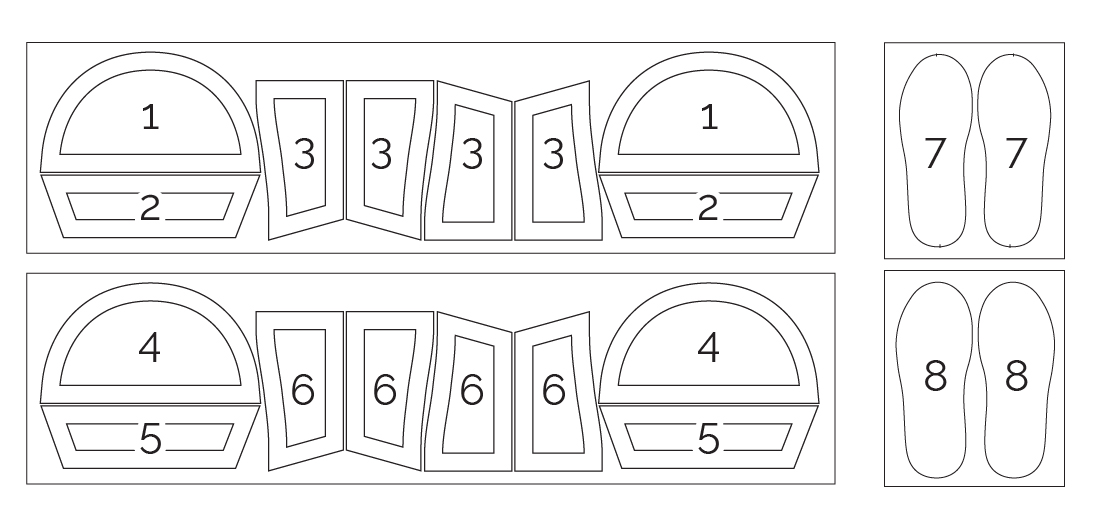
These are all the pieces you should have after cutting them out:
- Toe cap upper x 2
- Band upper x 2
- Sides upper x 2 of each (4 total)
- Toe cap lining x 2
- Band lining x 2
- Sides lining x 2 of each (4 total)
- Insoles x 2 out of cereal box/cardstock
- Out soles x 2 out of craft foam
The toe caps and bands are symmetrical, so all 4 pieces will be the same. The left and right sides are mirrored, so you will have 4 of each side. I used comic book board for the insoles, but any stiff cardboard should work, you could even cover it in fabric, scrapbooking paper or paint it. You could probably use something else for the outsoles too, I used 2mm craft foam from Joanne’s. I draw the seam all the seam allowance for this pattern on the right, it makes it easier to align the pieces. You do this by using a quilting ruler and draw 1/4 inch away from the edge on all the straight edges. The curved one don’t matter as much. I used a Pilot Frixion marker and drew on the right sides of the pieces. It will disappear with the heat of a hair dryer or blast of steam form an iron.
The Sides
The flat parts are the bottom that will attach to the insole. Lay the side pieces together in pairs, right sides facing and sew them together at the heel with a 1/4 inch seam allowance. Open the pieces up and spread the seams. Then align the pairs of lining pieces with the pairs of upper pieces, right sides facing, sew with 1/4 inch seam allowance on the top seam (the curved side). Turn this inside out, press and topstitch along the seamed edge.
The Toe
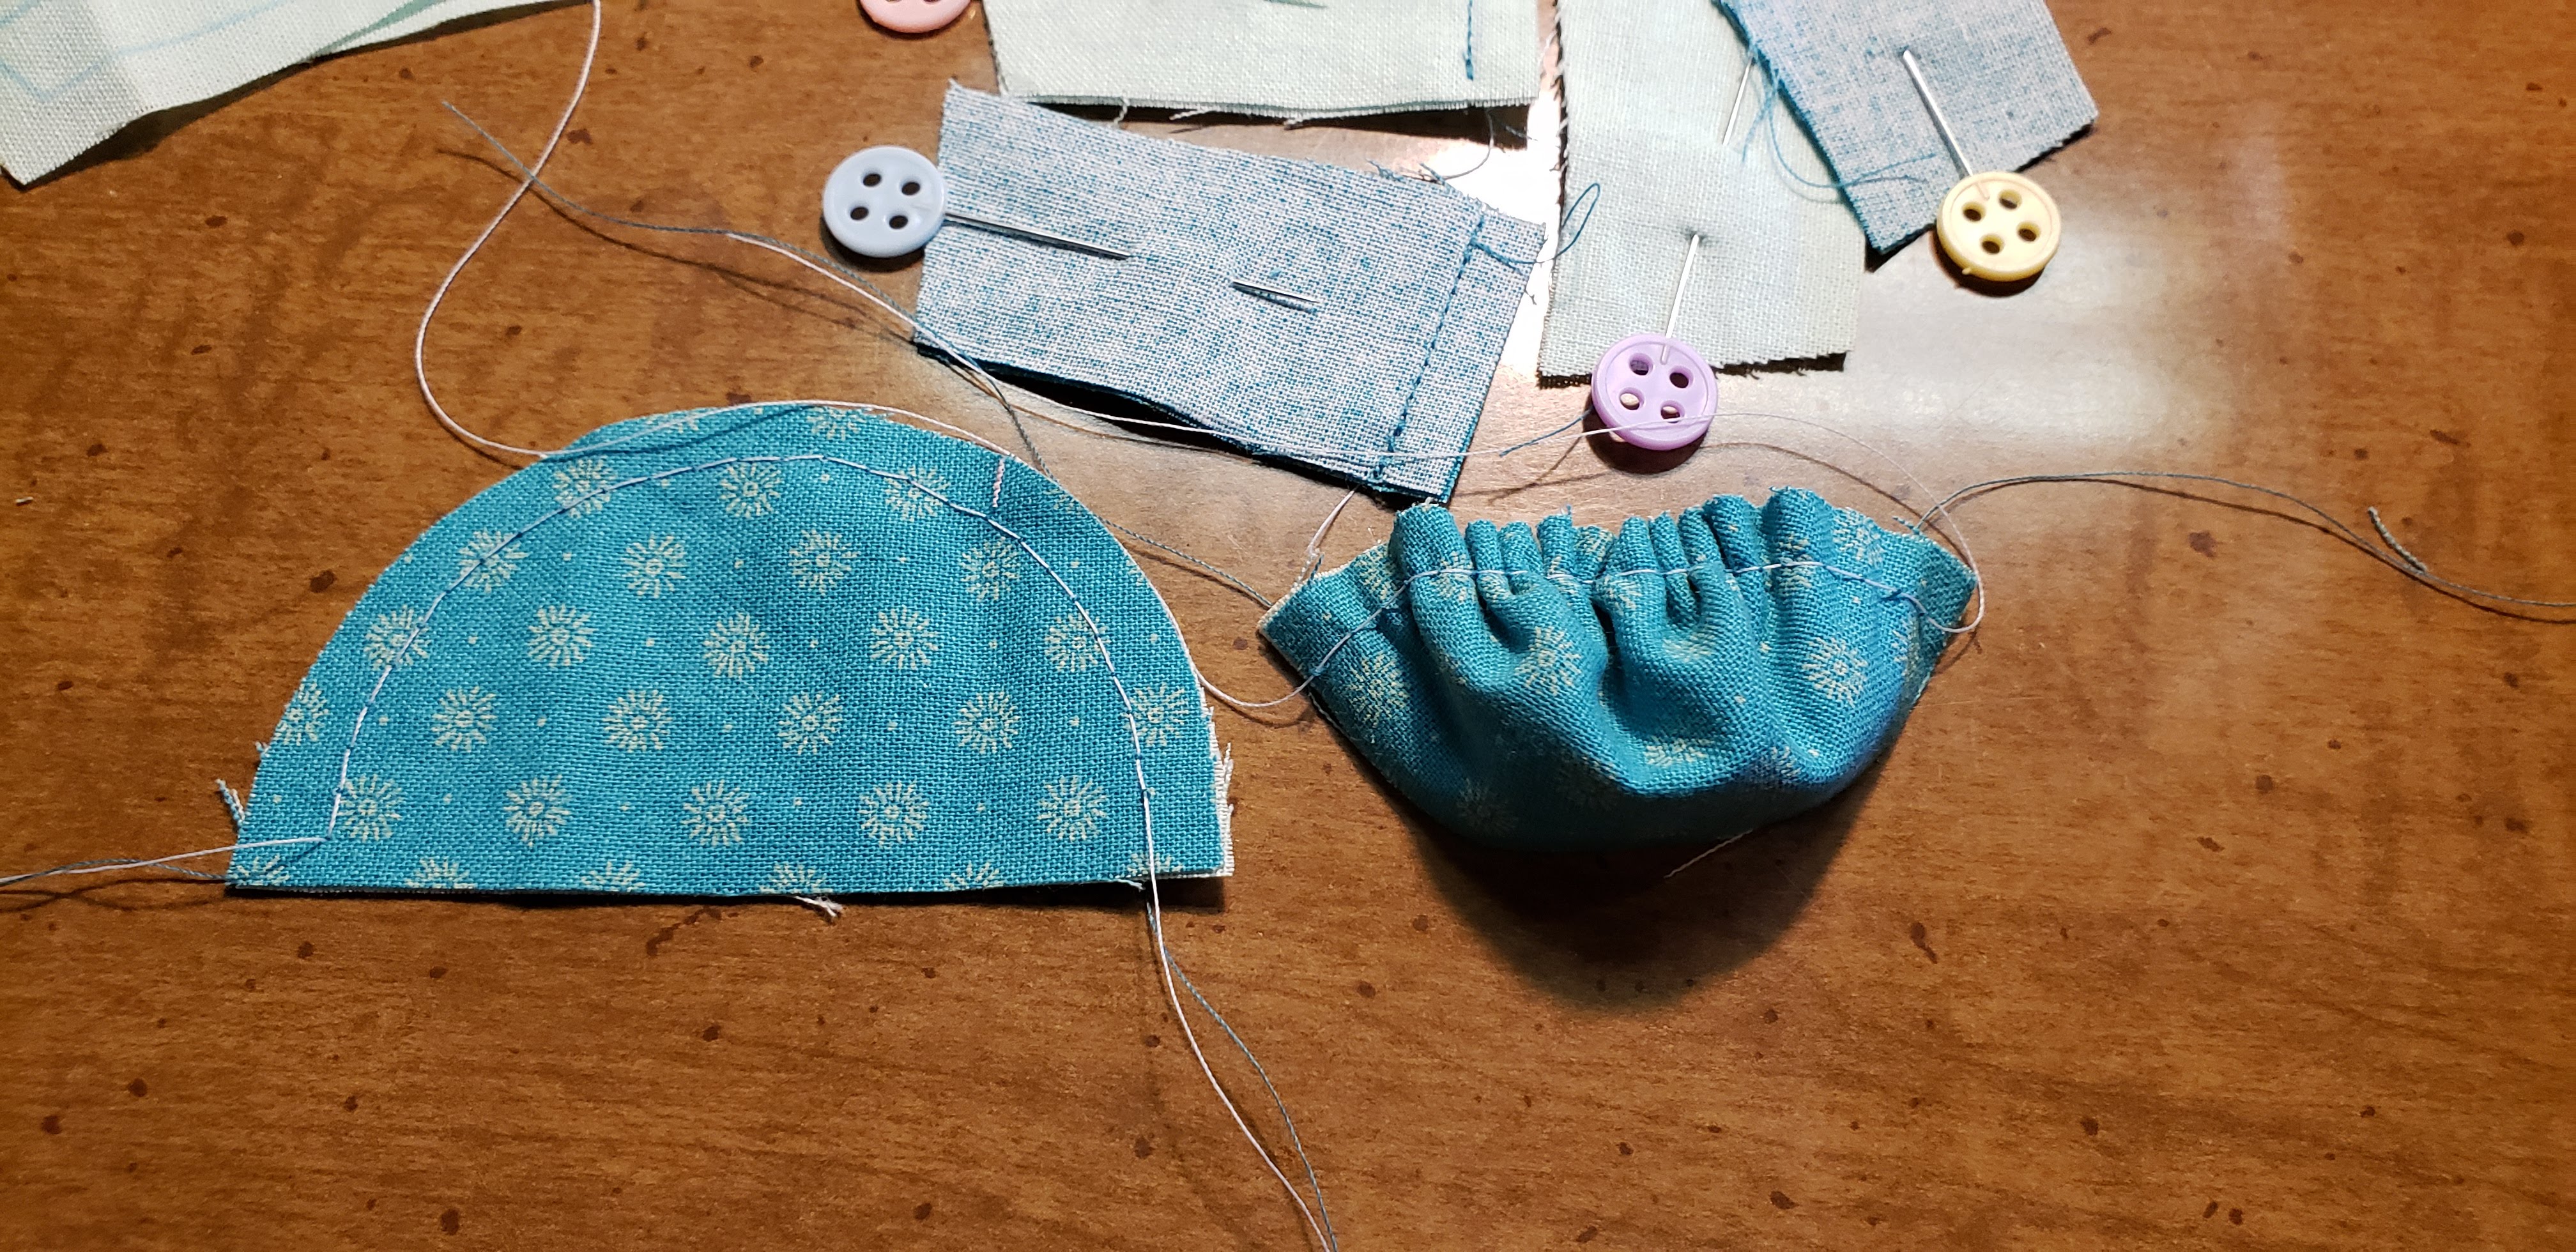
The flat part is the bottom of the toe piece, this will attach to the insole. The curved part is gathered into the band piece. Lay a toe piece and lining piece together wrong sides facing and run a gathering stitch along the curved part, less than 1/4 inch away form the edge. Gather up to form a toe.
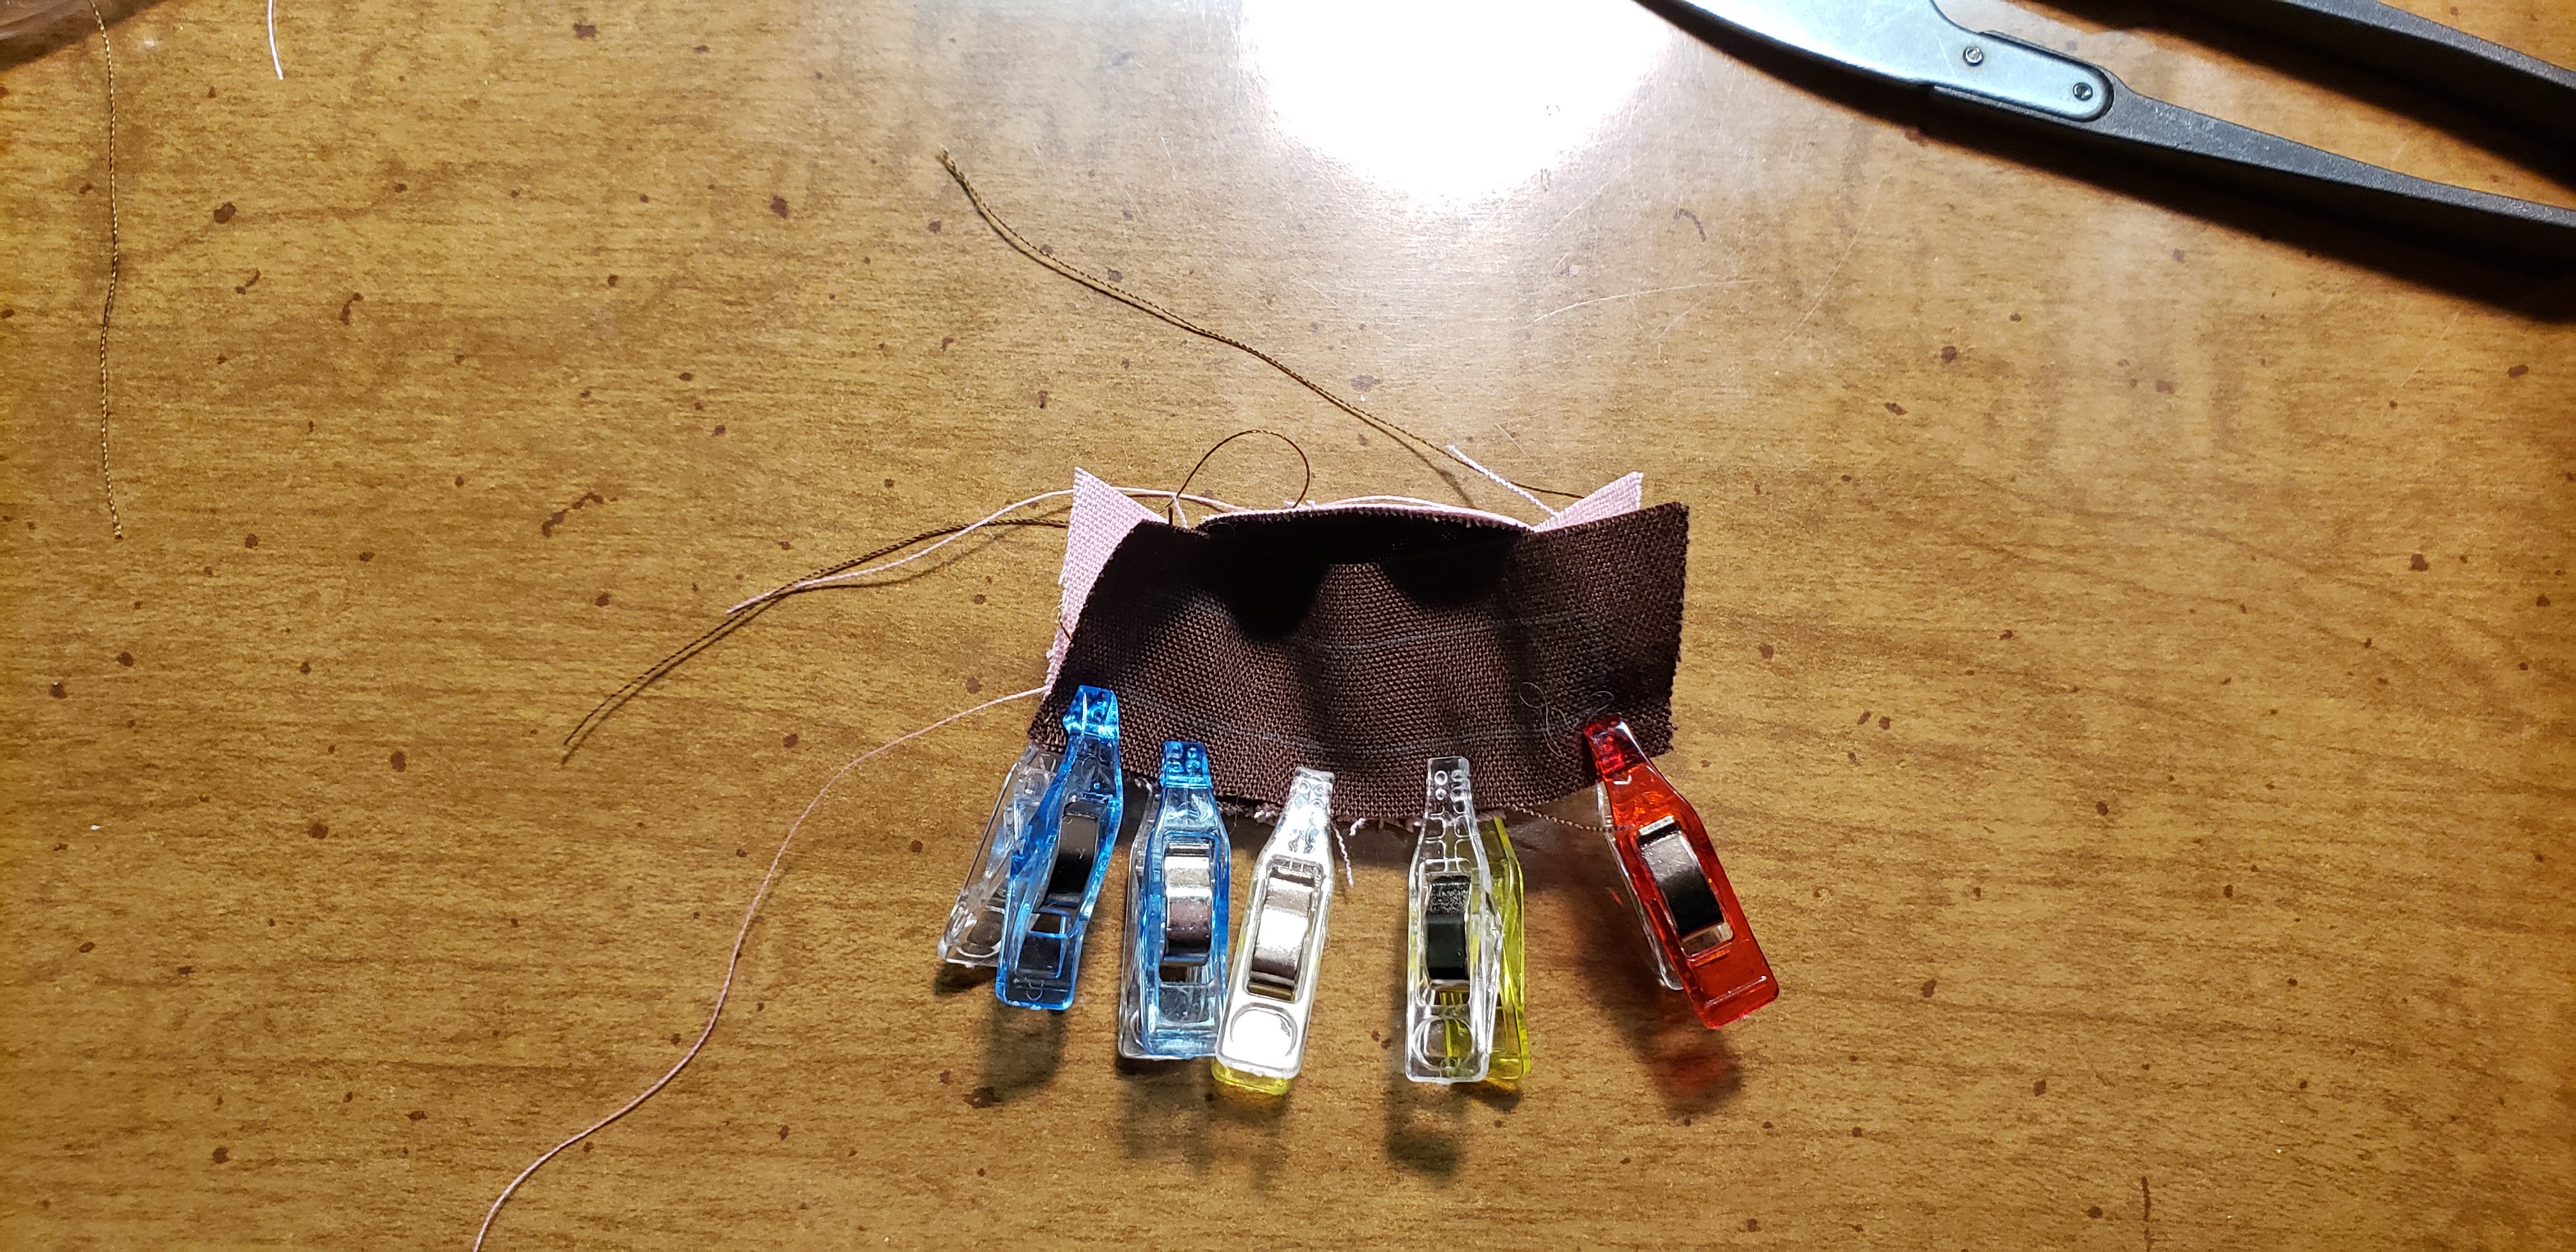
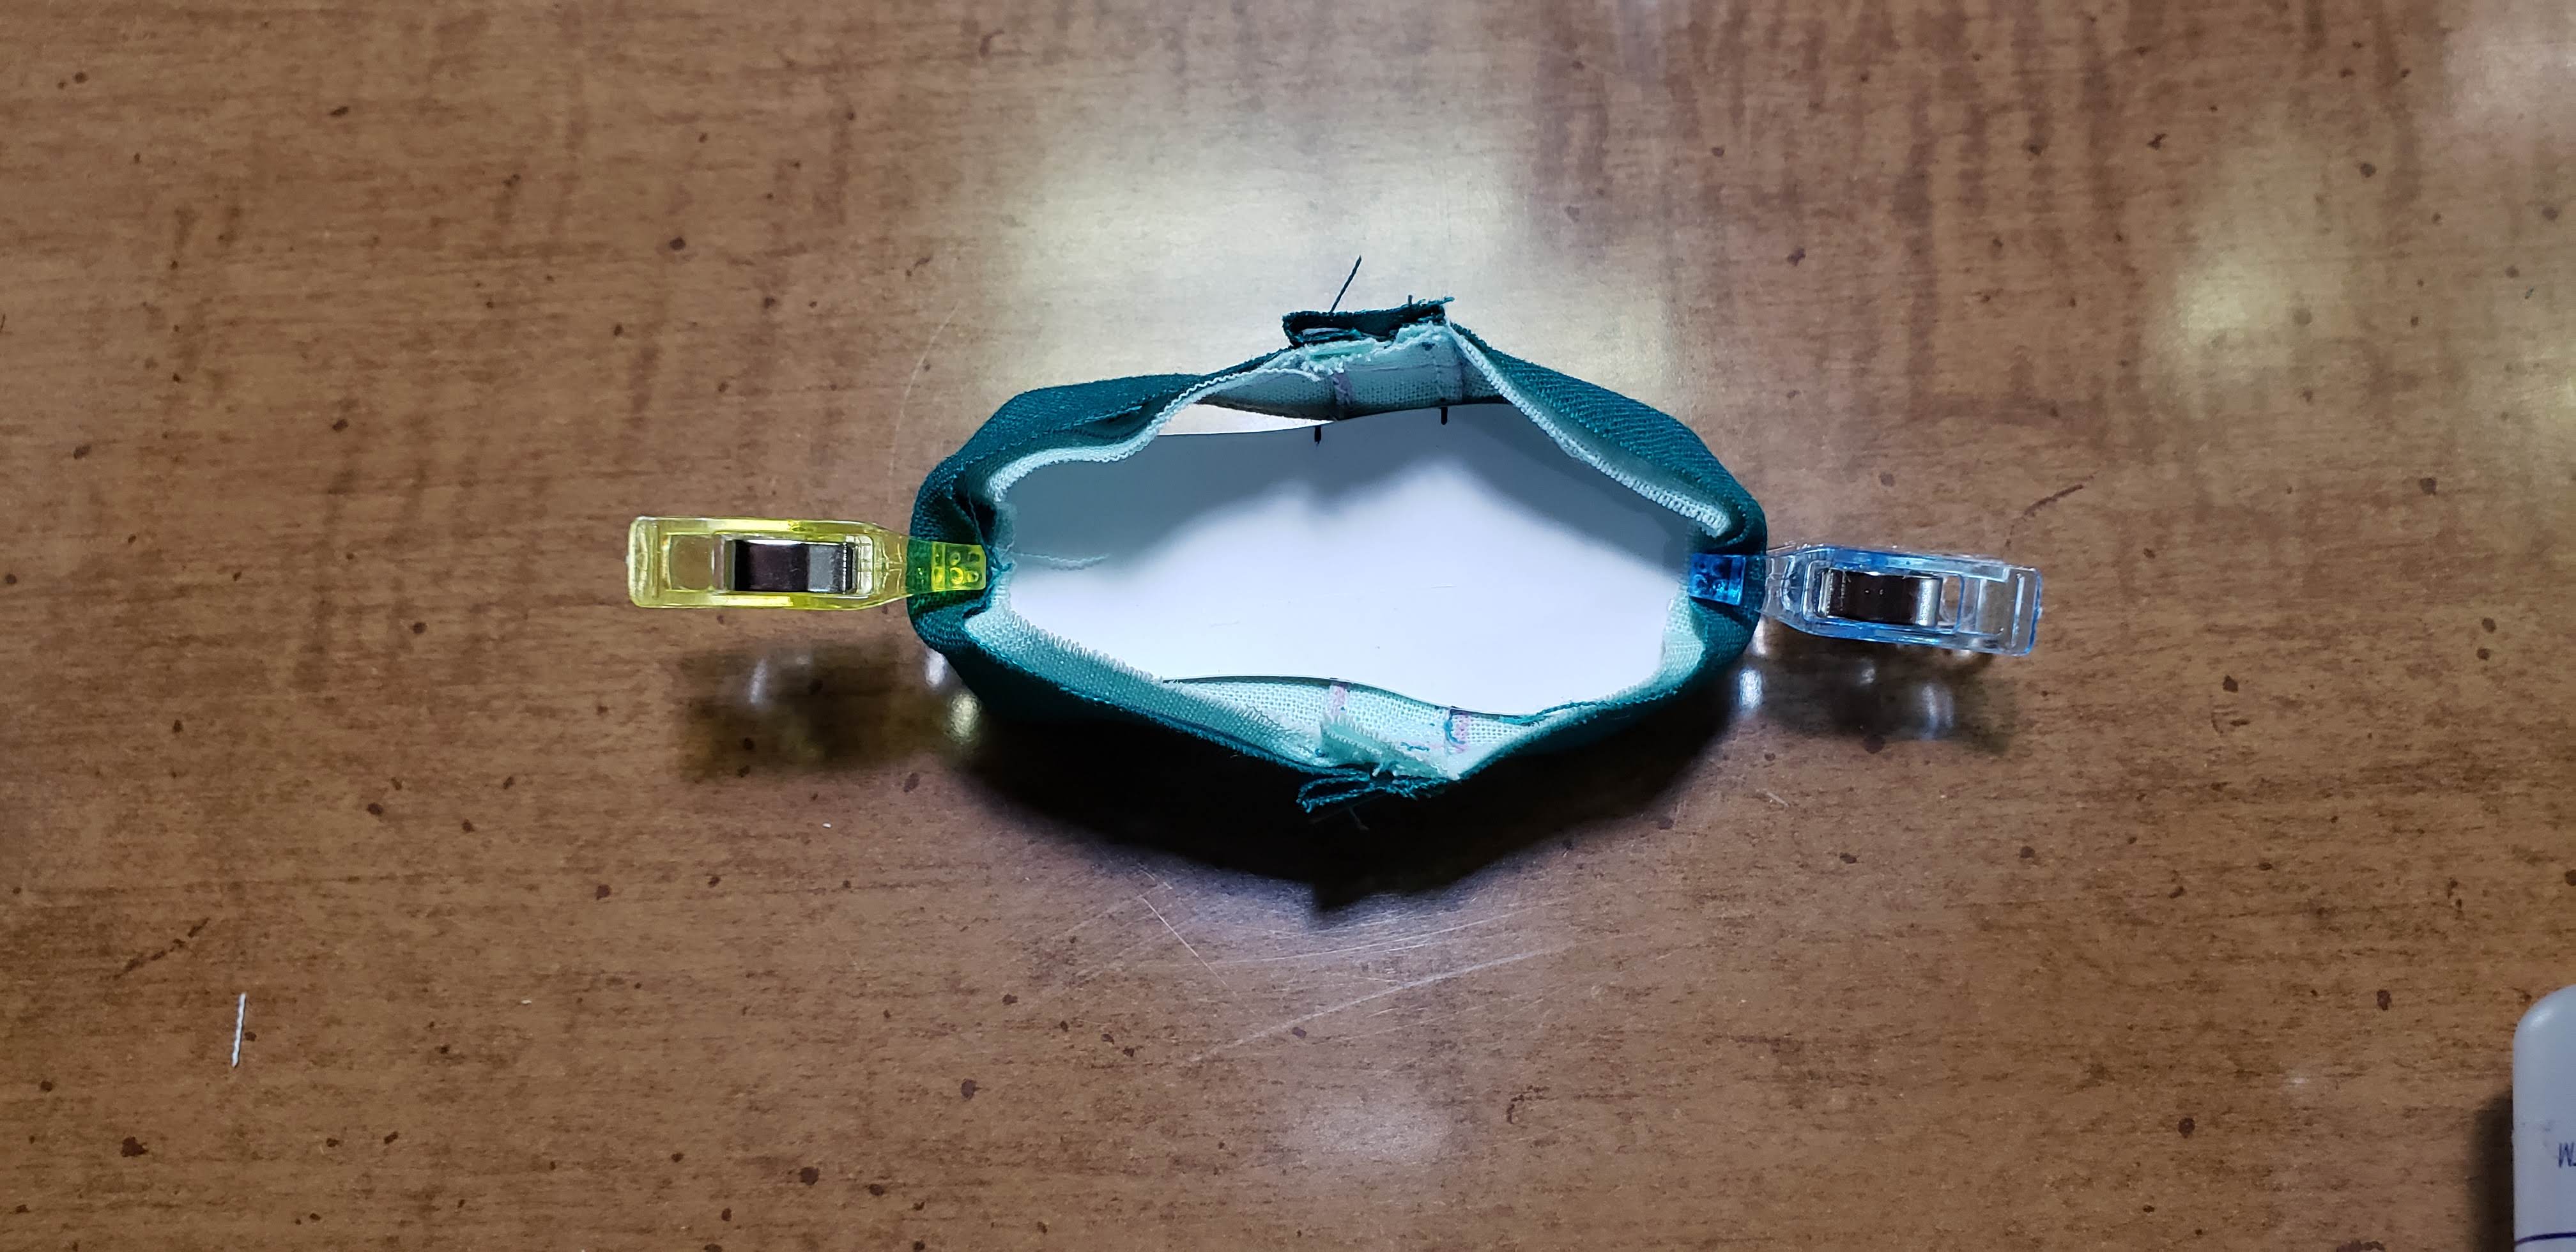
This is the tricky part. Sandwich the toe between a band piece and a lining piece, right sides facing. The shorter edge of the lining pieces is what aligns with the gathered edge. Adjust the gathers so the pieces fit. I pin on one lining piece first, then add then add the second one. This photos has clips, but I have used pins too. You could also baste it on.
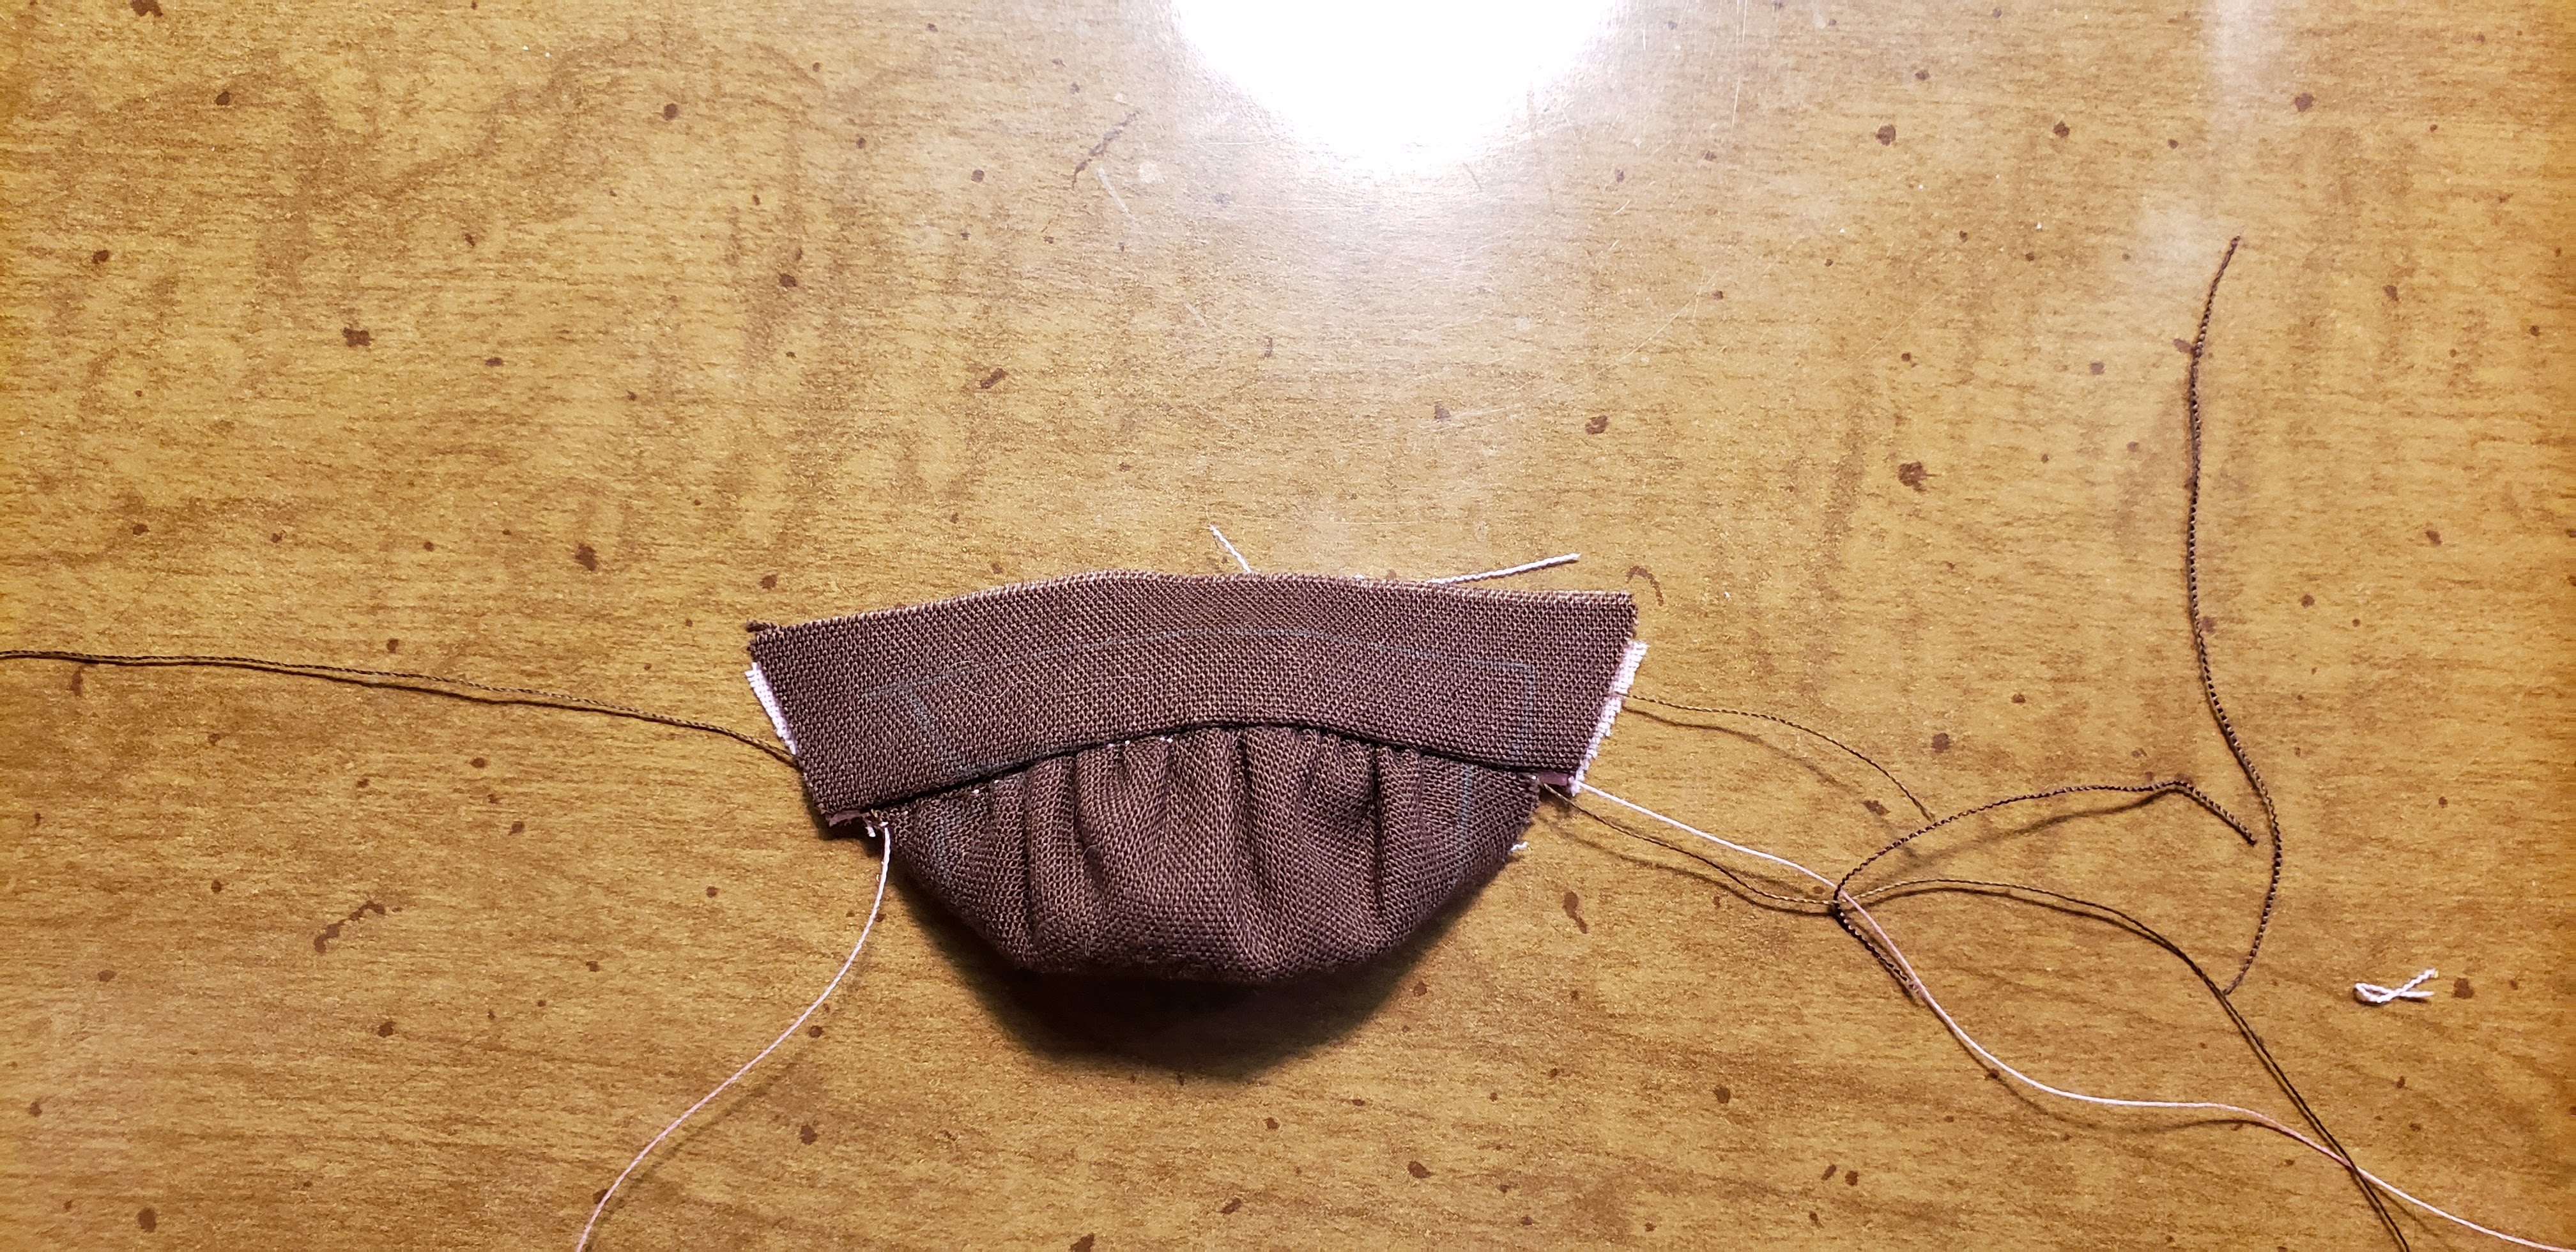
Sew this sandwich together with a 1/4 inch seam allowance.
Trim the seam allowance a little. Flip the band pieces out and press in place with your fingers. Then sew a line of topstitching next to the seam. I forgot to do this on the green pair, so one has top stitching and one doesn’t… So you can skip it if you want.
Attaching the Toe and Sides
Fold in the remaining long sides of the band pieces. Ideally you have 1/4 inch to fold in, but at this scale, things shift and that’s ok. having a line drawn on helps, you can fold at the line. Make sure this looks about the same on both shoes.
Insert the short edges of the side pieces in-between the folded band pieces. The drawn on lines should align with the edges of the band. The flat bottom of the band should align with the side edges of the band. If it doesn’t fit between the band pieces correctly, cut off a little but of the seam allowance on the short edges.
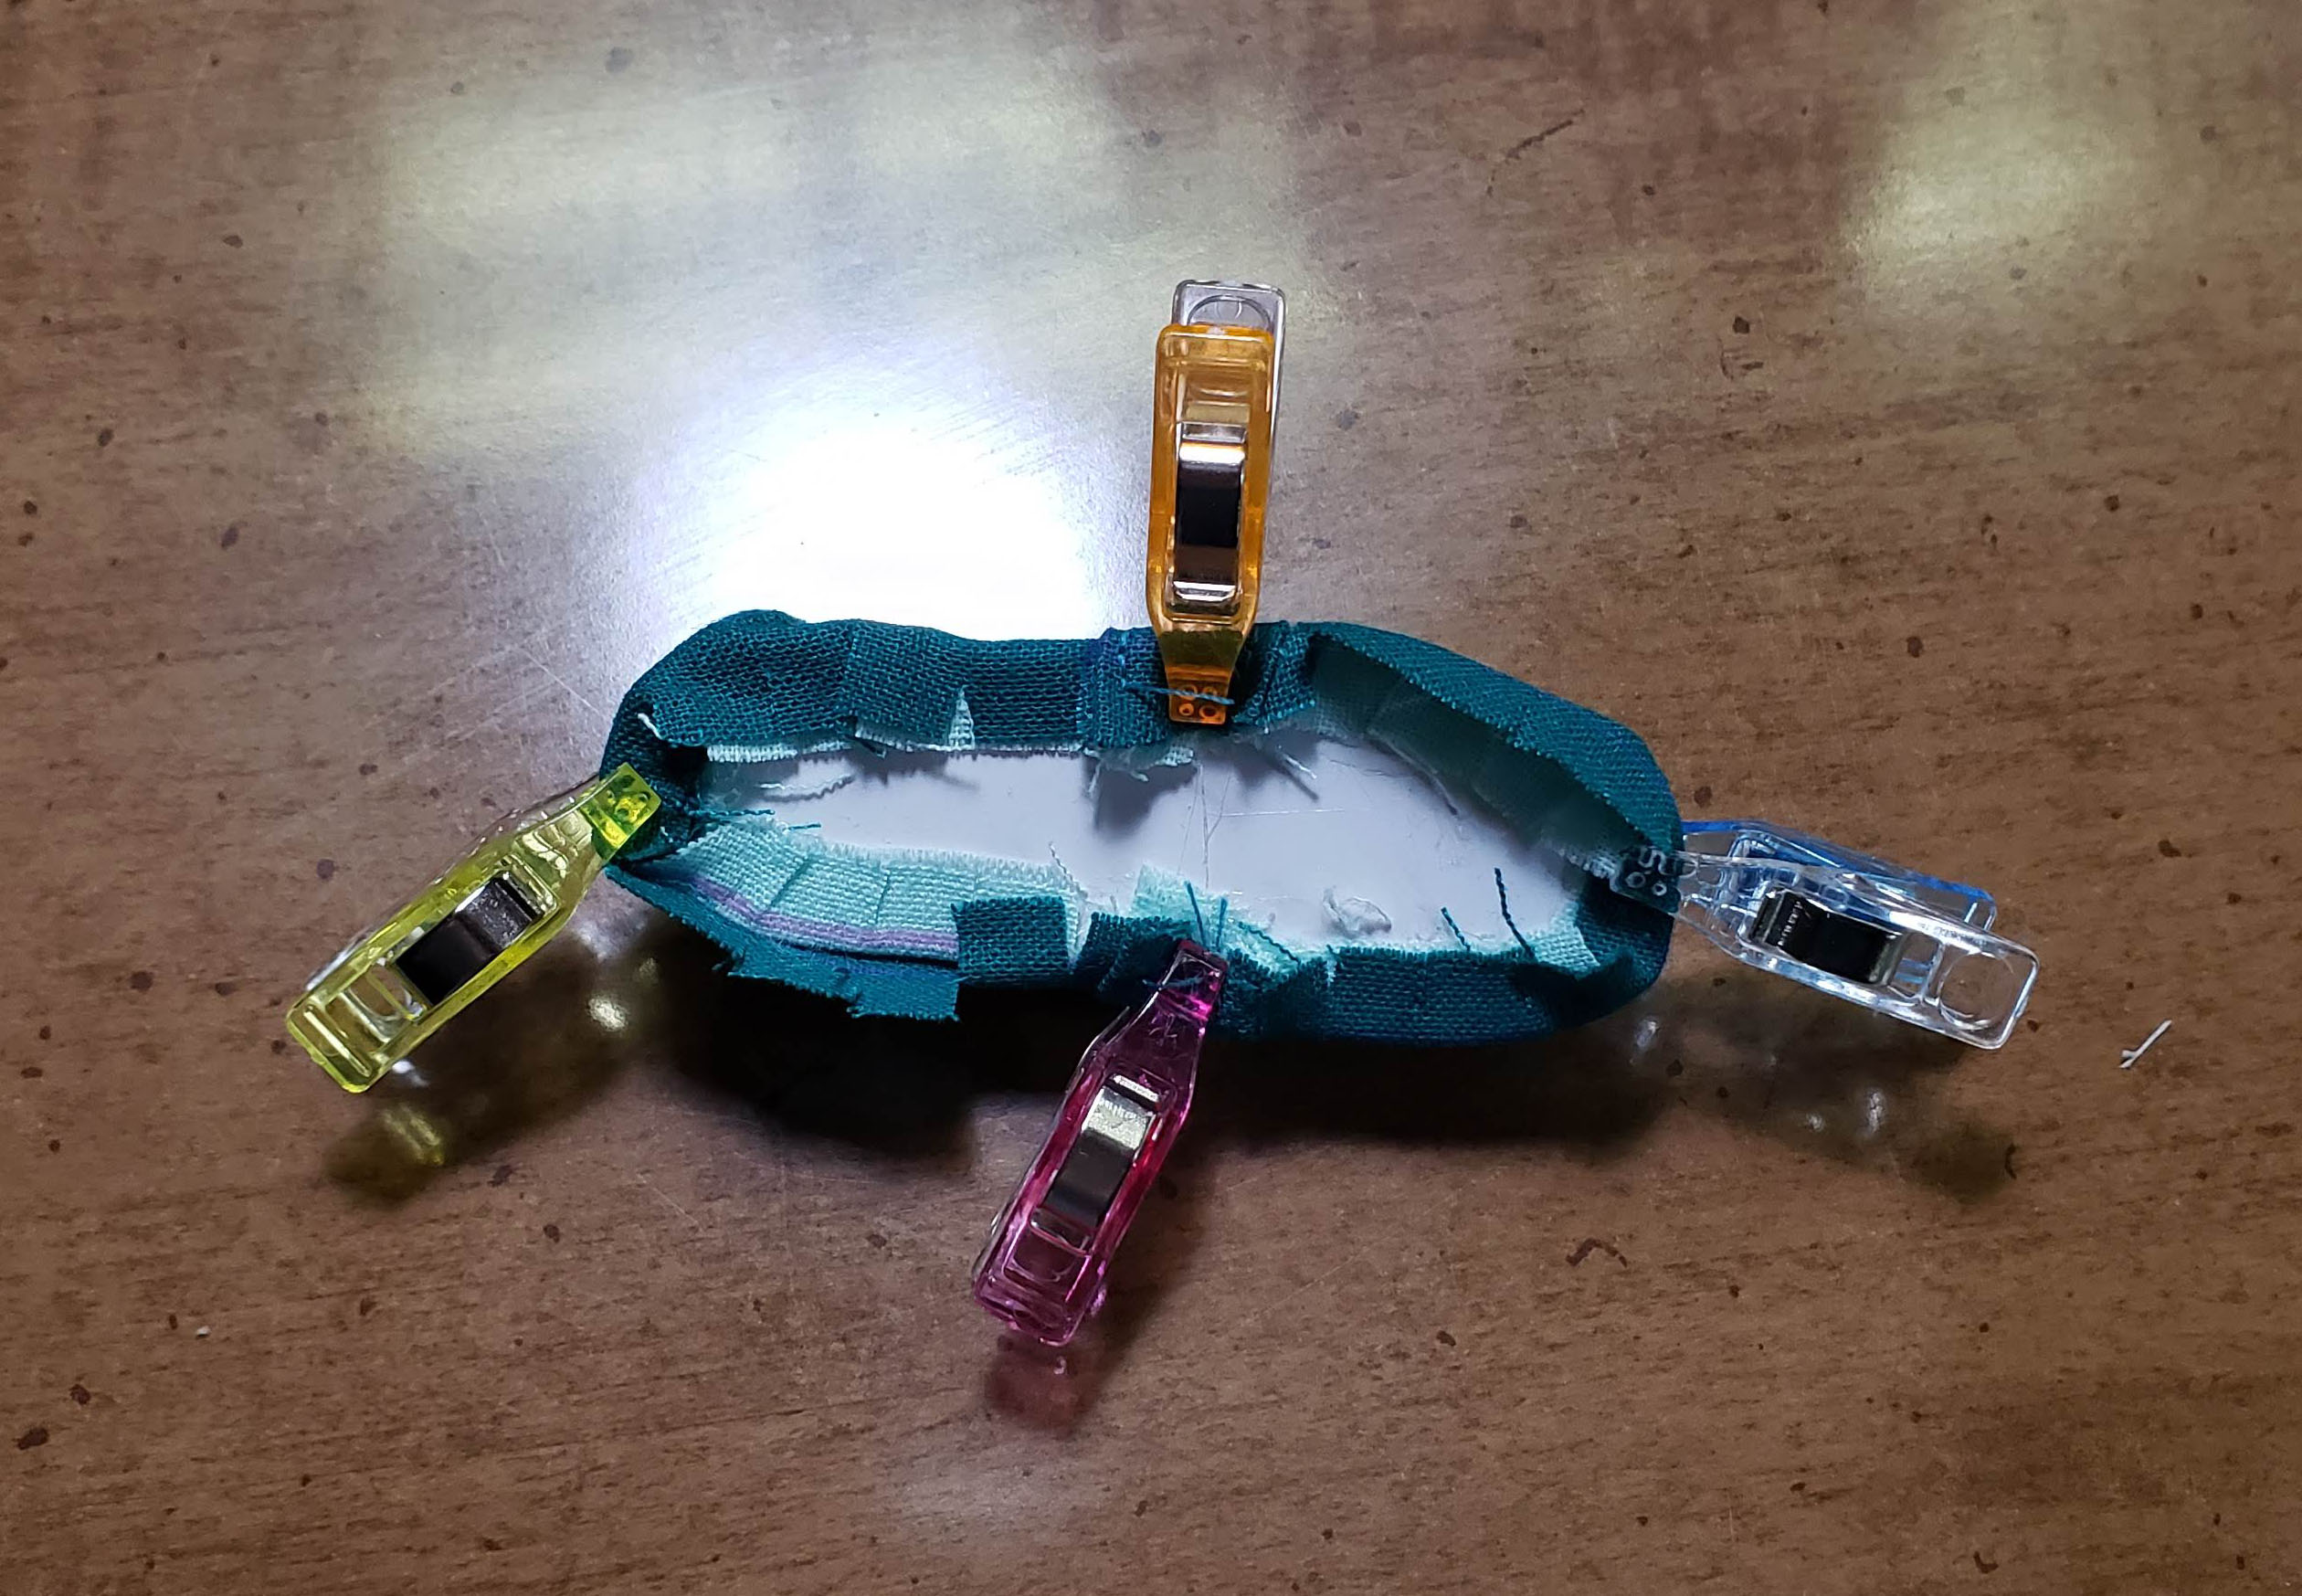
You can pin the pieces together as shown in the picture. You can also use fabric glue, or baste them to hold them in place.
Sew a line of top stitching to secure the sides in place and attach the band pieces together.
Attaching the Sole and Insole
To construct the finished shoe, the fabric parts are attached to the insole and the craft foam outsole is glued on. I used fabric glue (Fabri-tac or Liquid Stitch) for the insole and super glue for the craft foam.
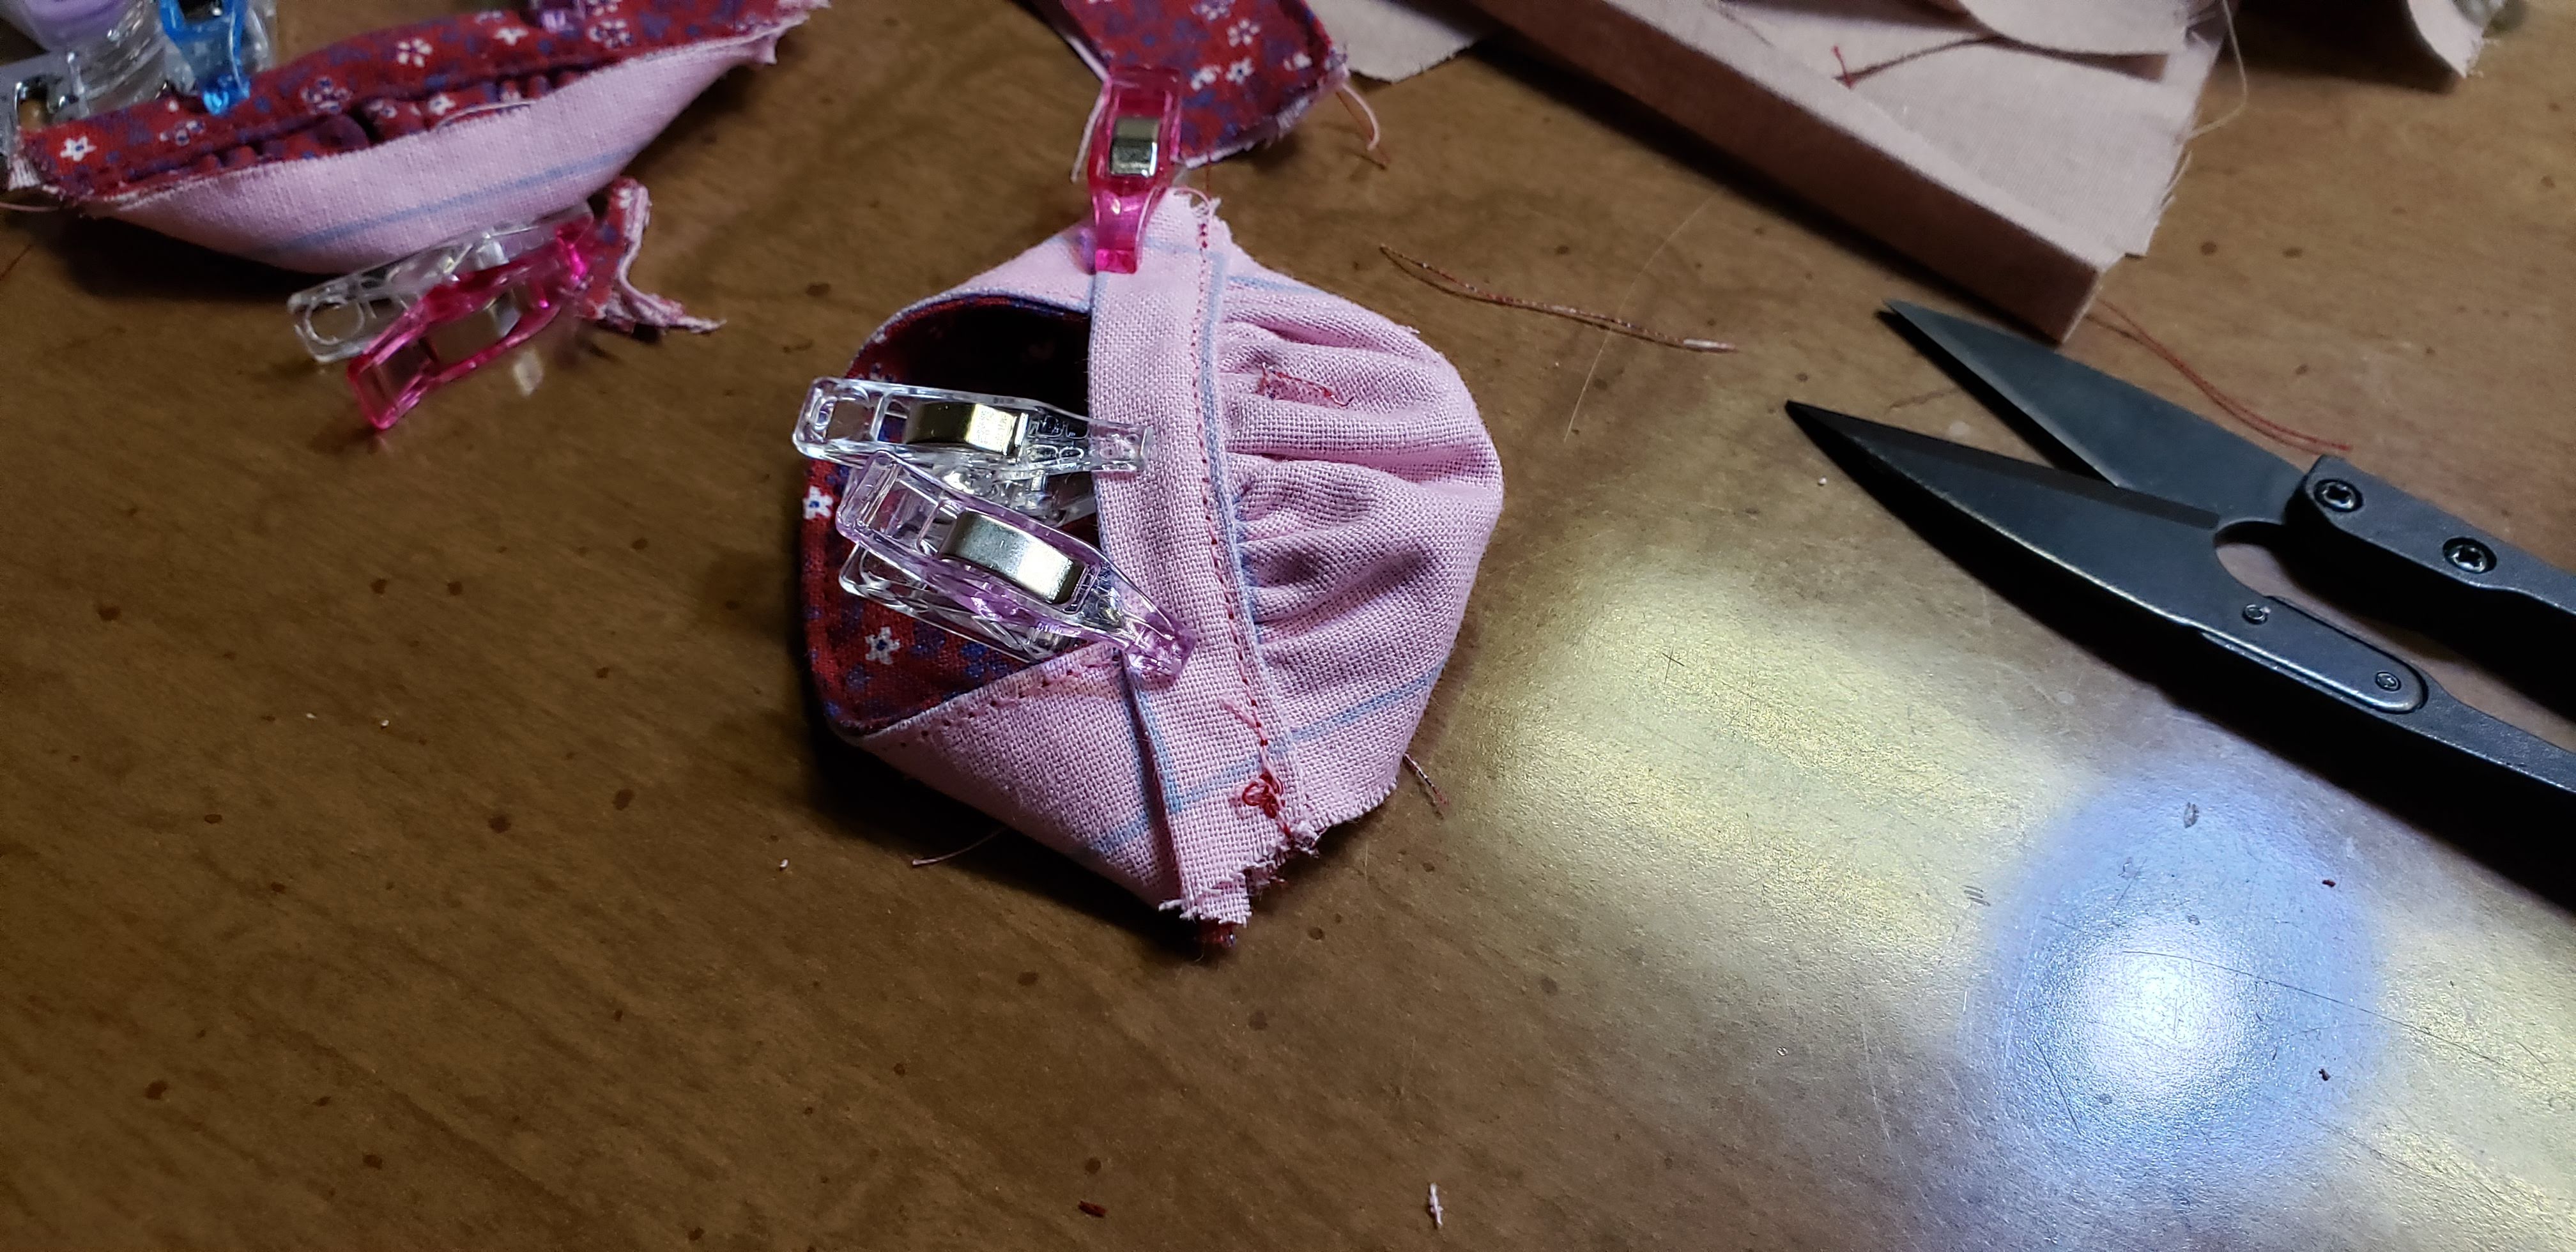
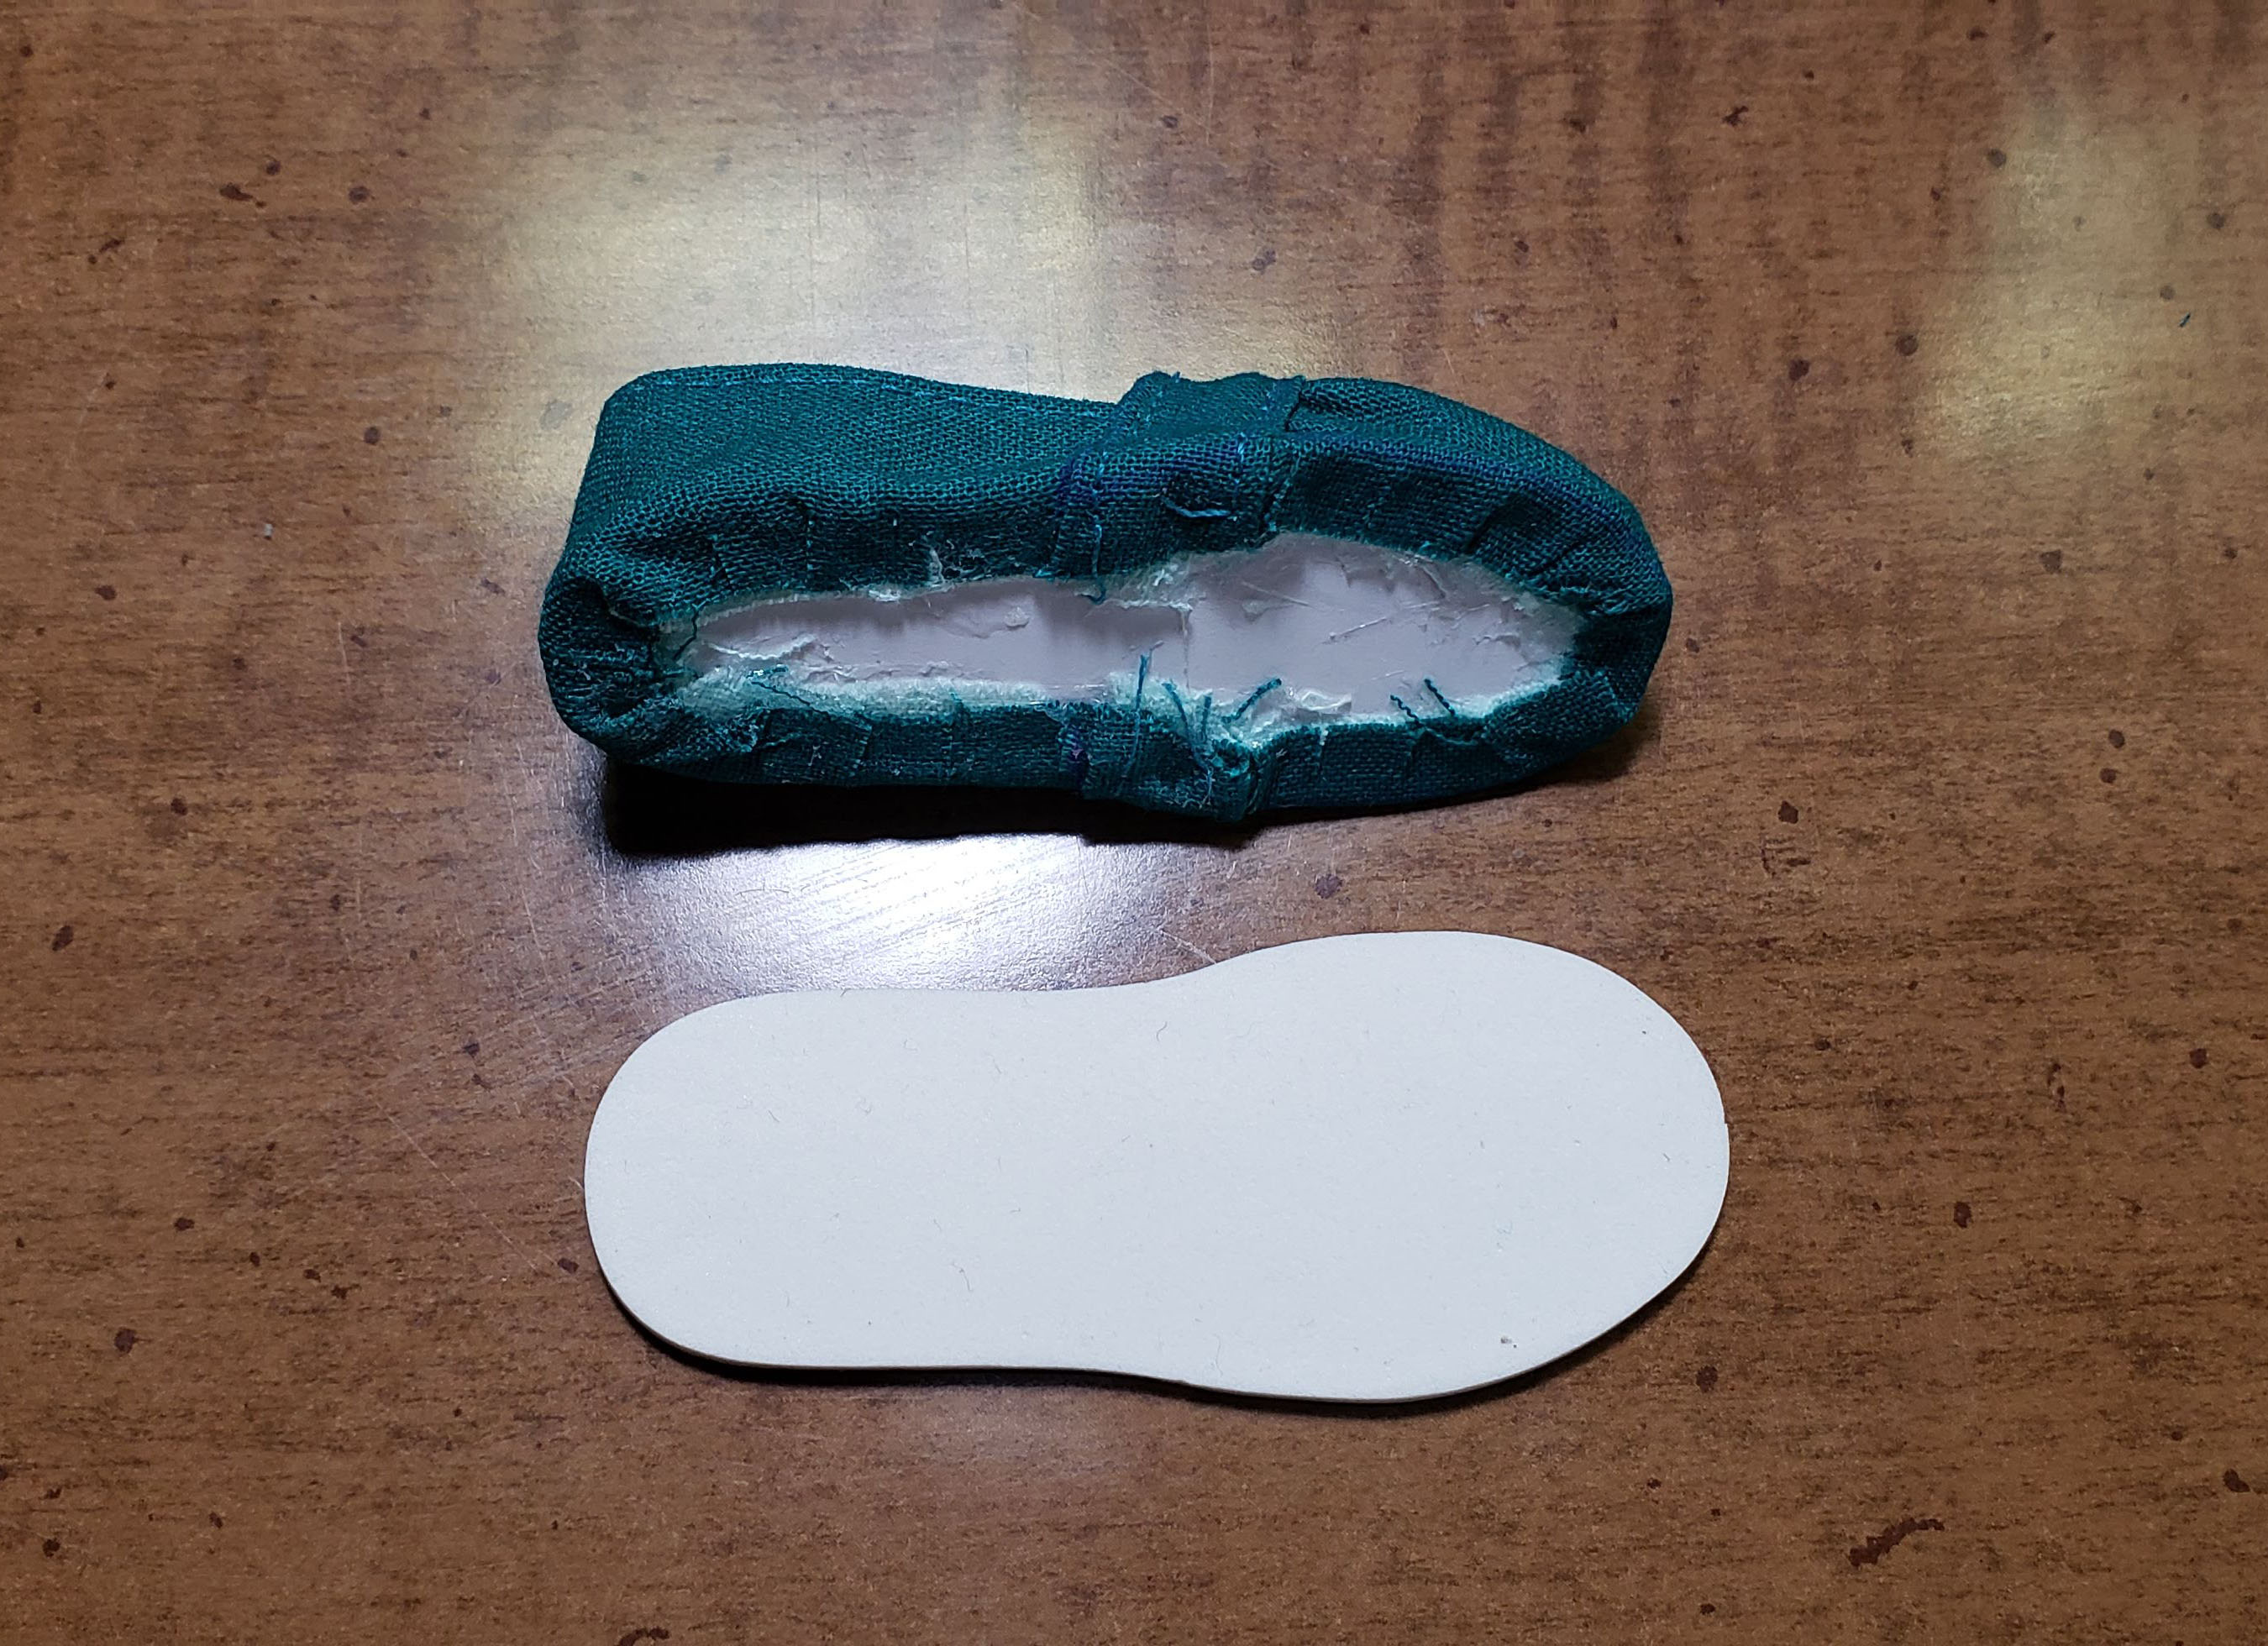
Insert the sole into the fabric piece, this is where the seam allowance lines really help. The line should align with the paper insole. Add a dab of glue at the heel and the toe. The fold over the fabric at the toe and heel and secure it with a clip (fabric clip, binder clip, clothes pin, …). The pattern has markings you can use to align this step.
Now clip the seam allowance part around the whole shoe, so it will be easier to fold over. Go in sections, spread some glue on the insole and fold the fabric into place. This will probably only secure the lining, so add more glue on top and attach the upper fabric.
The band part is usually the hardest to glue down, because it is thick. Secure that part with more clips to help it stay on while the glue dries.
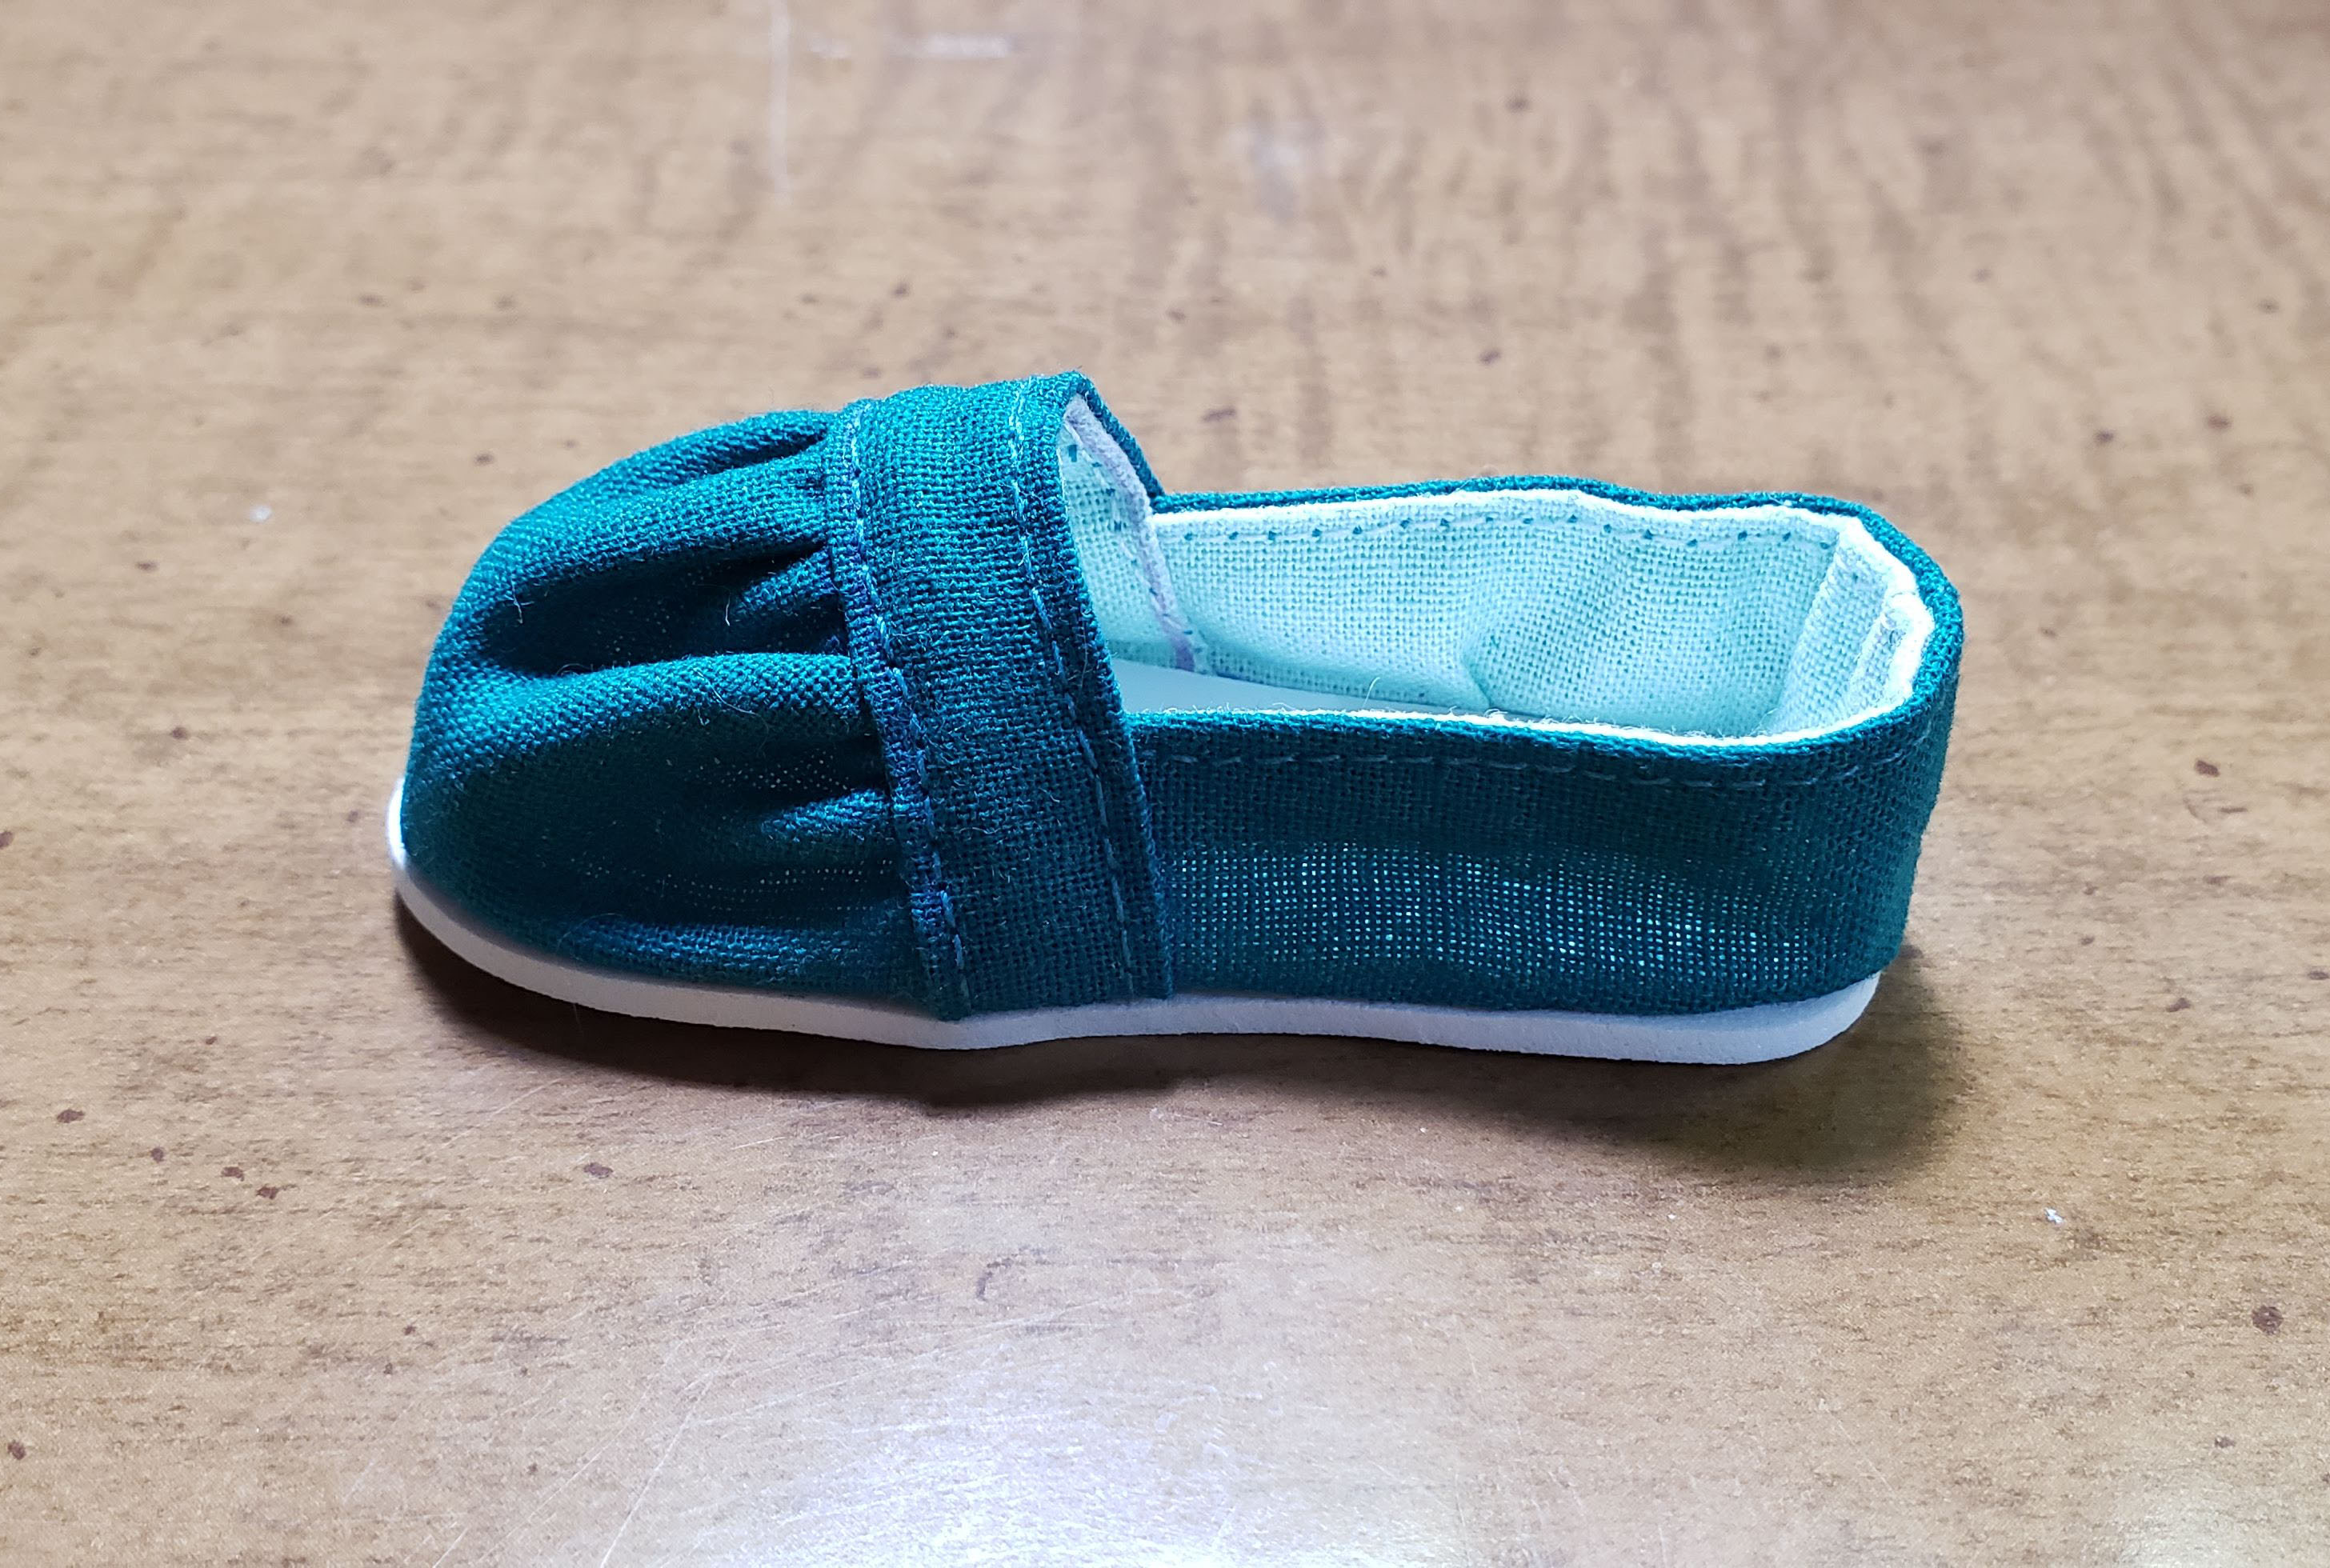
Lastly glue on the foam outsoles. The outsoles are a tiny bit bigger than the shoes so be sure the center them nicely.
Now you should have a finished shoe!
Download the Pattern
If you need help printing this pattern, make sure to read my digital pattern printing tips.