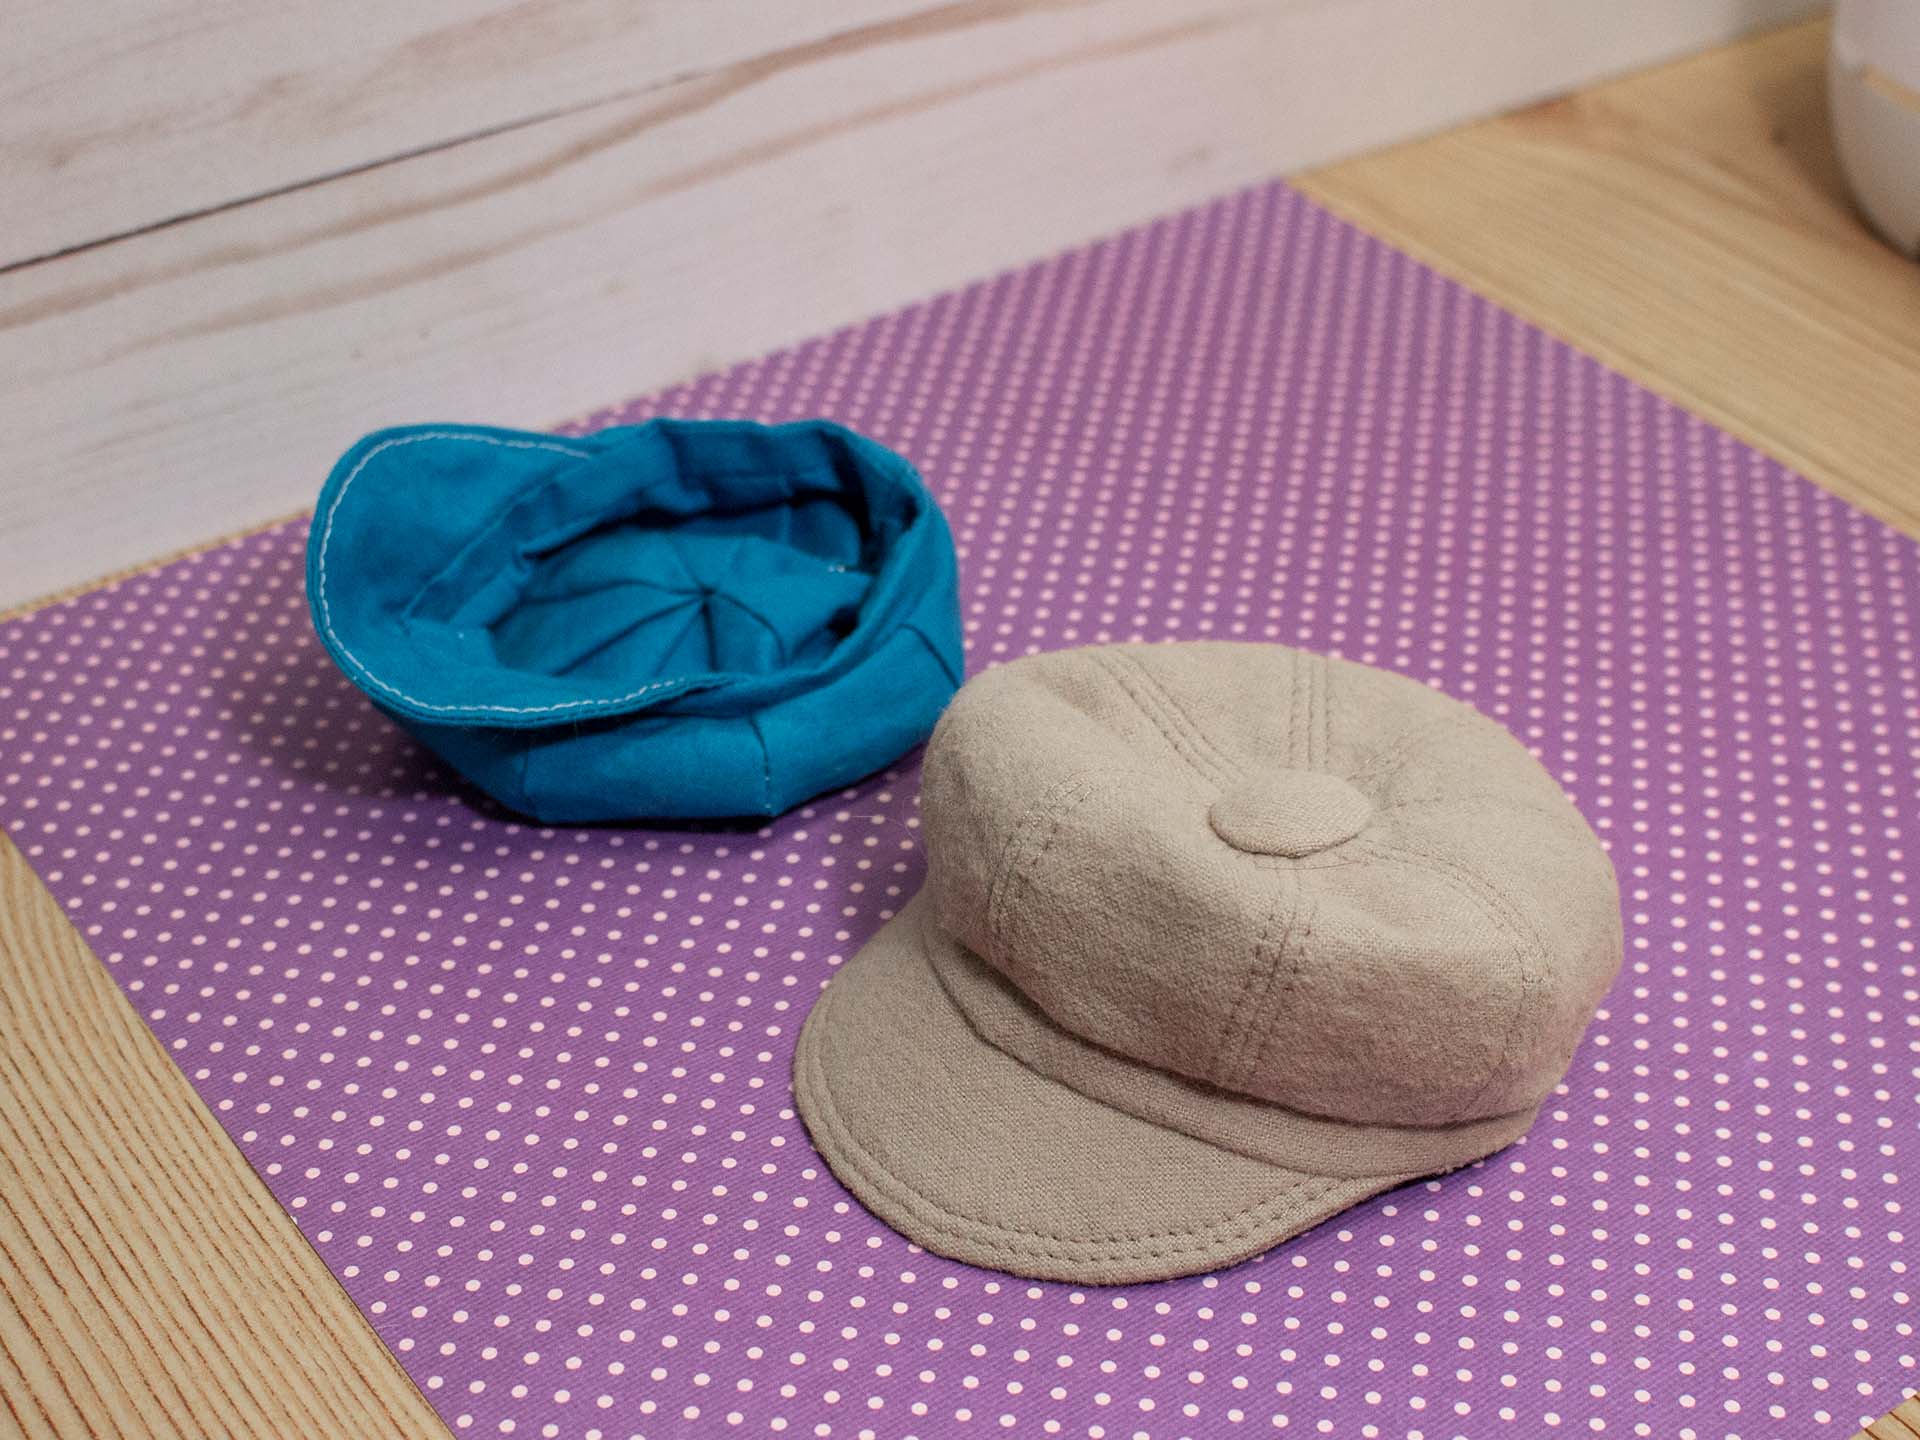
Smart Doll Newsboy Hat
Smart Doll ·I’ve always like this type of hat. My aunt who was a seamstress made several for me out of scraps when I was a kid. I wanted to make some for my Smart Dolls, so I created this pattern.
To start, I measured my dolls head. I held the measuring tape loosely, so the finished hat would not squish the wig, but sit nicely on top. Then I used trial and error to draft the brim. To test it I attached it to a piece of wire, that was the length of the head circumference. To make the top of the hat I guessed at a size of the widest part by holding up my measuring tape around the head a imagining what it would look like. I did the same for the length.
To draw the segments I started with 1/8 of the of the circumference (since I wanted 8 segments). Then I drew 1/2 the length perpendicular to the base of the segment, starting from the center. The angle at the top must be 45deg (360/8), else the top of the hat won’t lay flat. I guessed at where the widest part would be. Then connected the bottom, through the widest part ended at the top, making sure to preserve the angle. This piece is symmetrical, so if you are using paper, you can fold it in half and cut it out

I made a couple mockups and adjusted things I didn’t quite like, till I ended up with the final Smart Doll Newsboy Hat Pattern, which you can download below.
Here is what I used to make my finished hat:
Materials:
- Flannel for the outside of the hat - 27 x 27 cm (10 3/4 x 10 3/4 inches)
- Light weight lining fabric for the lining - 24.5 x 15 cm (9 3/4 x 6 inches)
- Heavyweight interfacing to stiffen the brim - 6 x 11.5cm (2 1/4 x 4 1/5 inches)
- Comic book board (cardstock) for the button base - 2.5 cm x 2.5 cm (1 x 1 inches) or a button about 2cm (3/4inch) in diameter to use as a base for the covered top button.
- Pillow fluff for the puffy button
The hats I had a s a kid were made of wool. I think that in Smart Doll scale, flannel can look quite similar. Most fabrics should work as long as they are not too thick. You could use a cereal box for the button base and you can skip the brim interfacing if you don’t have any.
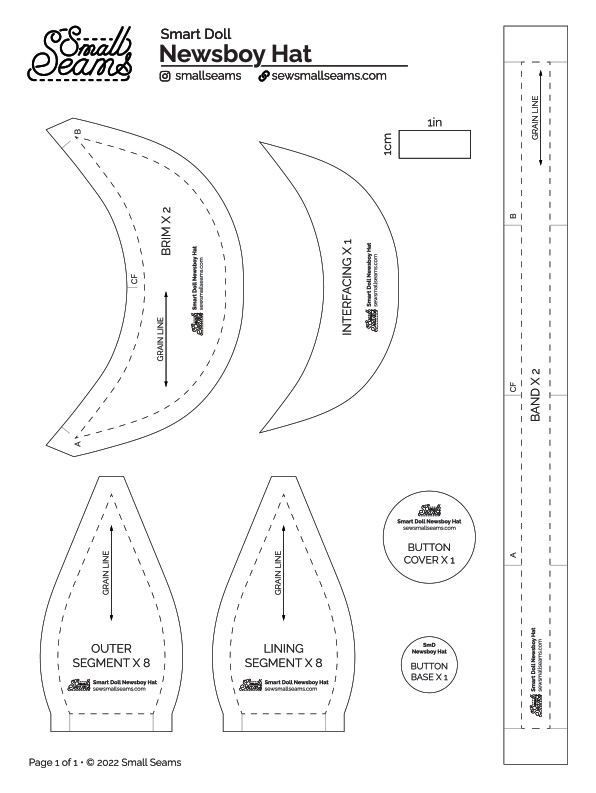
Pattern Pieces
All pieces are symmetrical and have a 1/4 inch seam allowance, unless otherwise noted.
- Brim - cut 2 (outer fabric)
- Band - cut 2 (outer fabric)
- Outer segment - cut 8 (outer fabric)
- Lining segment - cut 8 (lining fabric)
- Button cover - cut 1 (outer fabric)
- Button base - cut 1 (card stock)
- Interfacing for brim - cut 1 (heavyweight interfacing)
How I Made It
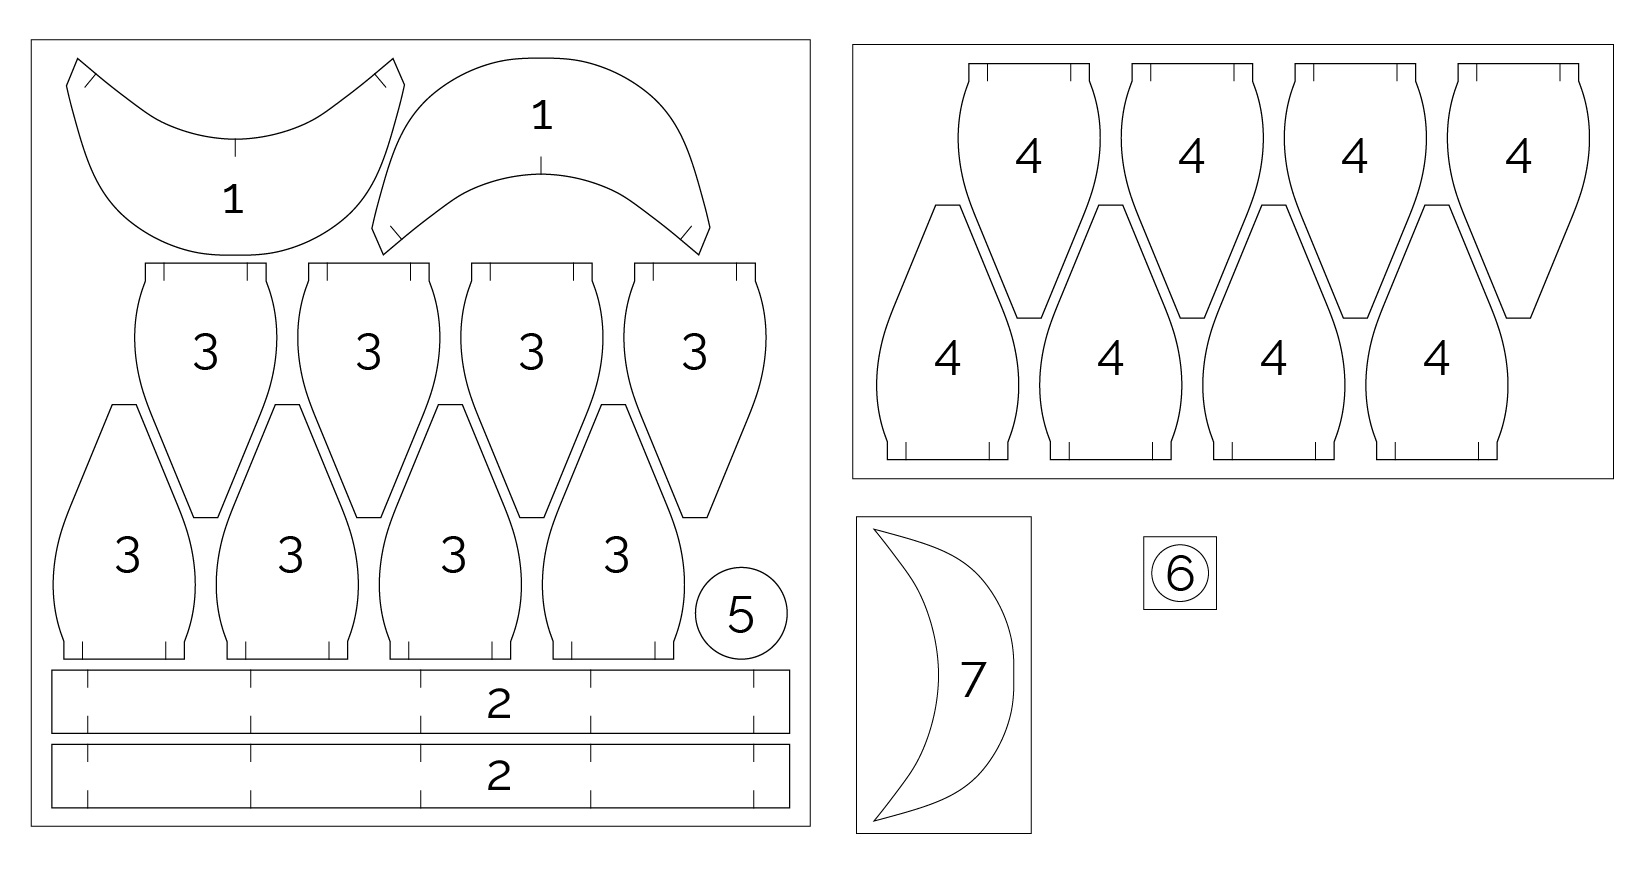
I cut out all pattern pieces and drew the gray markings to help with alignment. I used the Cricut machine do this step. Check out my Cricut pattern cutting guide to find out how.

Band
First I checked the size of the band around my dolls head, to make sure it would fit. Then I folded the band in half and sewed the edges together at the marking. I did the same for the second band piece. There are two pieces, because the brim will later be sandwiched between them.
Crown and Lining
Lining up pairs of the crown pieces right sides facing, I sewed them together with a 1/4” seam allowance, starting at the markings on the bottom. I notched all the seams on the curved sections, then spread and pressed them. I also added decorative coverstitching on each side of each seam, but this is optional. I didn’t finish any of the seams, because they will all be encased inside of the hat.
Next I aligned the pairs of pieces and sewed them together, notched, pressed open and added coverstitching.
Lastly I repeated the process for the two groups of four pieces. On this last step I made sure that the final circumference would match the already sewn bands. If it didn’t quite match, I could sew the seam in the back a little wider or narrower to adjust it. If ends up a lot larger then the band, it’s possible to gather up the excess fabric at the back when attaching it to the band.
I repeated basically the same process for lining fabric, skipping the coverstitching.
To attach the band to the crown I aligned and pinned one band piece to the crown, right sides facing, matching up the seams so the band seam will be in the back. I sewed 1/4 inch from the edge with the band piece on top, so I could see the seam allowance better.
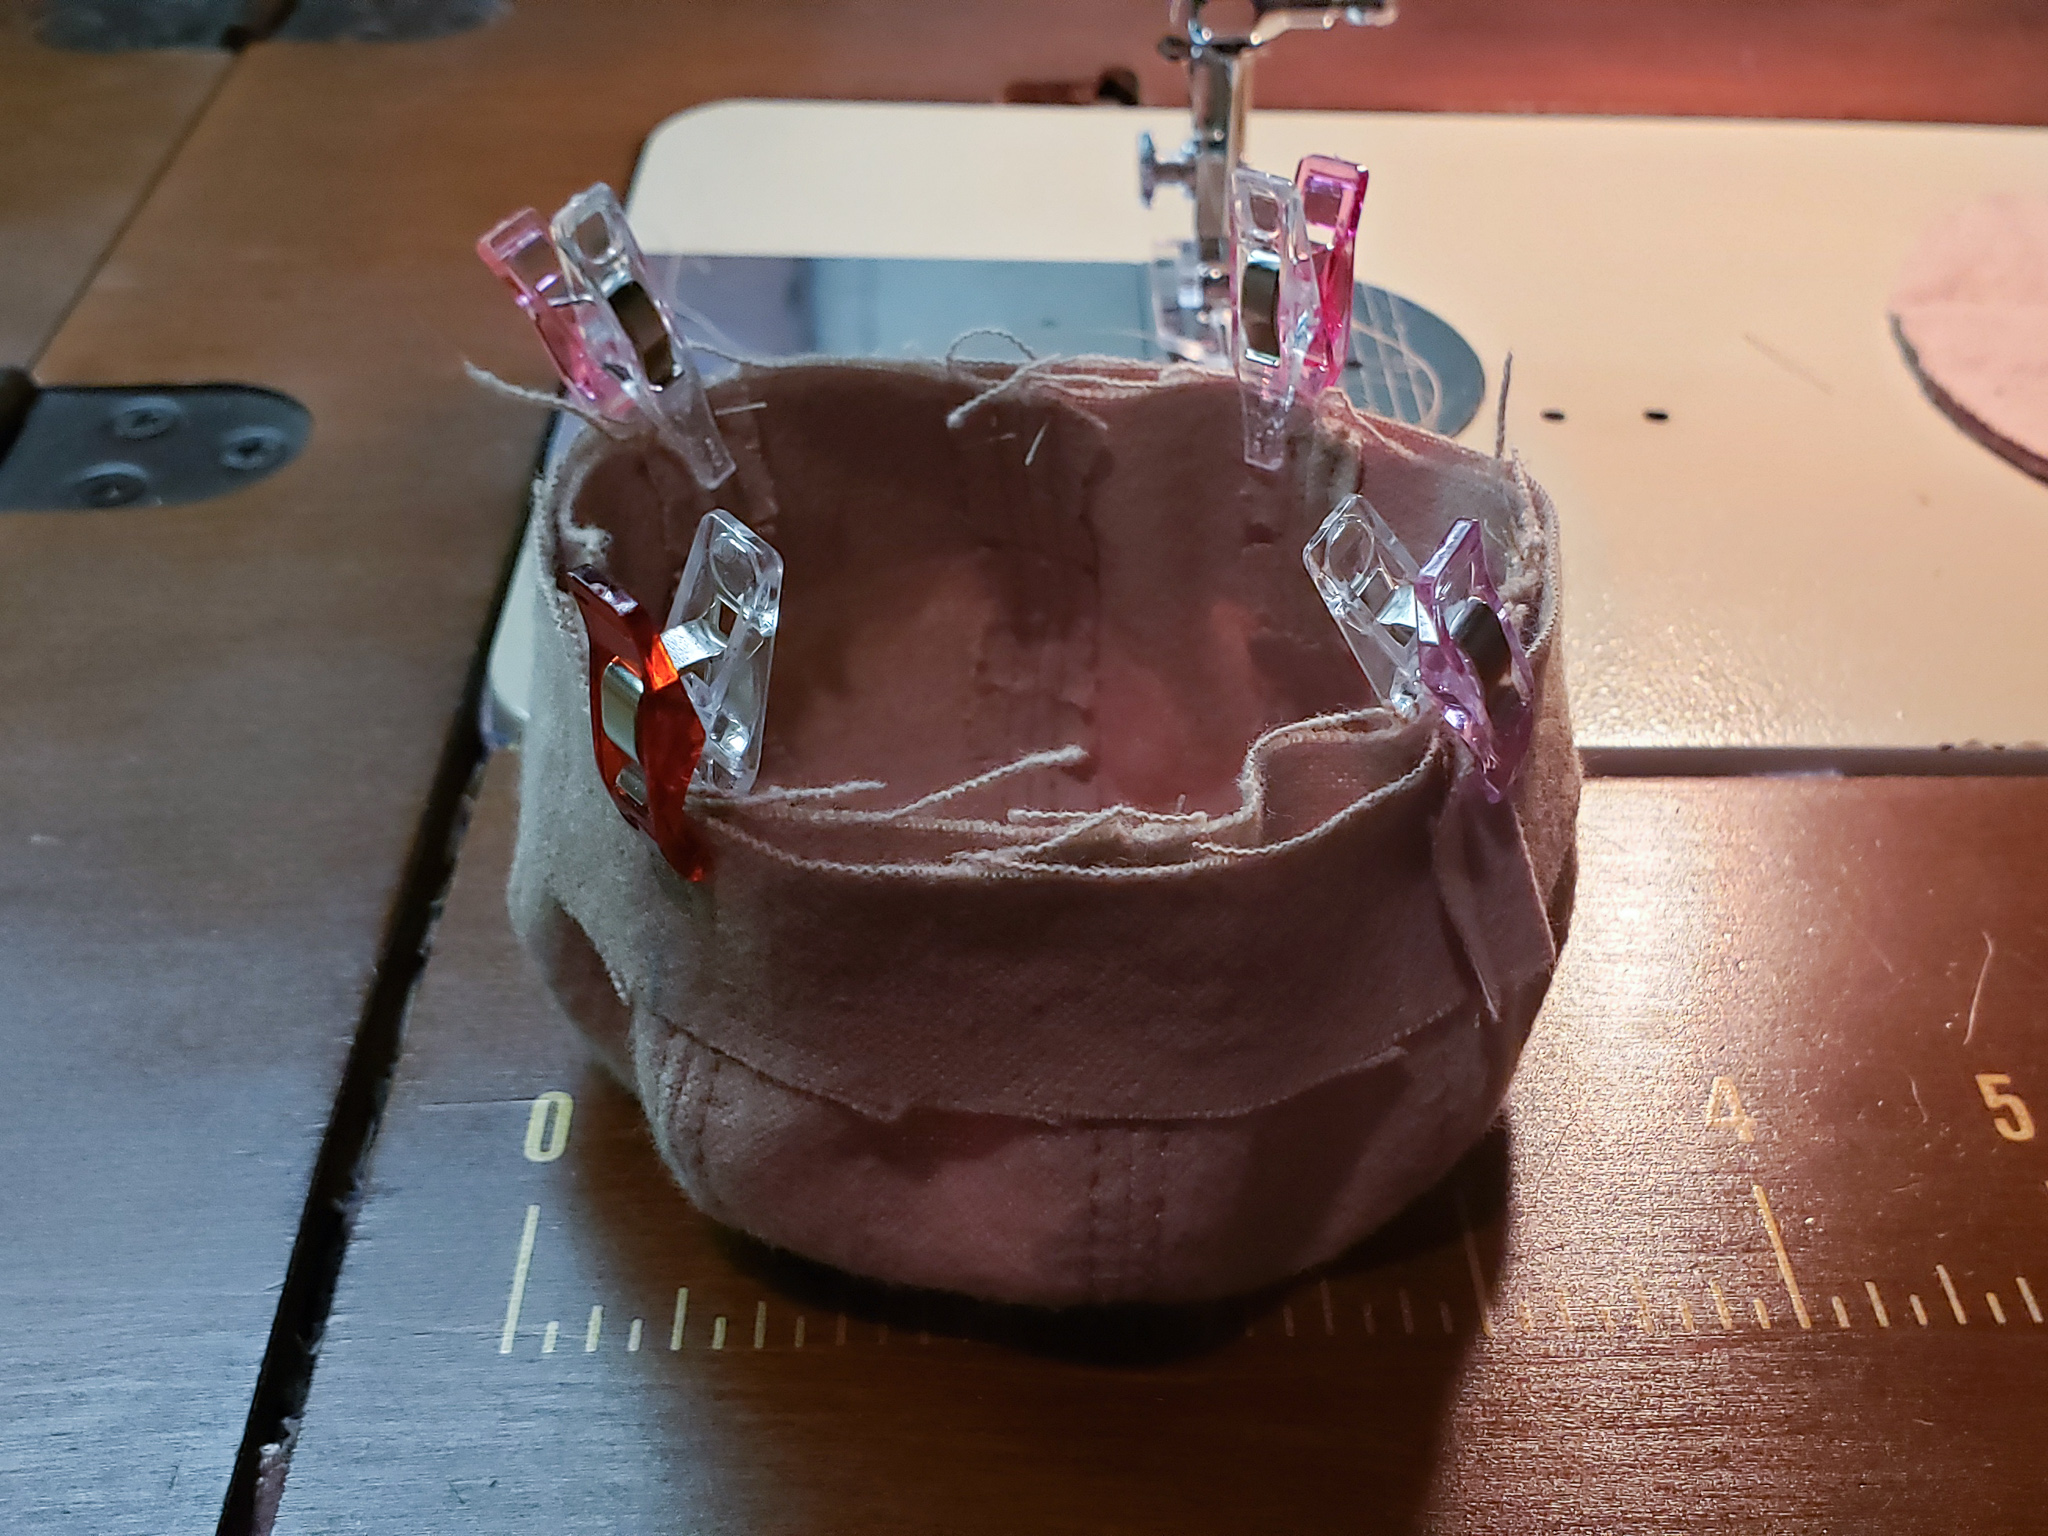
Then I repeated the same process for the crown lining, leaving about a 2 inch gap near the back seam so I could turn the hat right side out later.
Brim
For the brim I aligned the two pieces right sides facing and sewed along the convex curve with a 1/4 inch seam allowance. I notched the curve, then flipped it right side out and pressed. This formed a pocket for the interfacing.
I inserted the interfacing piece in this pocket. The interfacing piece is a little bit smaller, so it fit nicely. I made sure the seam allowance was all on one side of the interfacing, the bottom, so it wouldn’t form a bum on top. Then I pressed the piece again to make sure the fabric laid nicely.
I added two rows of cover stitching on the top side, close to the edge (about 4mm or 3/16 inch) to secure the interfacing. You could skip this, but I think it looks nice.
At this point I clipped the inside curve of the brim to help with the next step.
Attaching the Brim
To attach the brim, I sandwiched it between the two band pieces (with crown attached). Right sides facing (outer crown facing the brim top, lining crown facing the brim bottom).
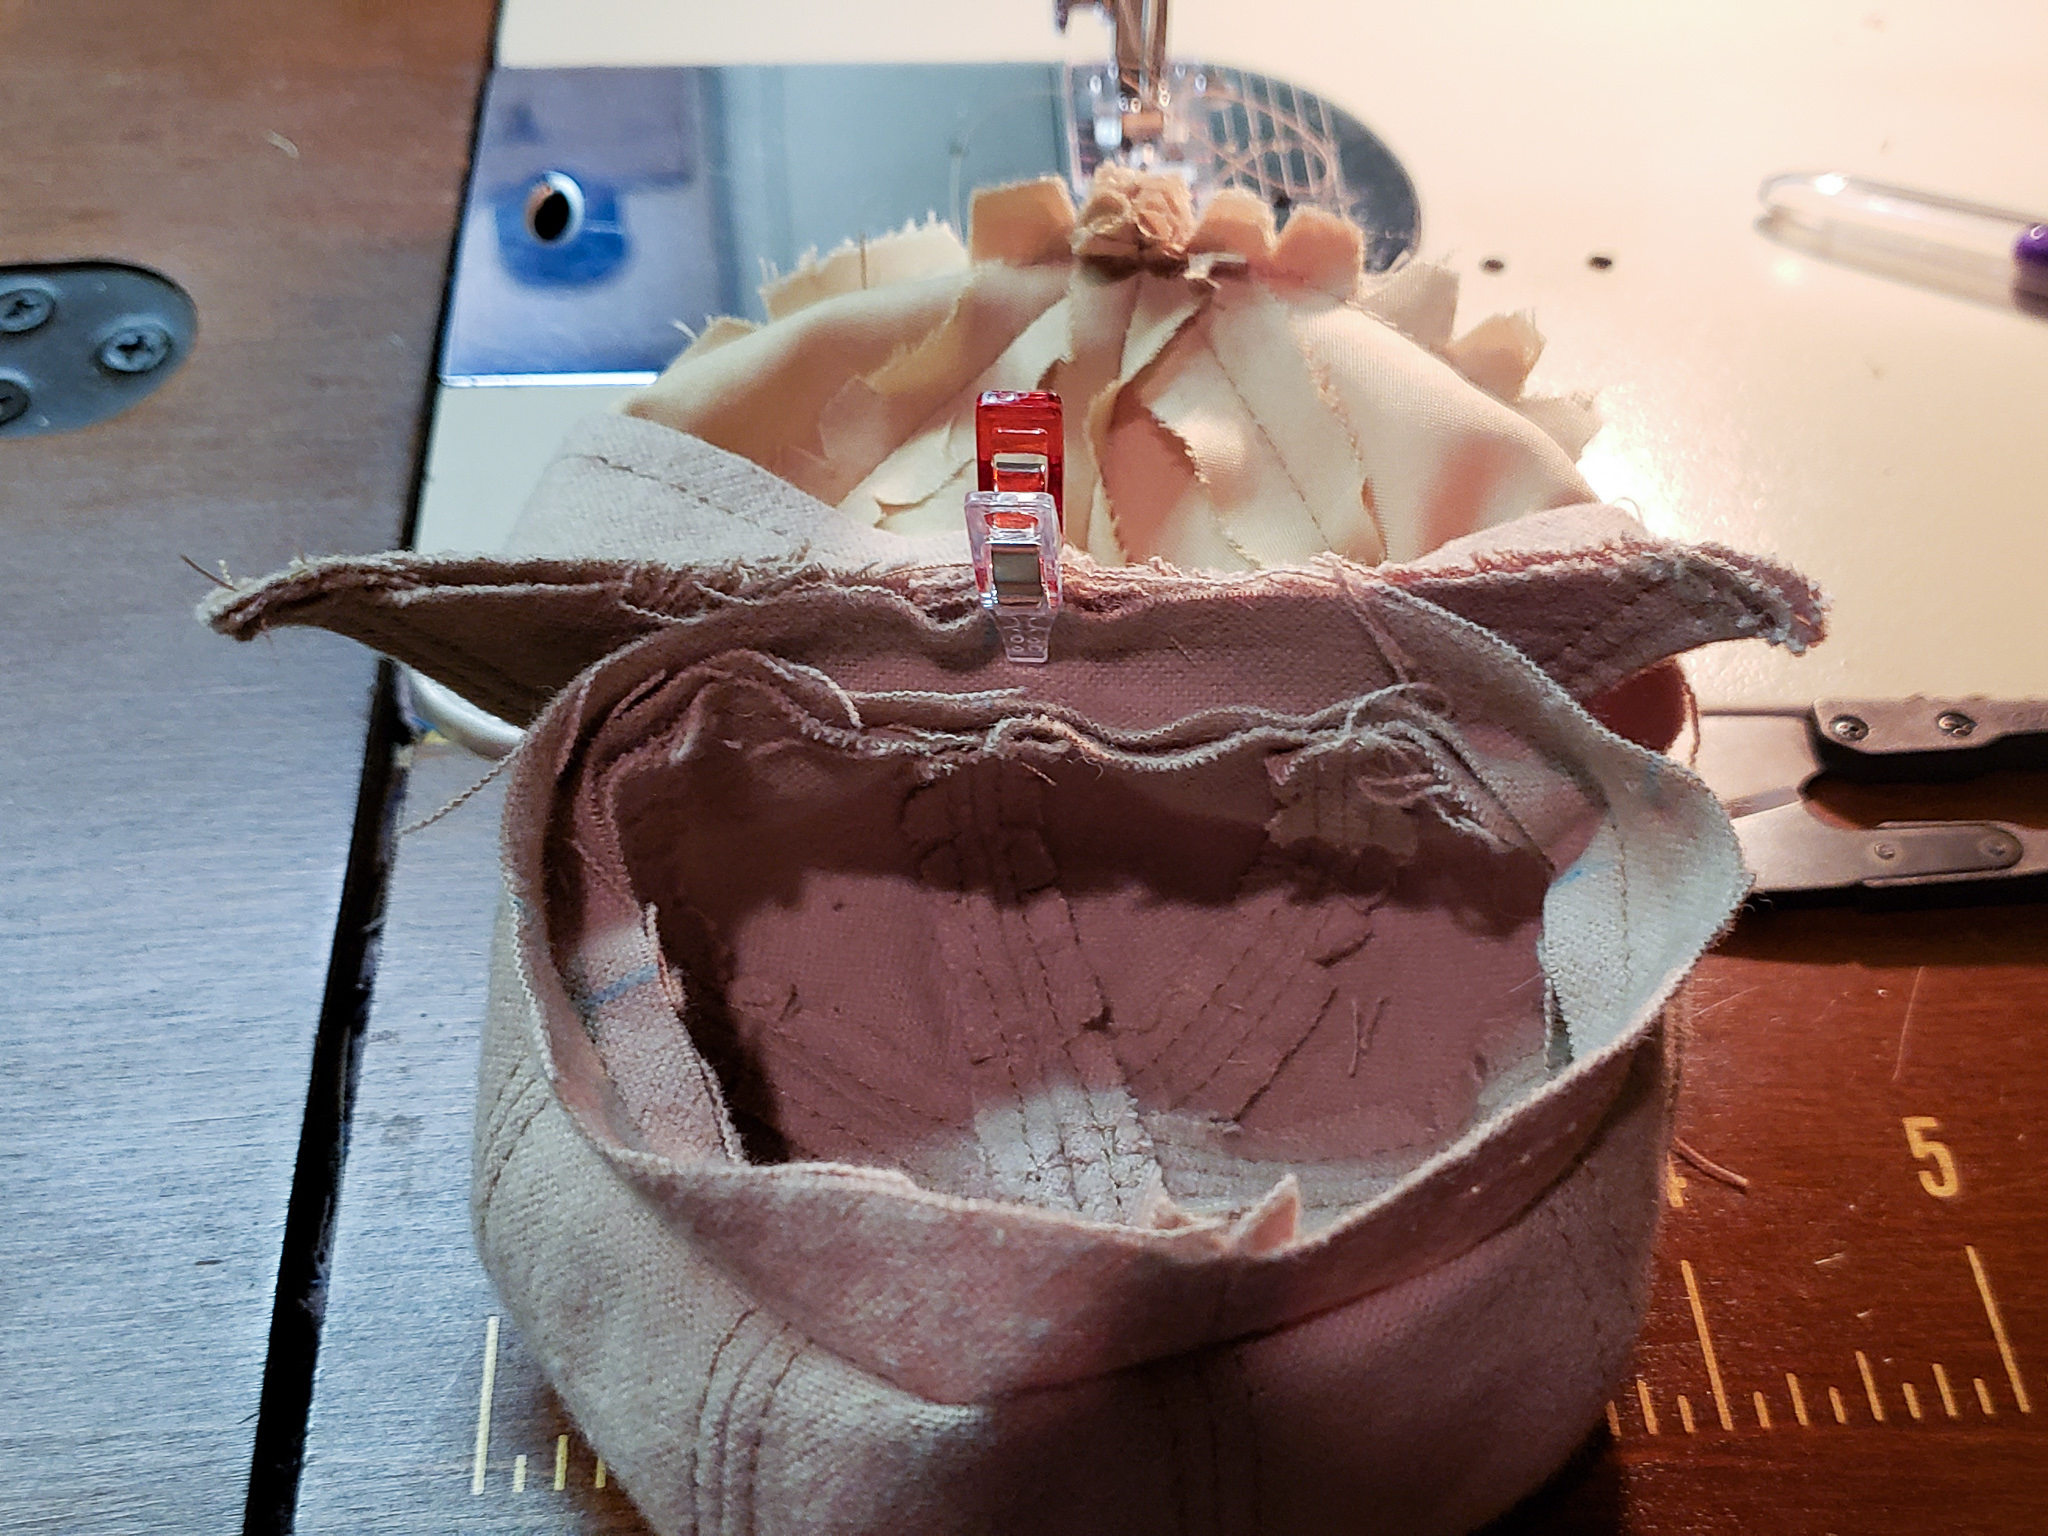
To make this easier I sewed from the center towards the back of the hat, aligning all layers as I went. Then repeated it for the other side. I could also have pinned the whole band on and sewed it in one go. The markings on the band should line up with the edges of the brim. At this point a made a mistake and the raw edges of the brim re peaking out at the band. I should have been more careful when aligning the brim and band.
I sewed with the outer band piece on top, so I could keep the band width consistent.
Finally I turned the hat right side out through the hole left in the back and pressed the seam on the bottom of the band. I stitched the lining to the band with a ladder stitch to hide the hole.
Top Button
I made my own matching puffy button for the top, but I could have also just used a store bought button or snap.
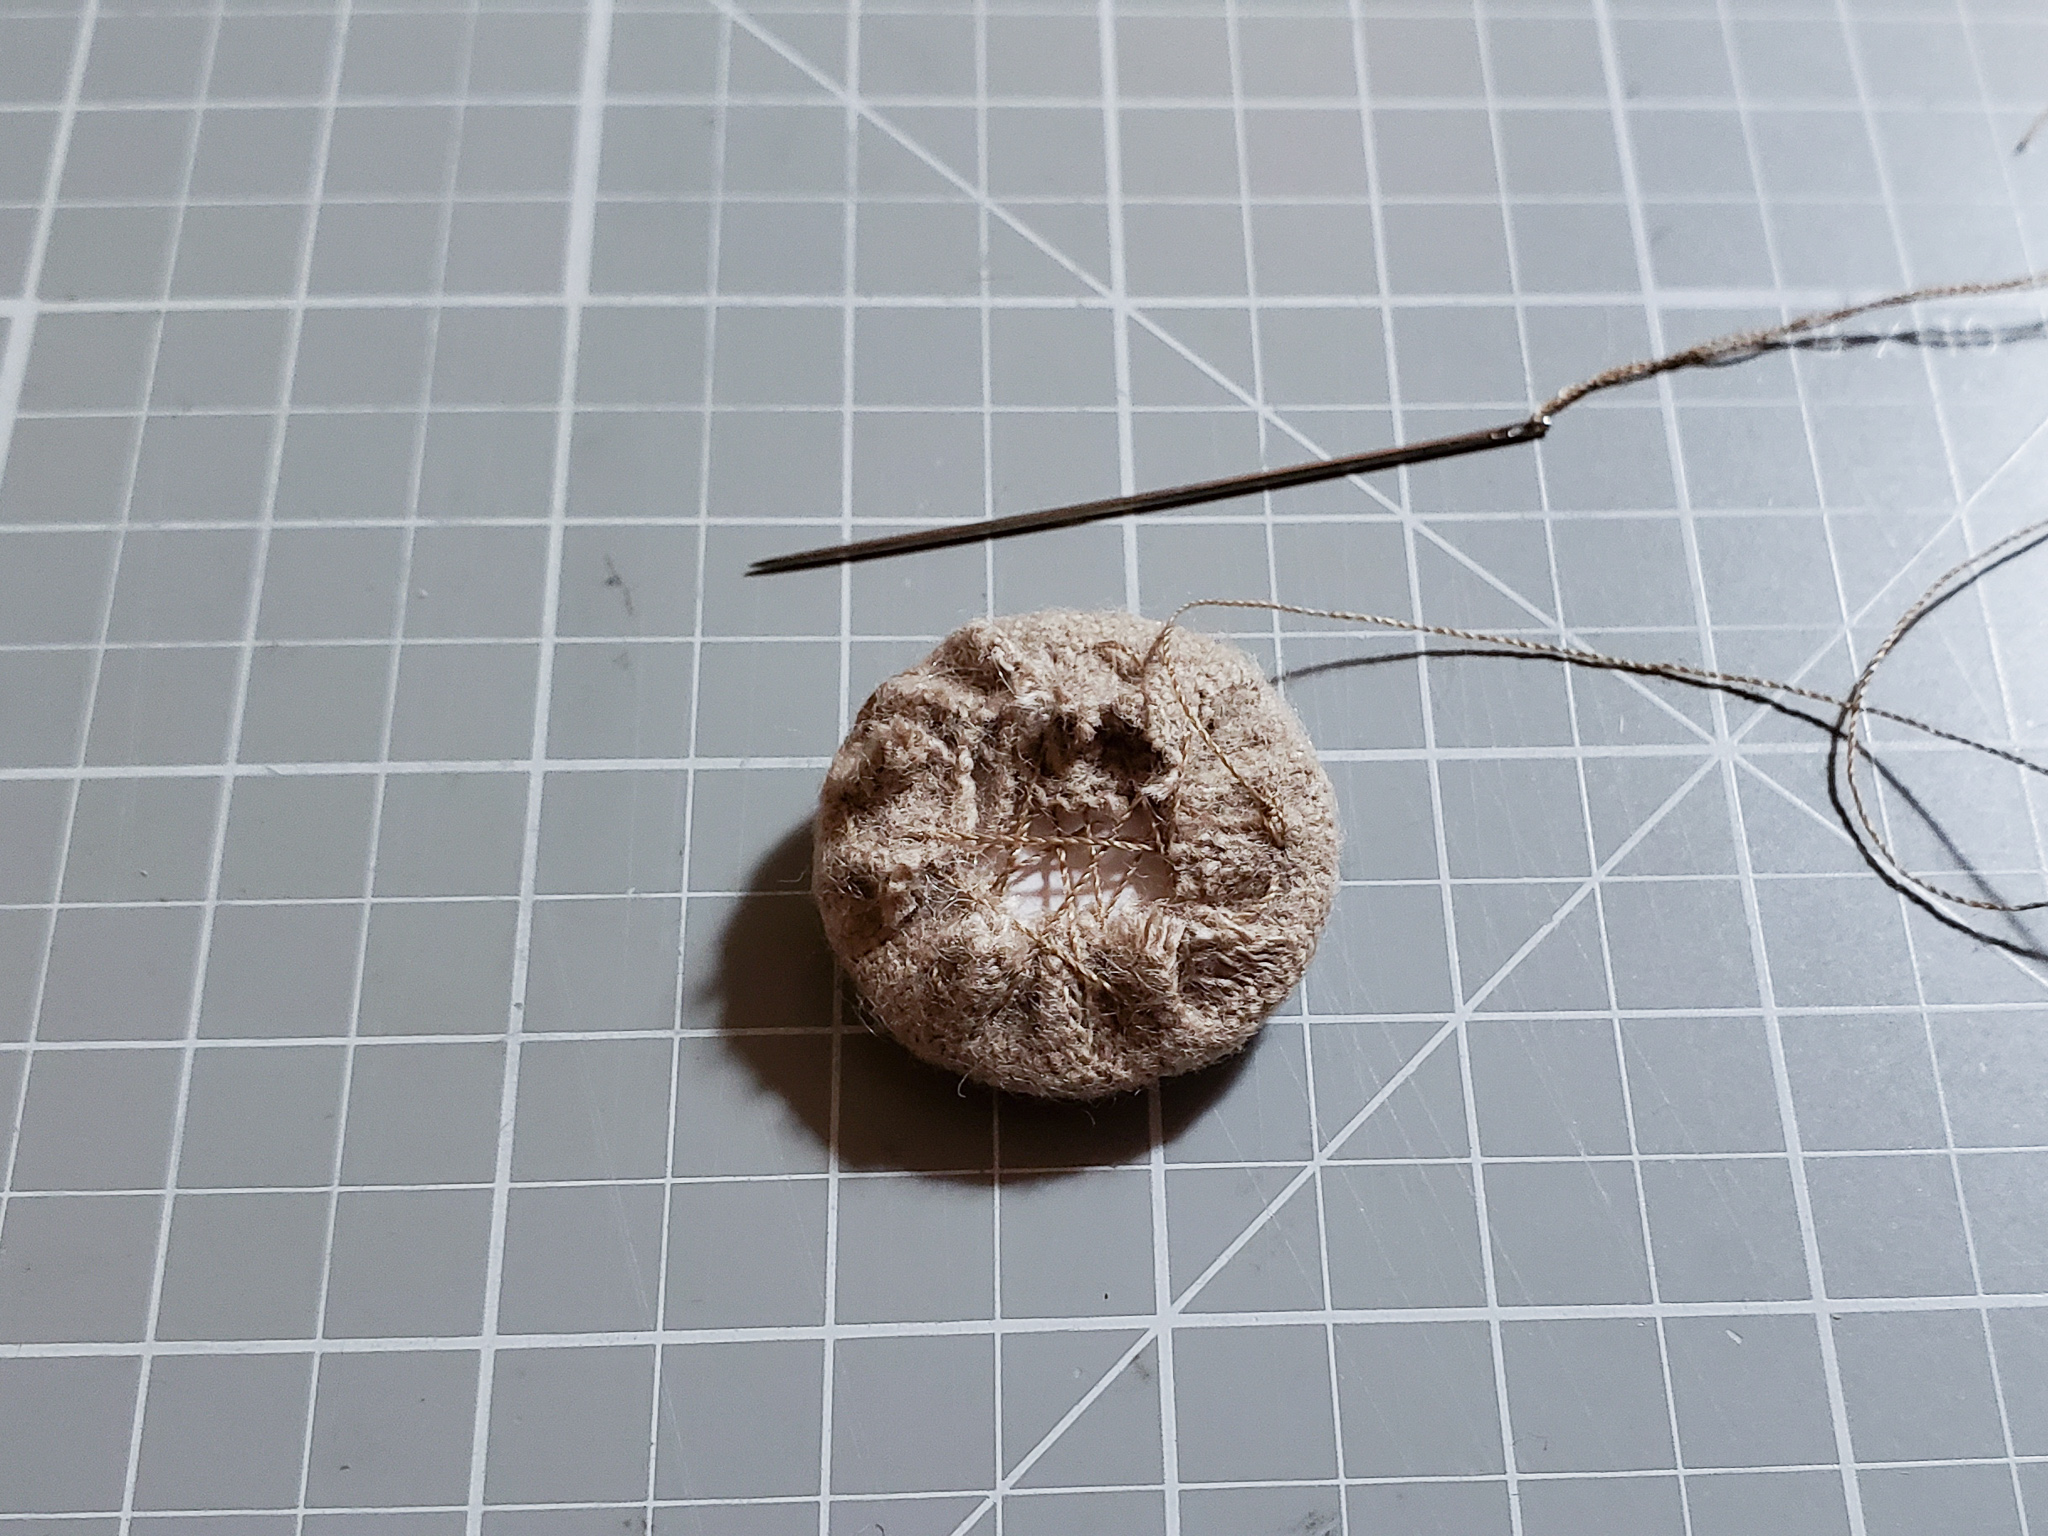
To make the button I cut the base out of comic book board. I use them to organize my fabric, so I always a have some. A cereal box or similar card stock would also have worked.
For the puffy part I added some pillow fluff, but felt, quilt batting, or even a cotton ball would also work.
I sewed a running stitch around the edge of the cloth piece. Then stacked the fluff and the base on top. I pulled on the thread to gather up the edges, then sewed the cover fabric in a sort of 5 pointed star pattern pulling it tight.
To attach the button to the top of the hat I used a ladder stitch. I went around the edge twice to make it more secure.
And here is my finished Smart Doll sized newsboy hat.
Download Pattern
If you need help printing this pattern, make sure to read my digital pattern printing tips.